BlitzWolf AF1 Air Fryer in Home Assistant Using Tasmota

Guide to seting up BlitzWolf AF1 air fryer running Tasmota in Home Assistant with only a blueprint and some rules and nifty Lovelace UI config.
All information applies only to Home Assistant 2021.8.0+ and Tasmota 9.5+
This guide assumes you’ve correctly set up Tasmota on the BlitzWolf AF1 and the Tasmota integration in Home Assistant. Make sure the template is applied with all the TuyaMCU commands.
Tasmota is configured like this:
Backlog DeviceName BW-AF1; FriendlyName1 Activate Fryer; FriendlyName2 Start/Pause Cooking; SetOption8 0; Rule0 1
The temperature is set to display in °C on the air fryer.
Tasmota Rule
Create a rule set that will dispatch received data from the Tuya MCU to separate topics. Some rules use variables or events to receive data from Home Assistant entities and forward them to the Tuya MCU.
rule3
on tuyareceived#dptype4id109 do publish %topic%/cookbook %value% endon
on tuyareceived#dptype2id103 do publish %topic%/cooktemp %value% endon
on var3#state do tuyasend2 103,%value% endon
on tuyareceived#dptype2id105 do publish %topic%/cooktime %value% endon
on var5#state do tuyasend2 105,%value% endon
on event#default do tuyasend4 109,0 endon
on event#custom do tuyasend4 109,1 endon
on event#fries do tuyasend4 109,2 endon
on event#frozen fries do tuyasend4 109,3 endon
on event#nuggets do tuyasend4 109,4 endon
on event#chicken do tuyasend4 109,5 endon
on event#steak do tuyasend4 109,6 endon
on event#fish do tuyasend4 109,7 endon
on power2#state do tuyasend0 endon
Add Device to Home Assistant
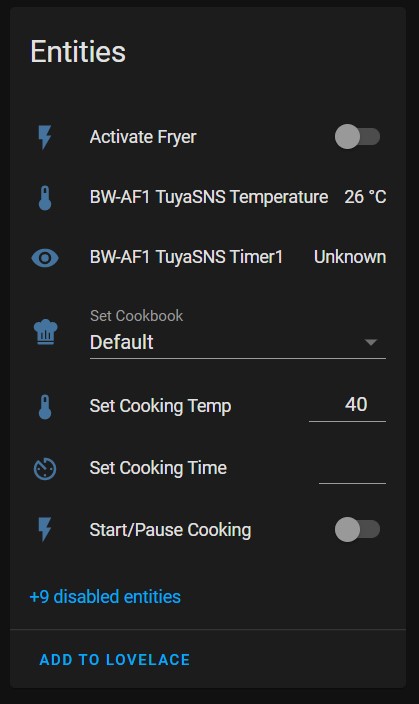
Make sure the Tasmota device is discovered in Home Assistant under Tasmota integration. If everything is configured correctly, Home Assistant’s Configuration - Devices list should have a device “BW-AF1” and will show the following entities.
If you want to customize any of the entities click their name!
Autodiscover Entities Blueprint
Next, import a blueprint for an automation that will generate and publish all necessary MQTT discovery messages so all the sensors will be in the device card for the air fryer.
Automation will run on every Home Assistant restart or when BlitzWolf AF1 reports to the MQTT broker it’s online.
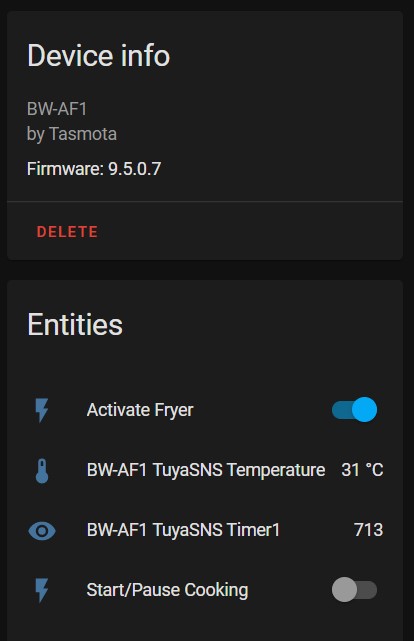
Resulting Device Card will look like this:
And that’s all there is to it. Use the newly added select and number entities to set the cooking program, cooking temperature and time.
The timer shows time left in seconds.
Lovelace Card
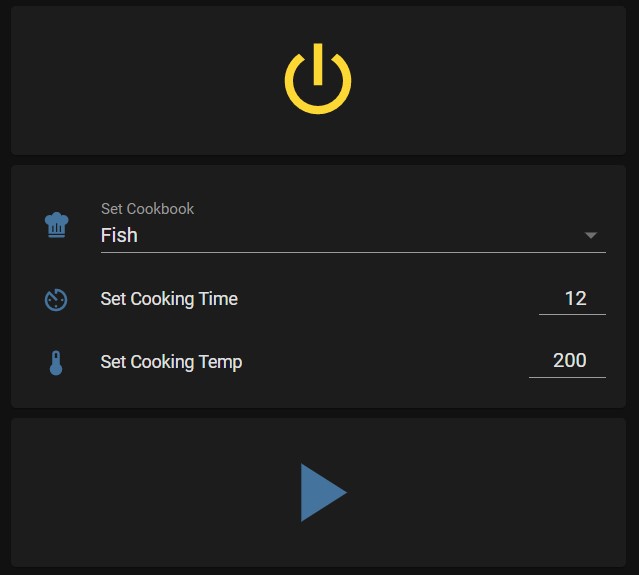
To bring it all together there’s a Lovelace UI card utilising conditional cards because not all fryer options are available at all time.
If you followed the guide using the same names you can paste the entire configuration in the UI.
type: vertical-stack
cards:
  - type: button
    tap_action:
      action: toggle
    entity: switch.activate_fryer
    icon_height: 80px
    icon: mdi:power
    show_name: false
  - type: conditional
    conditions:
      - entity: switch.activate_fryer
        state: 'on'
      - entity: switch.start_pause_cooking
        state: 'off'
    card:
      type: entities
      entities:
        - entity: select.set_cookbook
        - entity: number.set_cooking_time
        - entity: number.set_cooking_temp
      state_color: true
  - type: conditional
    conditions:
      - entity: switch.activate_fryer
        state: 'on'
    card:
      type: button
      tap_action:
        action: toggle
      entity: switch.start_pause_cooking
      icon: mdi:play
      show_name: false
      icon_height: 80px
      show_state: false
      name: Start Cooking
  - type: conditional
    conditions:
      - entity: switch.start_pause_cooking
        state: 'on'
      - entity: switch.activate_fryer
        state: 'on'
    card:
      type: horizontal-stack
      cards:
        - type: entity
          entity: select.set_cookbook
          name: Status
        - type: entity
          entity: sensor.bw_af1_tuyasns_timer1
          name: Time Remaining
          icon: mdi:timer-sand
          unit: seconds
        - type: entity
          entity: sensor.bw_af1_tuyasns_temperature
          name: Cooking Temperature


Comments