Sideload Apps to Sonoff NSPanel Pro
Summary
How to sideload apps to NSPanel Pro.
Full disclosure: This is a pre production unit sent to me free of charge by Sonoff. Some aspects of it might be changed in official release. Shopping links in this article are affiliate links and I earn a small commission when you buy through them
You can still grab an NSPanel Pro for a presale discount on Itead store.
After the initial shock and disappointment with the release firmware and a smaller scale repeat of that with the September upgrade I decided to go deeper. The simplest way to do that is with Android Debug Bridge.
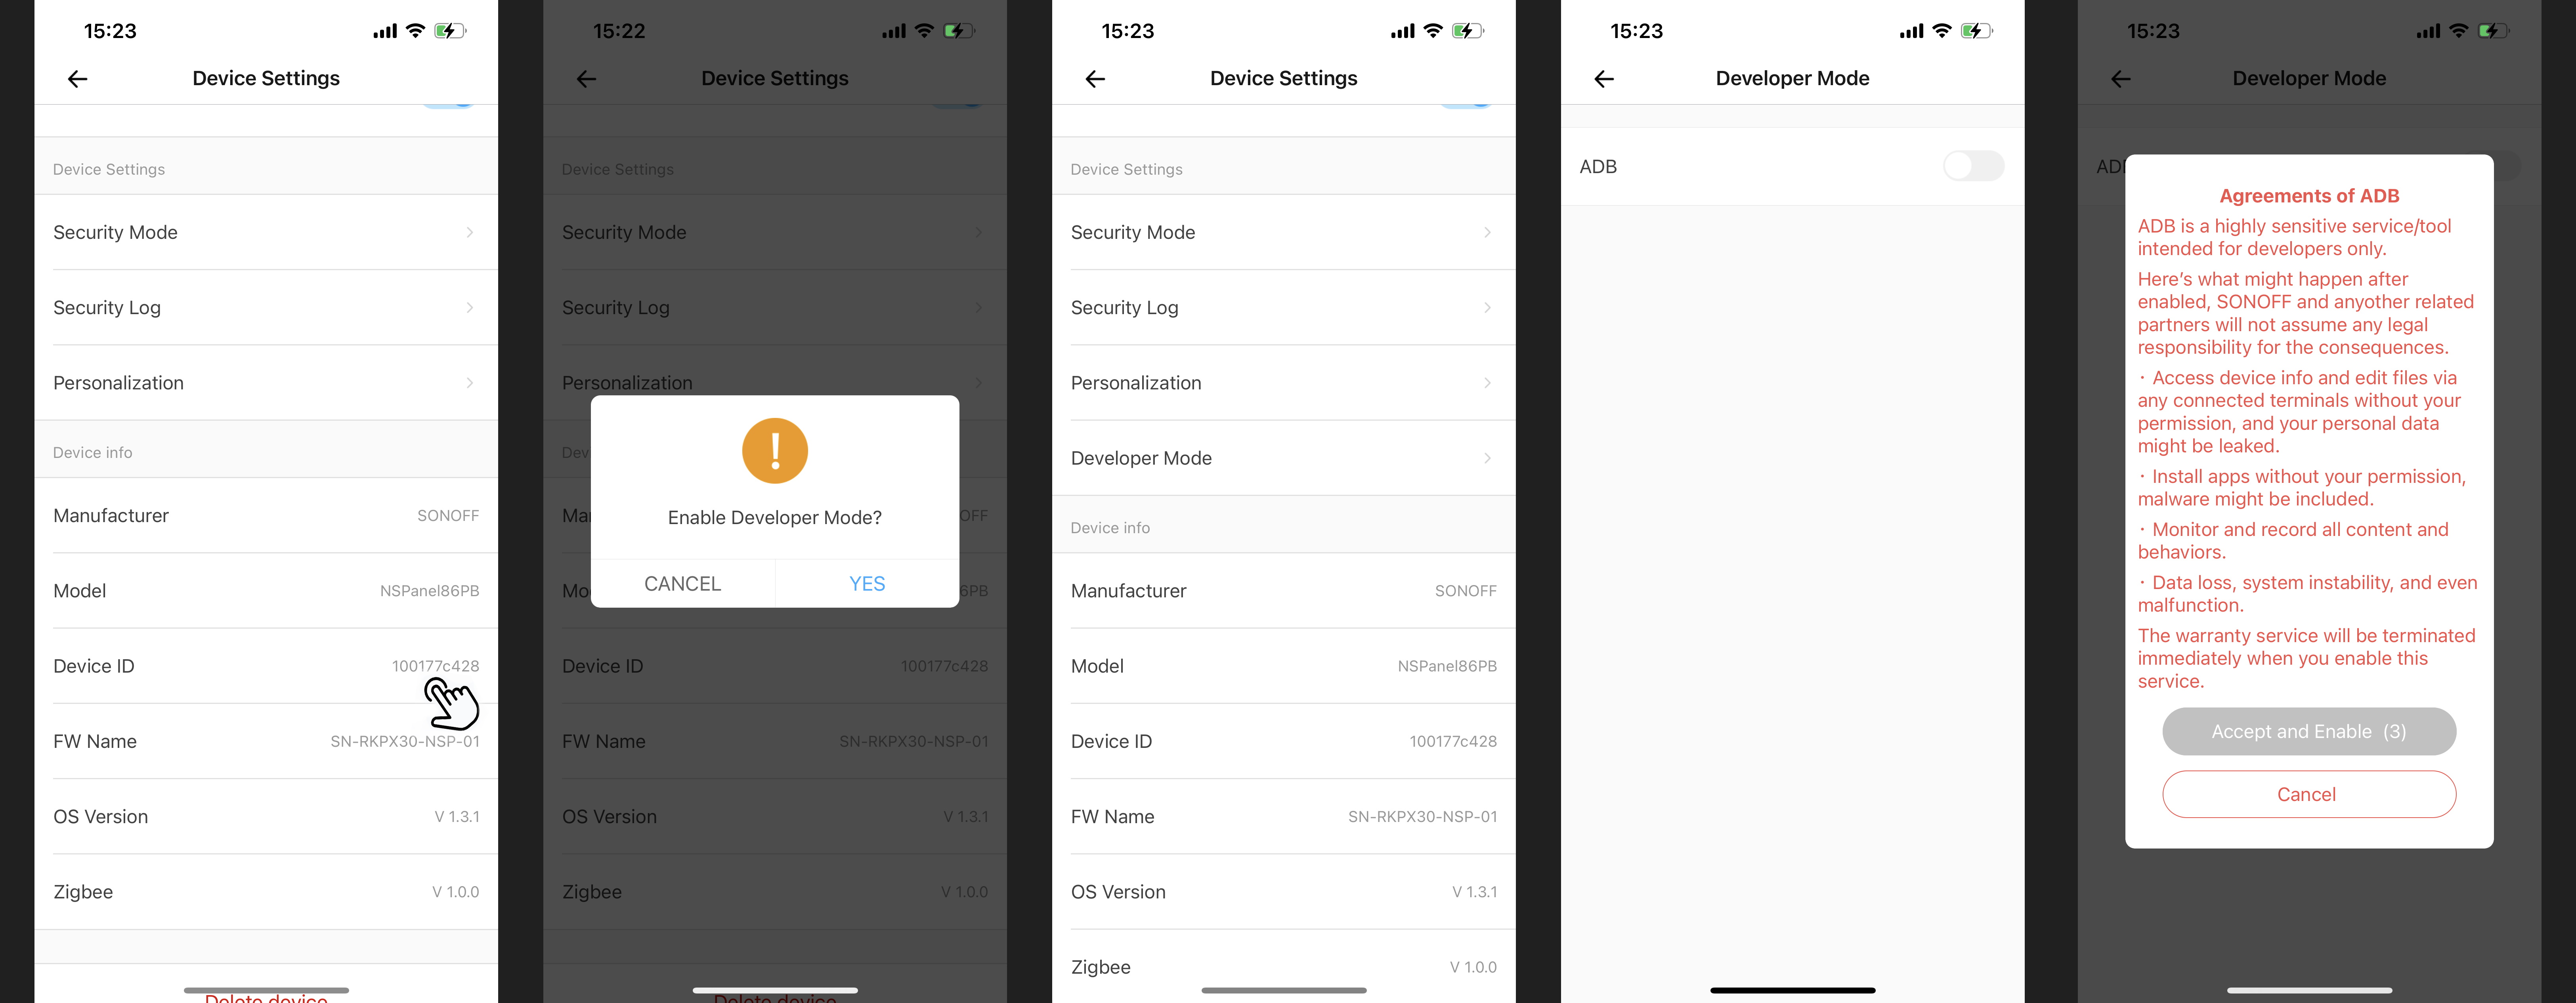
Edit 2022-09-26 Upon further inspection it seems ADB over TCP is enabled by default on some devices or can be enabled when developer mode is activated by tapping the Device ID 8 times to enable developer mode in eWeLink app Device Settings of NSPanel Pro. For those you can skip the disassembly and USB cable. Just install ADB and connect immediately with adb connect [ip_address] and jump to Using ADB
Disassembly
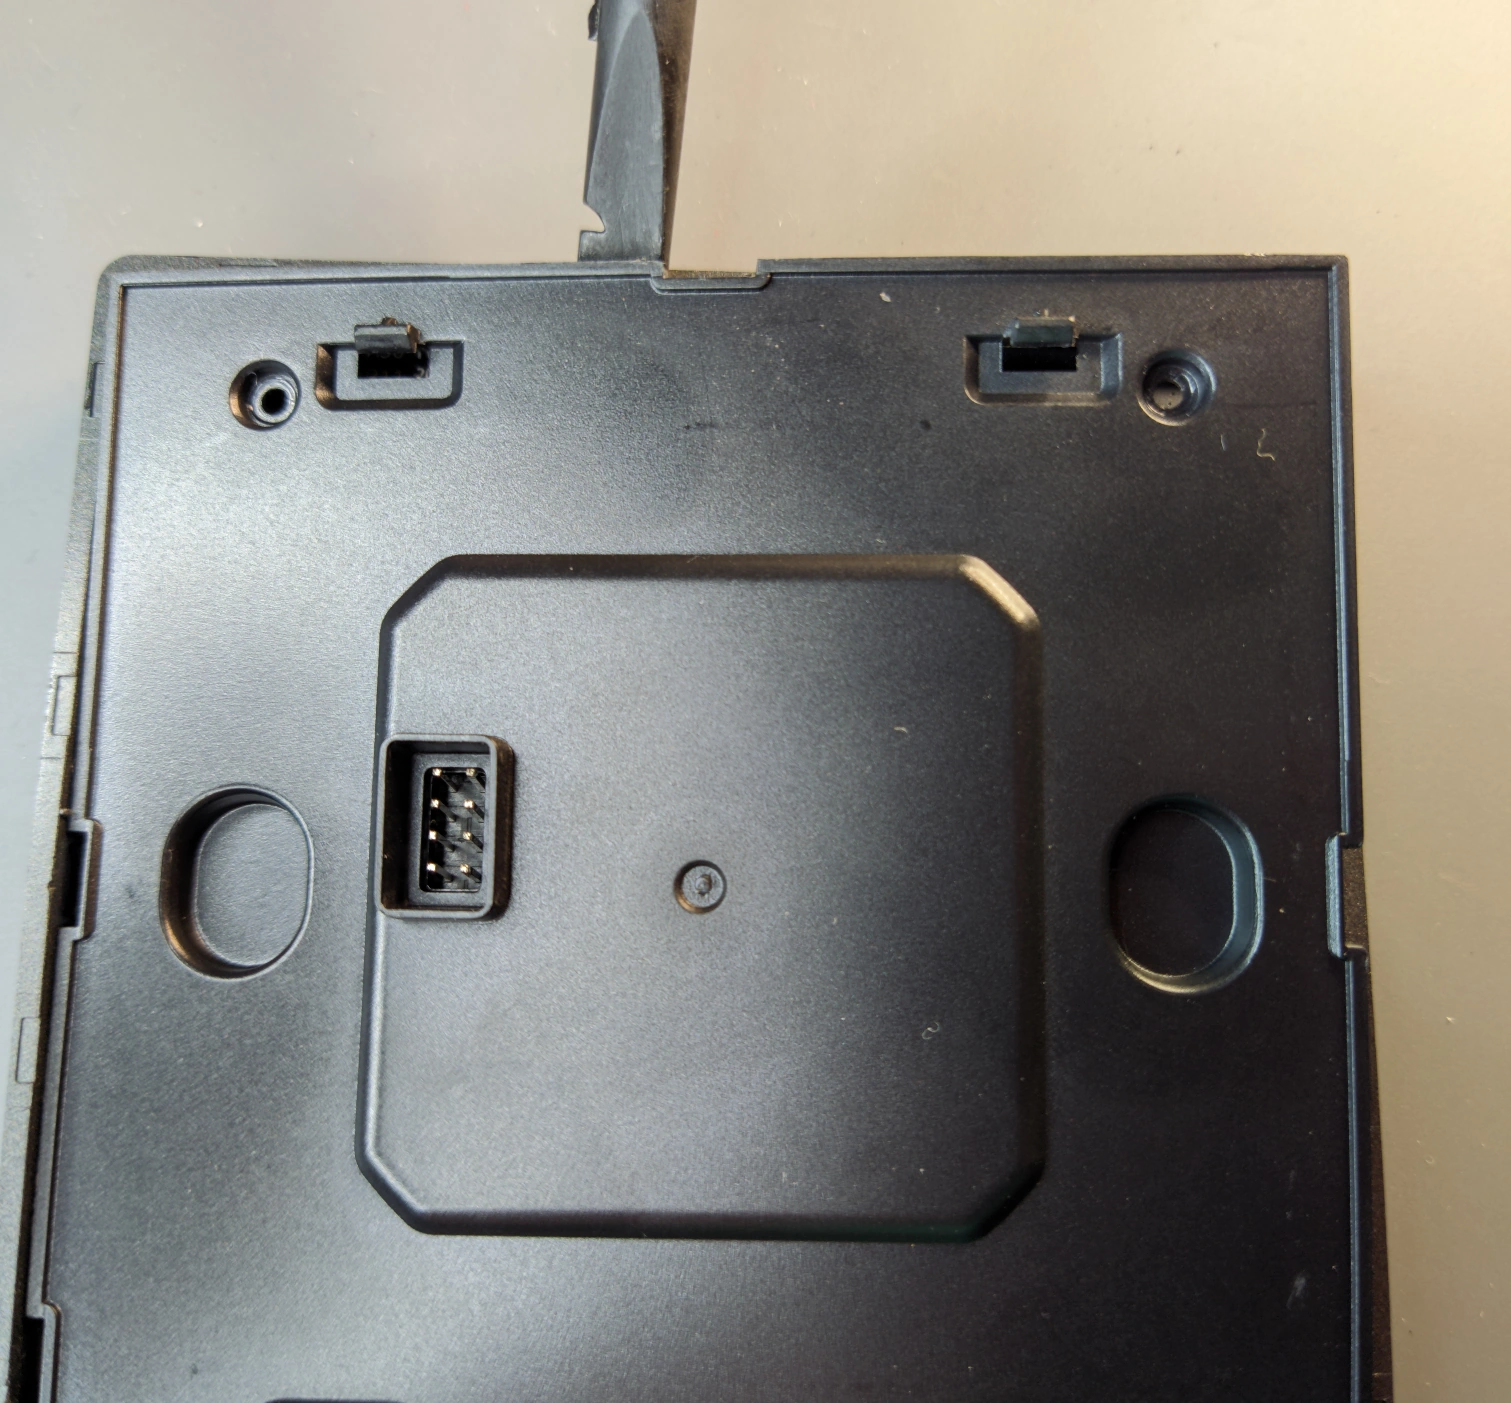
Remove the panel from the base. Unscrew the two screws on the back then carefully pry away the back plate starting at this point.

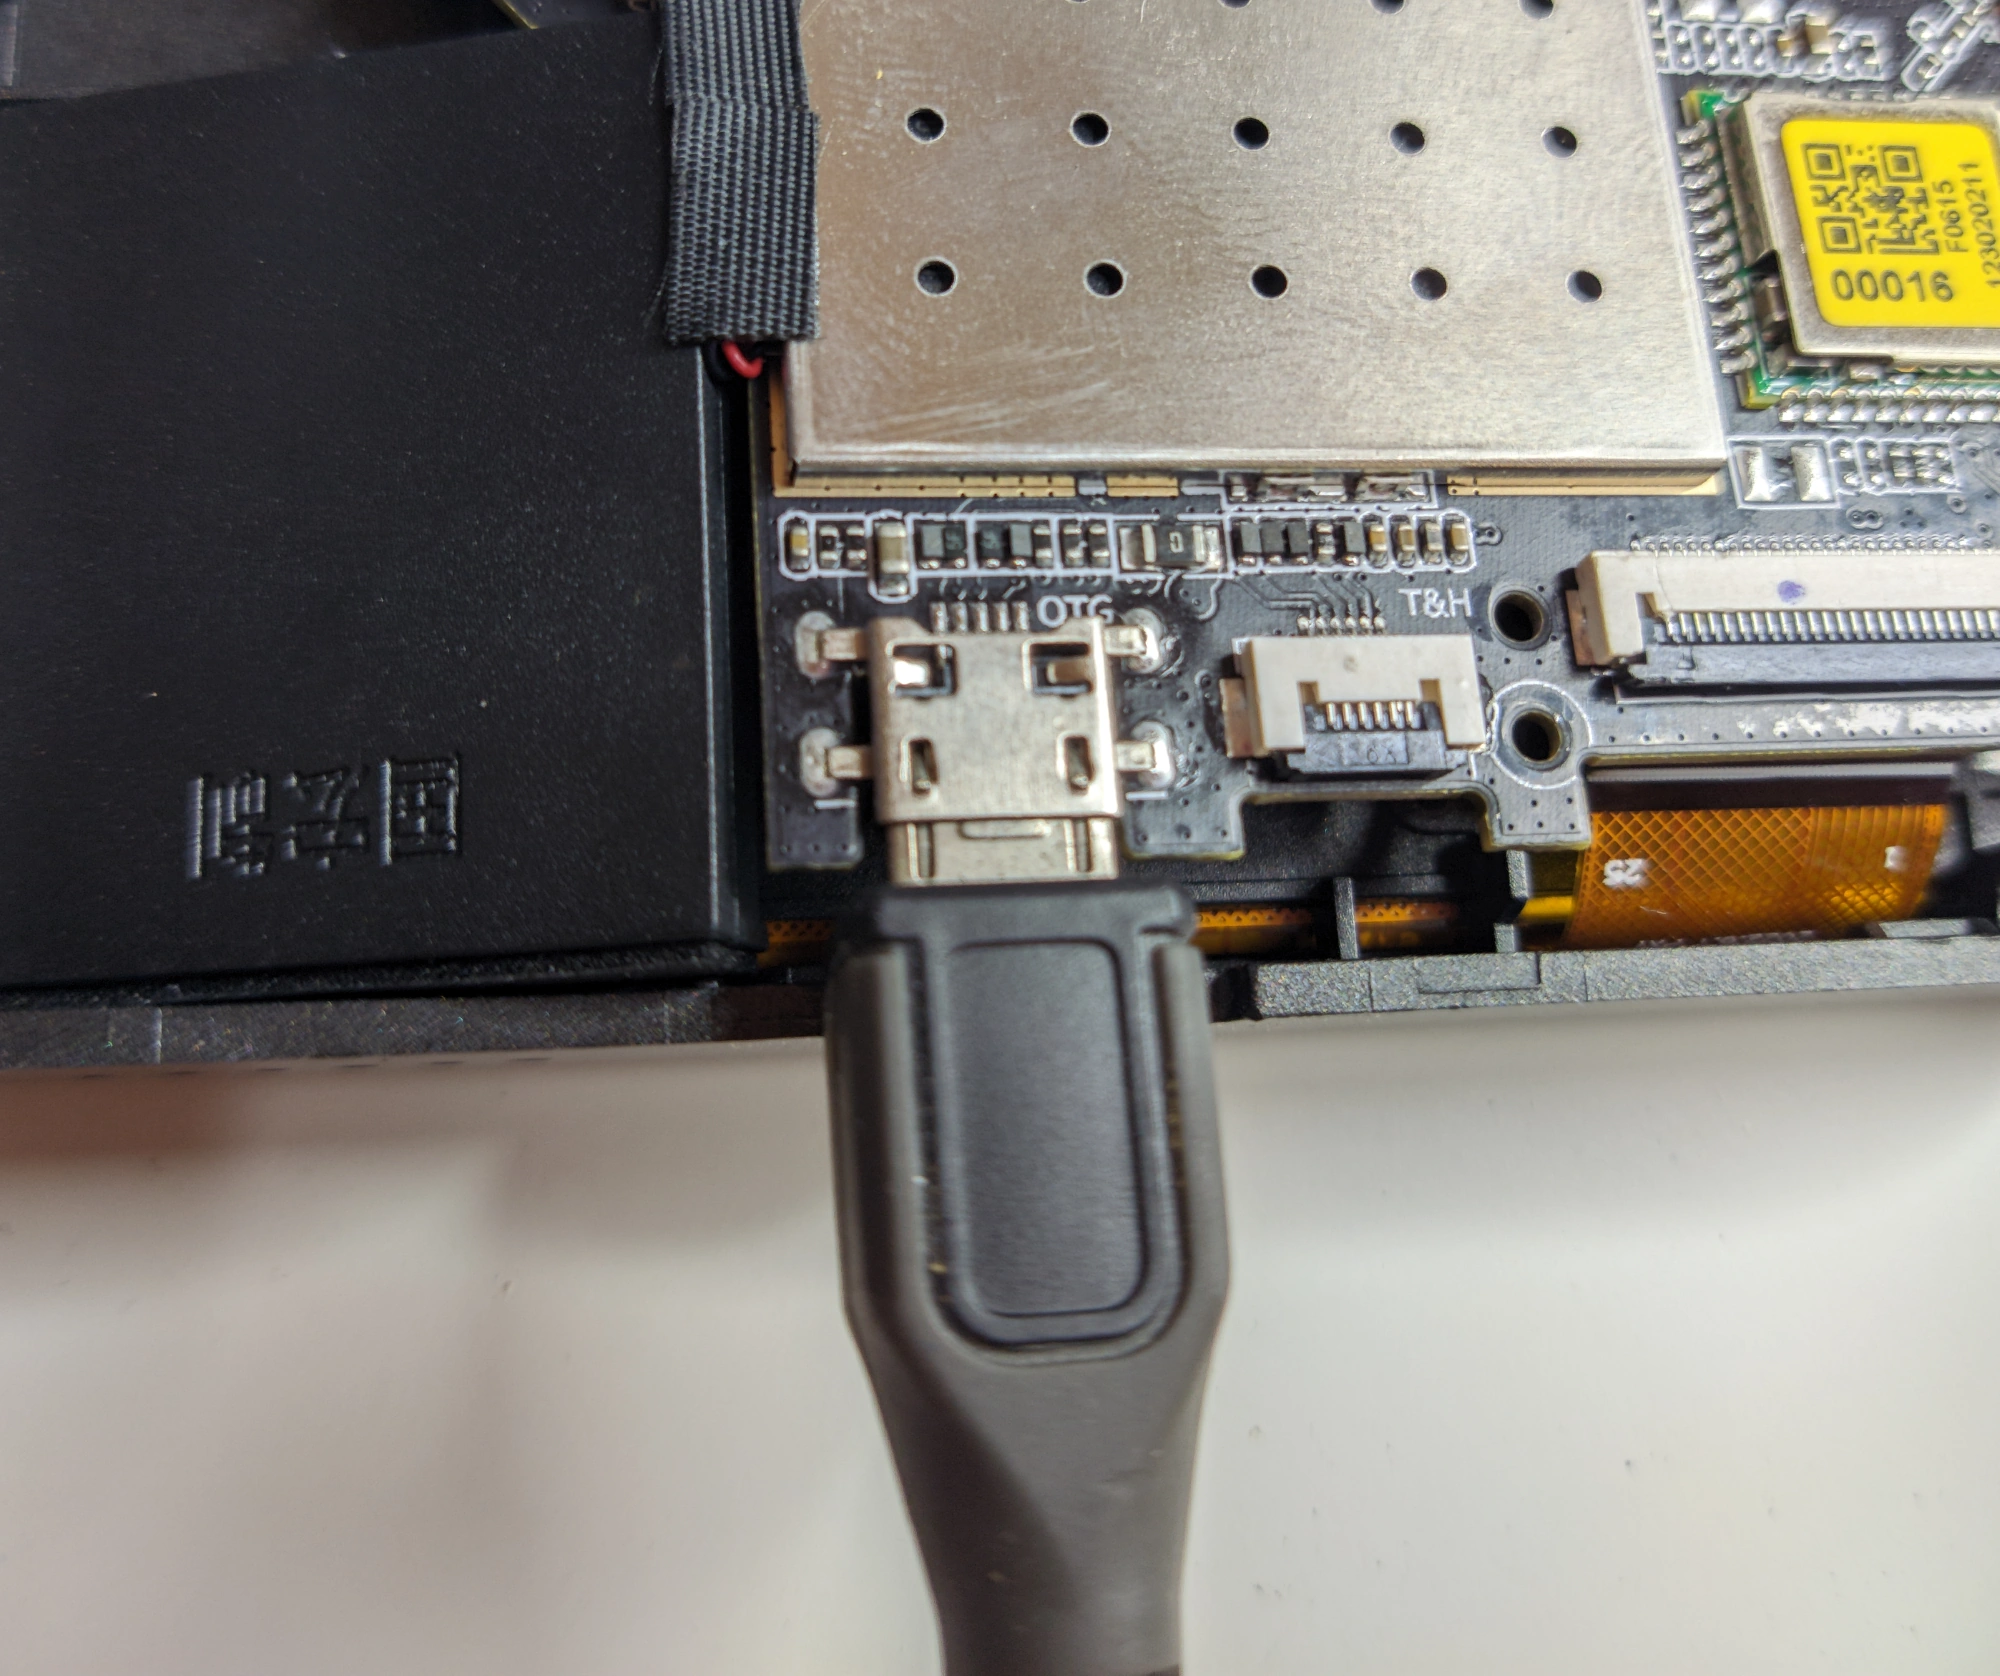
Now unscrew the tiny screws circled. Remove the tape from the touch panel connector and disconnect the connector to lift up the PCB.
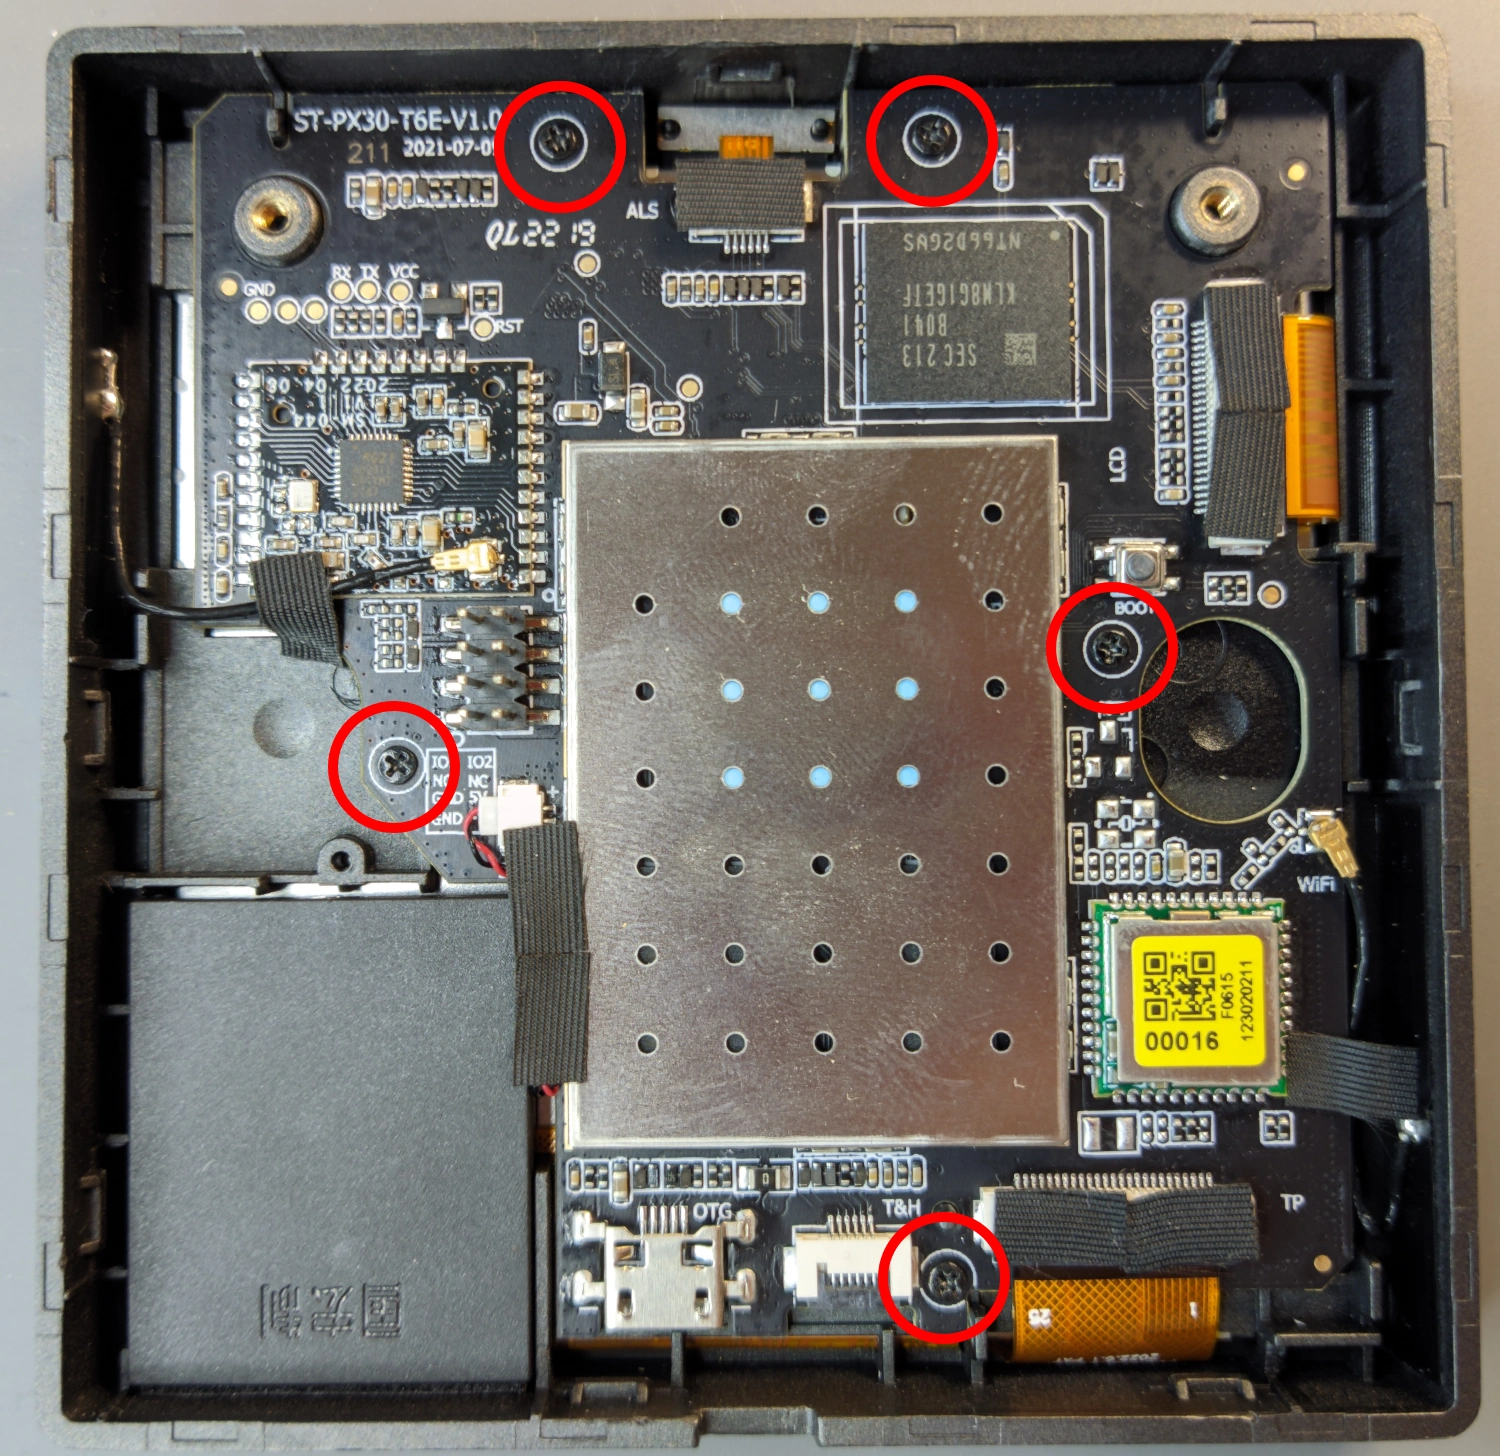
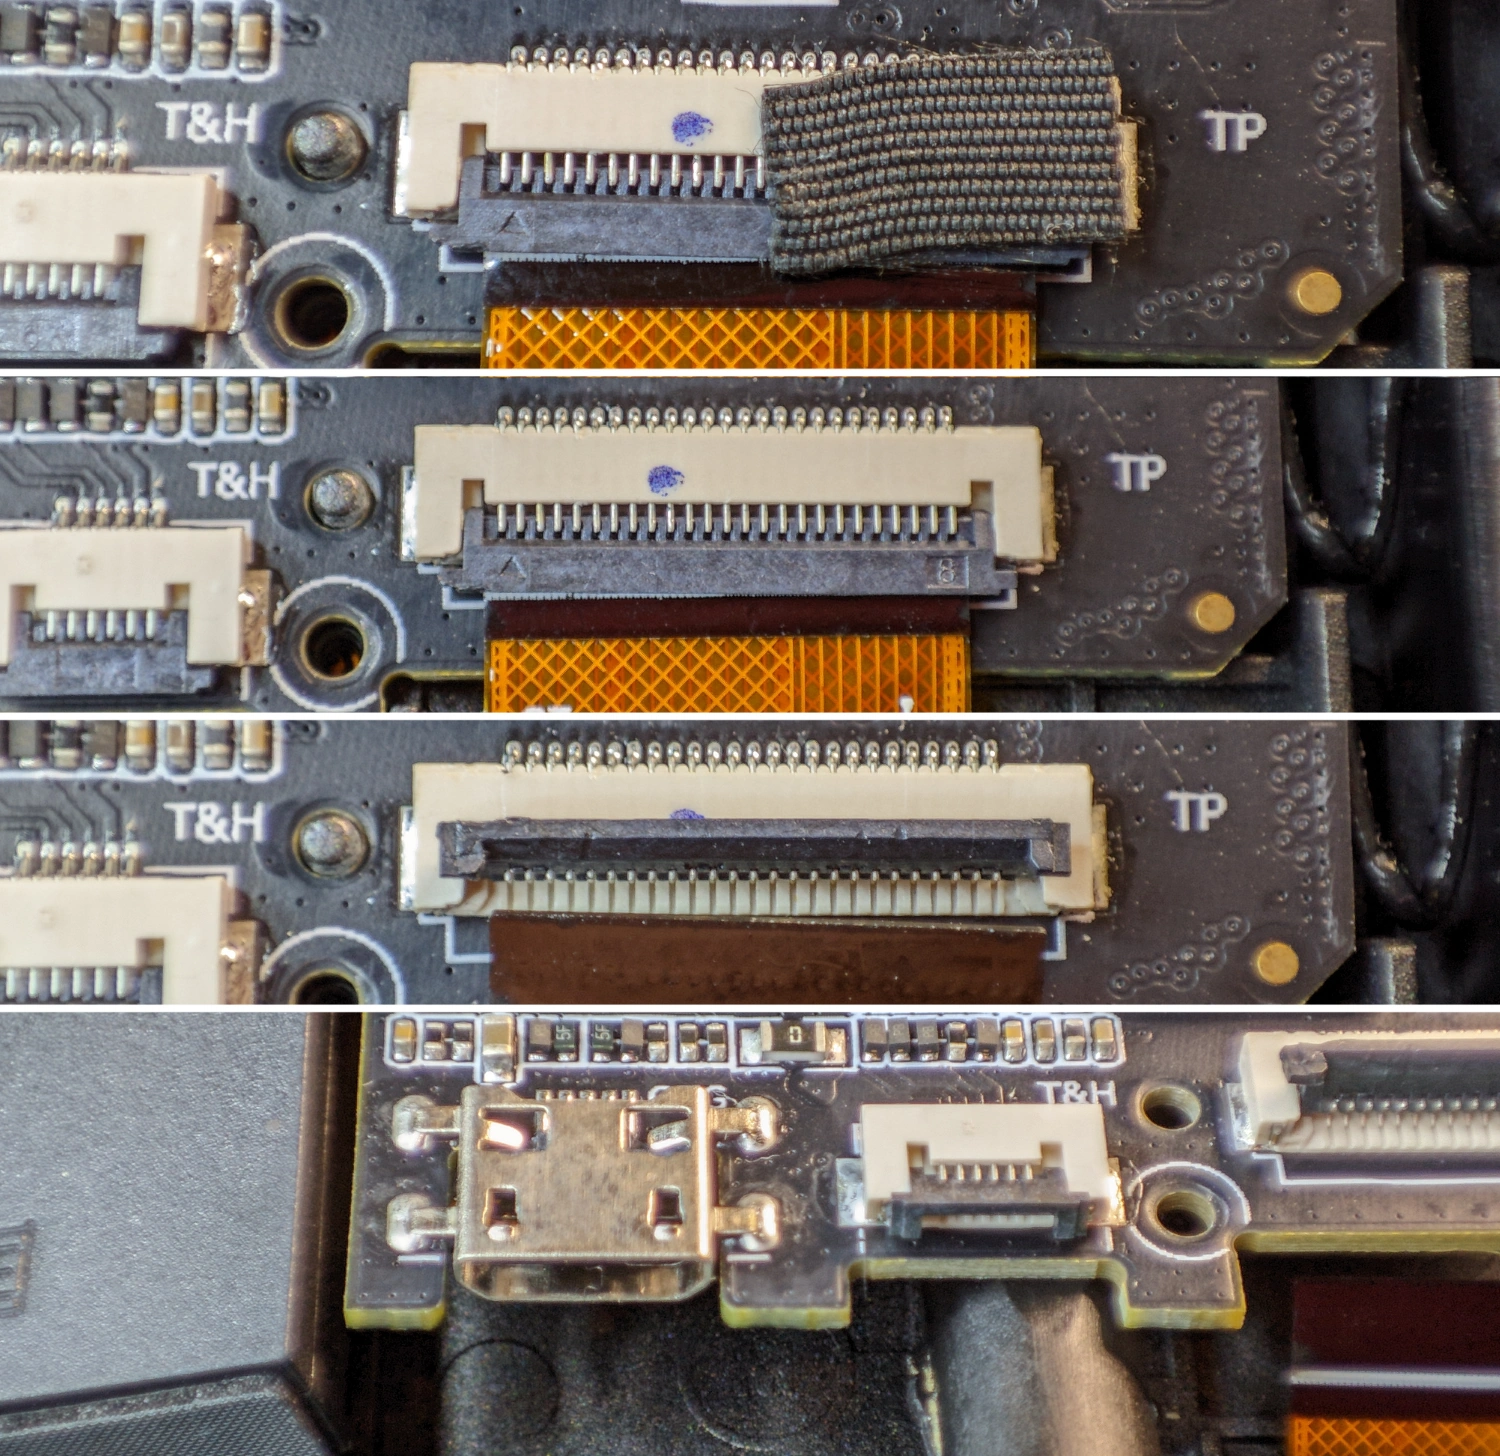
Connect the data USB cable from your computer to the OTG port.
Install ADB and Drivers
Download ADB drivers and install.
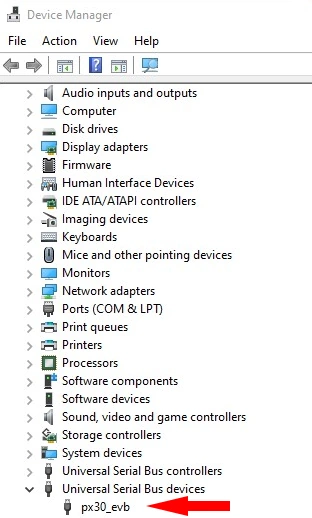
When the NSPanel Pro is connected to your computer via USB you should have a new device in Device Manager.
Download the Android platform-tools and unzip the contents to a folder. Open a Command Prompt
and navigate to that folder. In my case it is located at D:\adb
Get ADB Access
This command will list all the connected devices with extra information.
adb devices -l
List of devices attached
F061512302021100016    device product:px30_evb model:px30_evb device:px30_evb transport_id:3
Run command adb tcpip 5555 to set the NSPanel Pro to listen for a TCP/IP connection on port 5555
D:\adb>adb tcpip 5555
restarting in TCP mode port: 5555
Now you can connect to the NSPanel Pro wirelessly. If you don’t know the IP address run adb shell ip -o a to find out.
Try it out while still wired to make sure everything is working.
D:\adb>adb connect 10.1.1.144
connected to 10.1.1.144:5555
Reassemble the panel and plug it into the base again. Make sure you’ve mounted the light and proximity sensor labelled “ALS” correctly. Once it boots up, run
adb connect [ip_address]
V1.3.2 Changes
In this version Sonoff locked down SSH and ADB access. To regain ADB access quickly tap the Device ID 8 times to enable developer mode in eWeLink app Device Settings. That means you need to pair the NSPanel Pro with an eWeLink account to be able to do this.
Statement from Itead:
We need to remind you that once you turn on the ADB function, it means that we cannot guarantee that any operations you perform on the device are safe, reliable, and legal. Sonoff and any other related partners will not assume any legal responsibility for the consequences.
After the ADB function is turned on, we can no longer guarantee the reliable operation of NSPanel Pro, so we will not admit any legal responsibility for the device in the future, and users who turn on this function are deemed to have waived the warranty service. Therefore, before enabling the developer mode and ADB functions, please evaluate and be aware of all possible risks.
V1.4 Changes
Seems Itead is intent on locking things down and has disabled the developer mode in versions 1.4 and up but there’s a way, courtesy of Filya75 on Home Assistant forum
I ran into this too, however I found a solution:
1.I connected the panel via USB 2.Started panel recovery by turning off the power 5 times when the animated logo appears. 3.After restoring the panel, I continuously gave the adb devices -l command in the command line, and as soon as the panel appeared in the list, I immediately launched the launcher installation. adb install ultra-small-launcher.apk 4.After the reboot, I selected the launcher as the default application and through Go to Settings → System → About tablet → Build Number and tap the “Build Number” option 7 times to enable developer options enabled USB debugging
and experience from ian.tait
I got the exact same thing to start with. Keep pushing the installation after the recovery process has completed.
That first reboot after the recovery is when to push the launcher. I found mine took after the spinning Sonoff graphic and just as CAST comes up on the screen and it was too late once the eWelink log comes up. I hope this narrows the timing for you. Once pushed I completed the eWelink setup with the QR code and went to About and selected Reboot. On the next load it gave me the option to choose launcher. I selected Always.
Once loaded in, I went to About and activated Dev mode (blah blah, you get this bit). In the Dev Mode menu, I enabled USB debugging.
I then turned it off and put it all back together. Now it is back together, I can continue with the great doc from blakadder using the connect command. This allows you to continue the setup over the air and has no need for USB cables.
In summary, spam it, it will take I promise as it worked for me last night. Spent hours on making this work, and thanks to Filya75, I had this nailed in an hour.
Using ADB
With ADB access you have a powerful tool at your disposal to take control of the NSPanel Pro. You can use to install and uninstall apps, list running processes, free memory and even gain root access.
Here’s a list of ADB commands you can use on your NSPanel Pro.
A useful one is a simulated press of the Home button with
adb shell input keyevent 3
You can get root access with adb root or with su while in ADB shell.
Push a file to NSPanel Pro, f.e. a new wallpaper:
D:\adb>adb push wallpaper.jpg /sdcard/Download/wallpaper.jpg
wallpaper.jpg: 1 file pushed, 0 skipped. 18.5 MB/s (52101 bytes in 0.003s)
Useful ADB commands:
adb input keyevent 26- simulate power button press, used to wake device or put it to sleepadb input keyevent 4- simulate back key pressadb input keyevent 3- simulate home key pressadb input keyboard text "your_text"- send text as if typing on screen keyboard, useful for long passwordsadb shell cmd statusbar expand-notifications- show notifications menuadb shell dumpsys meminfo- show memory usage and all the running apps
Install a Launcher
To make working with your panel easier you need to install a standard launcher. I’ve found the smallest launcher possible (only 7kb), which doesn’t take up a lot of precious device memory.
Download the Ultra Small Launcher to the ADB folder and install it with:
adb install ultra-small-launcher.apk
Simulate a Home key press.
adb shell input keyevent 3
You will be offered a selection of launchers, set “Launcher” as default.
Enable Navigation Bar
To enable the navigation bar go to Settings - Display and toggle “show status bar” to on!
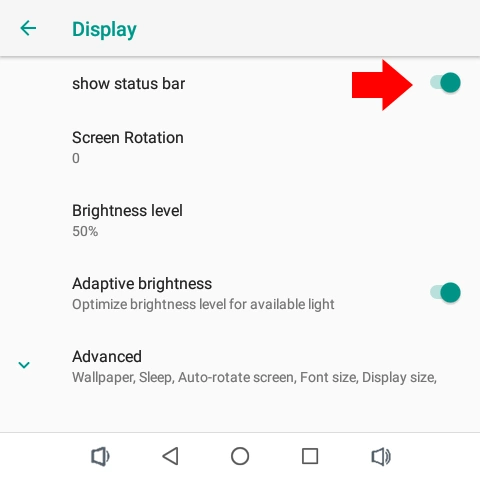
Now you can navigate through the UI properly instead of using ADB commands.
Update WebView
To run more modern apps based on WebView like Home Assistant Companion, Fully Kiosk Browser or Wallpanel you need to update WebView component.
Possibilities?!
This solution isn’t perfect but its the best we got for now. The ideal option would be to contact Itead en masse and demand support for HA Companion app and Fully Kiosk Browser out of the box. They get more sales, we get more options, its a win-win scenario and now we know it is possible. At the very least, demand an updated WebView to a compatible version. Tweet them at https://twitter.com/ITeadstudio, write them at support@itead.cc or through their contact form and tell them Blakadder sent you!
Digging into the adb shell revealed some interesting things like mosquitto broker, a way to interface with the Zigbee module, code remnants of RS485, Ethernet, Relay 1 and Relay 2 and probably more. I hope even more Android savvy developers will hop on the train and really unlock the device’s potential.
So far it can do the following:
- sideload apps
- Home Assistant dashboard via HA Companion, Fully Kiosk, Wallpanel or web browser
- run Alexa with voice recognition
- run Tuya Smart Life app (albeit the performance is not great)
- serve as MQTT broker
- ZHA or Zigbee2MQTT coordinator over TCP
- run Zigbee2MQTT with frontend on the panel
- wake screen on proximity
- a music/video player
- iBeacon to MQTT tracker
Share with me what you’ve managed to do with it on Twitter or in comments!
You can still grab an NSPanel Pro for a presale discount on Itead store.

Explore more like this

Moes ES1 (ZSS-LP-HP02) Zigbee Human Presence Sensor Review
It was hard to resist the new Moes labelled sensor on AliExpress because it looked identical to the Linptech ES1 sensor which works with Xiaomi’s Mijia ecosystem but I avoided...
Comments