Run Zigbee2MQTT on Tuya T6E Android Smart Home Panels

Summary
How to run a full Zigbee2MQTT instance with frontend on Tuya T6E Android smart home touch panels.
Shopping links in this article are affiliate links and I earn a small commission when you buy through them
This guide applies to touch control panels such as:
- discontinued and replaced with an “Alexa” version that has completely different hardware
This probably works on any panel with TYZ13S module but is not yet verified.
This guide assumes you already have adb shell access to the panel.
Note that Zigbee2MQTT support for Silabs EFR32 Zigbee chips is still marked as experimental.
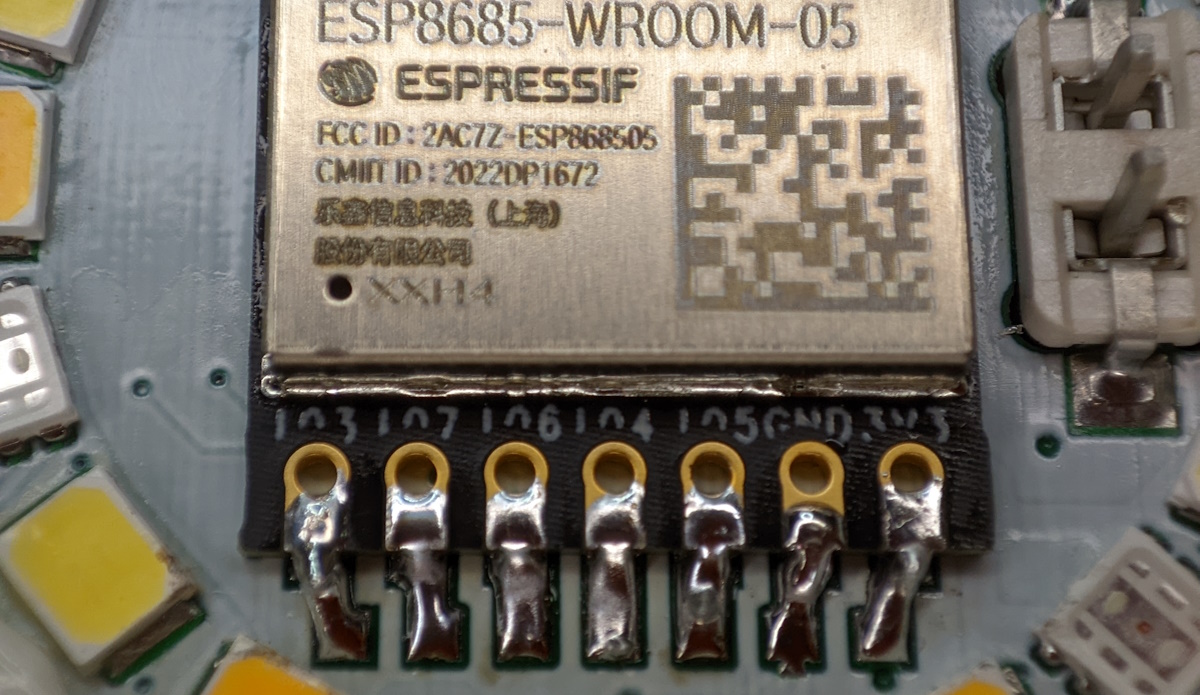
T6E Android panels use the Tuya TYZS13 Zigbee module with old 6.5 firmware version which is not supported. To run Zigbee2MQTT first you have to update the firmware.
Update Zigbee Firmware
To update the firmware you will need tools:
- a soldering iron - a basic one is sufficient for small projects like this such as Mustool MT883 (Banggood*, AliExpress*)
- good solder and flux - don’t get the super cheap stuff and definitely don’t use unleaded solder. I typically get Mechanic brand from AliExpress* and also their RMA223 flux*.
- Dupont wires*
- serial to USB flasher - a CH340G based one has been proven to be most reliable (AliExpress* or Amazon*).
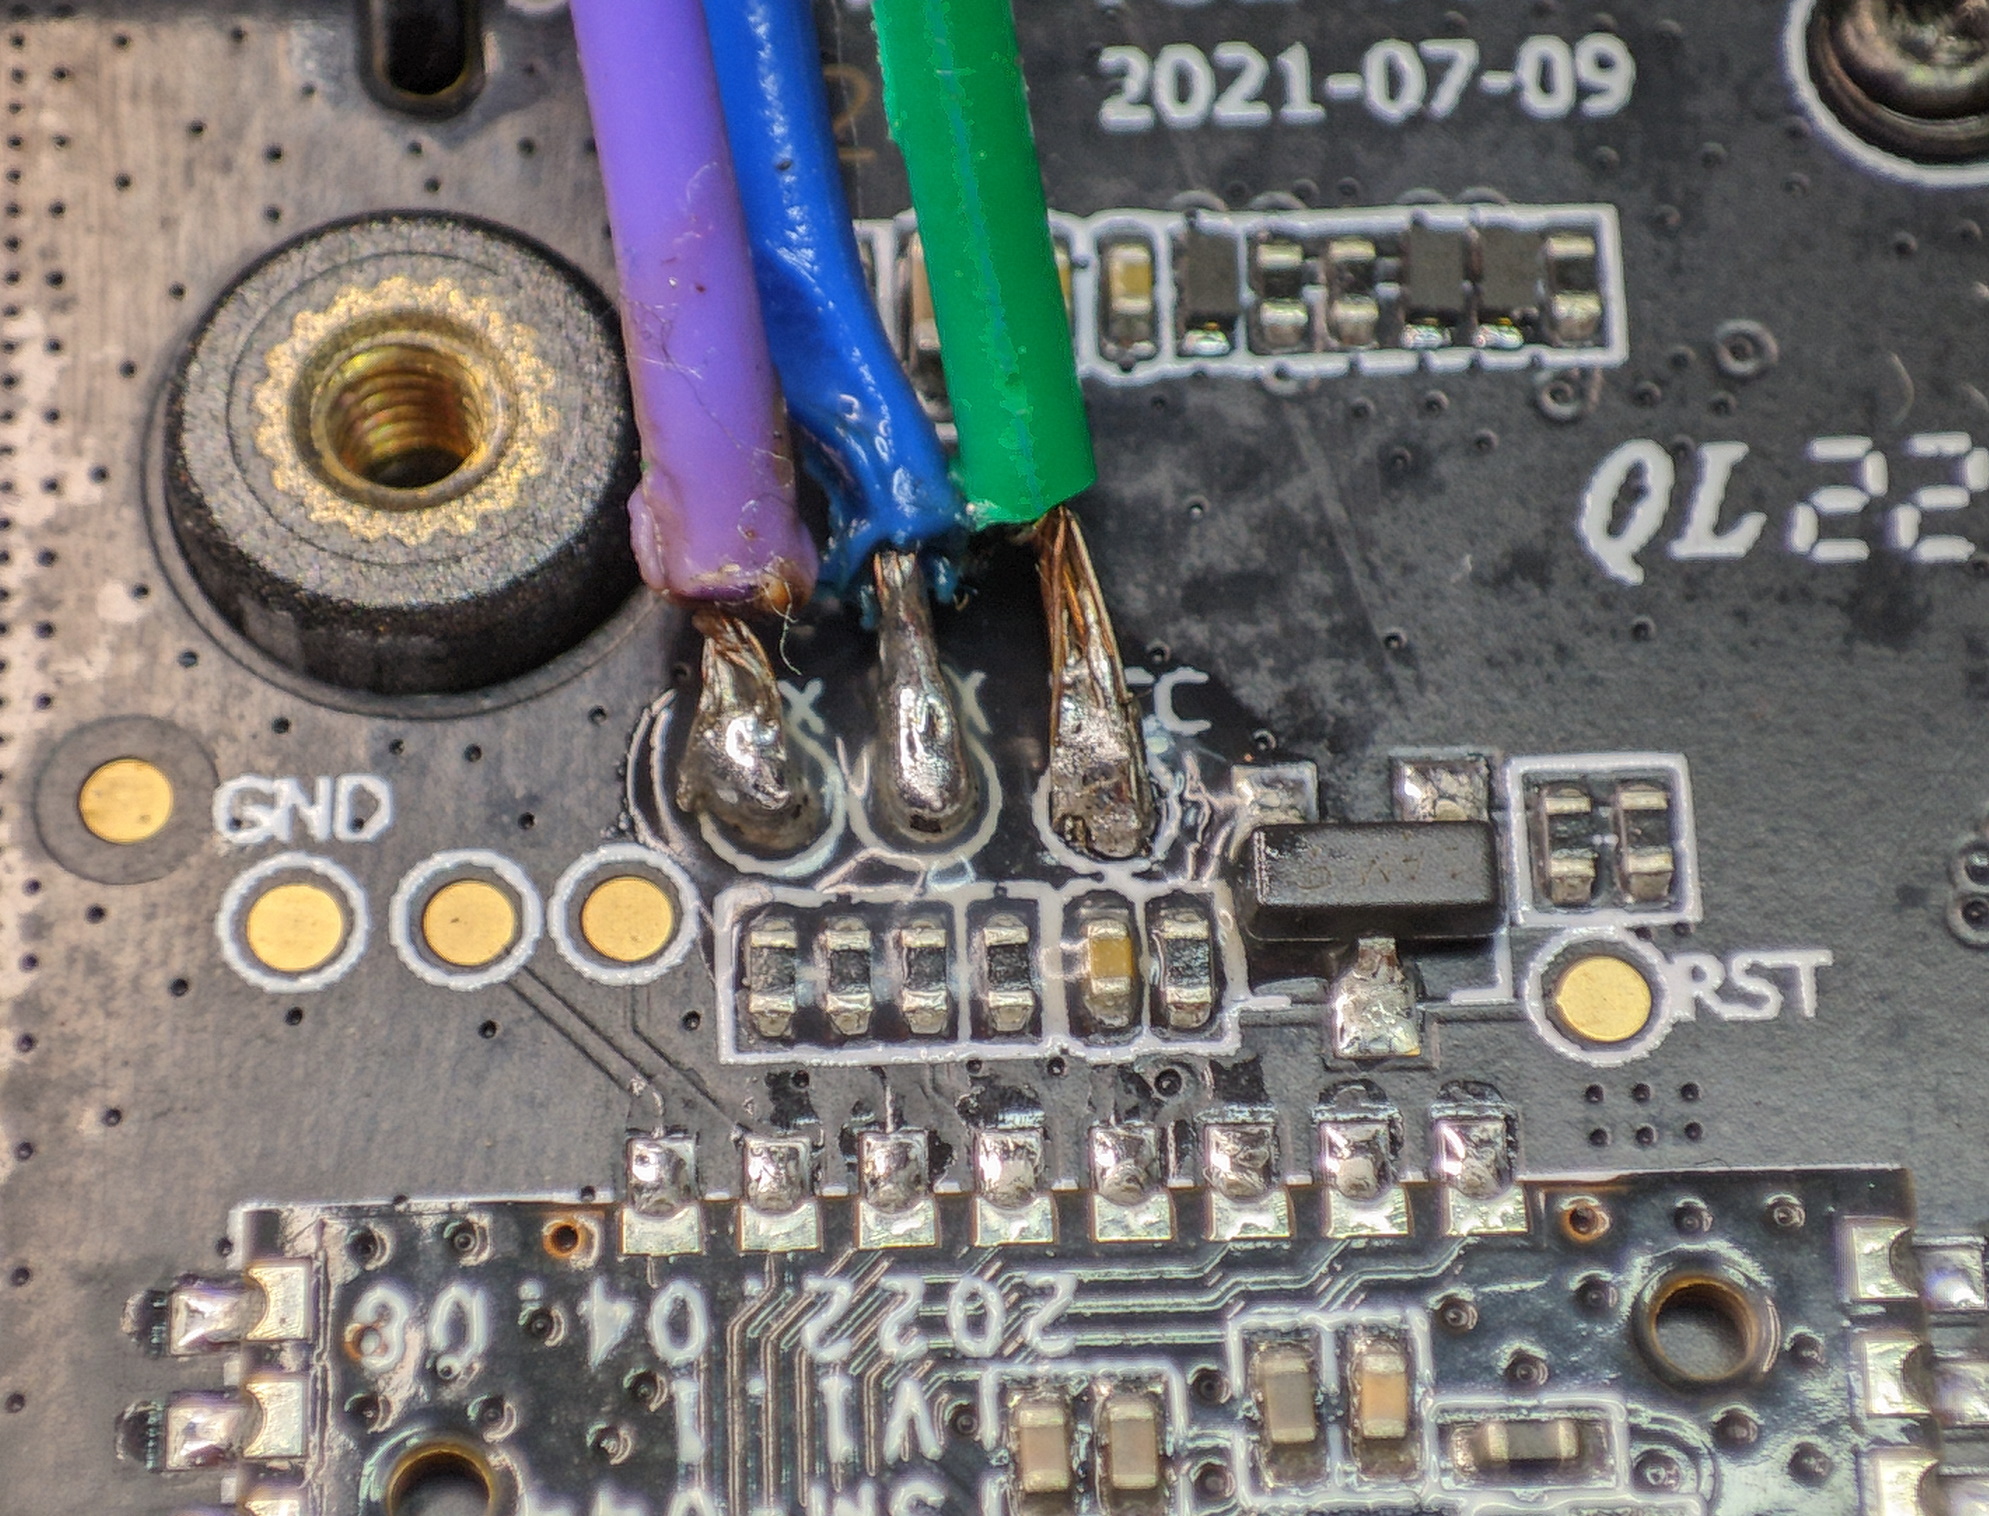
Wiring
Disassemble the panel to get access to test pads for the Zigbee module. Solder wires to TX, RX, VCC and GND pads.
Connect the Dupont cables to the USB adapter:
| T6E | adapter |
|---|---|
| TX | RX |
| RX | TX |
| VCC | 3V3 |
| GND | GND |
Flashing
Install Elelabs Firmware Update Utility.
Download firmware in .gbl format for EFR32MG13P from ESZP-Firmware repo, I used efr32mg13p-v8-6910-115200.gbl.
Connect the serial to USB adapter to the PC and note the COM port number.
Flash the firmware with (replace COM number with yours)
Elelabs_EzspFwUtility.py flash -f efr32mg13p-v8-6910-115200.gbl -p COM3
The output should be similar to:
2022/10/12 19:01:57 Elelabs_EzspFwUtility:   Successfully restarted into X-MODEM mode! Starting upload of the new firmware... DO NOT INTERRUPT(!)
.....
.....
.....
.....
.....
.....
.....
.....
.....
.....
.....
.....
.....
.....
.....
.....
.....
..
2022/10/12 19:02:37 Elelabs_EzspFwUtility:   Firmware upload complete
2022/10/12 19:02:37 Elelabs_EzspFwUtility:   Rebooting NCP...
2022/10/12 19:02:44 Elelabs_EzspFwUtility:   Generic Zigbee EZSP adapter detected:
2022/10/12 19:02:44 Elelabs_EzspFwUtility:   Firmware: 6.9.1-214
2022/10/12 19:02:44 Elelabs_EzspFwUtility:   EZSP v8
Prepare T6E Panel
Open an ADB shell and change to root with su command then allow access to the Zigbee module to other users with:
chmod a+w /dev/ttyS5
px30_evb:/ # ls -al /dev/ttyS5
crw-rw-rw- 1 gps gps 4,  69 2022-10-06 19:00 /dev/ttyS5
While still a superuser disable the Tuya panel app
pm disable com.smartpad.fourinchneeu.smart
The underlying launcher is more persistent and we need to hide the .apk from the system.
First make system partition writeable:
mount -o remount,rw /system
Rename the .apk:
mv /system/app/TuyaLauncherInternational/TuyaLauncherInternational.apk /system/app/TuyaLauncherInternational/TuyaLauncherInternational.apk.original
Reboot the panel.
Install Termux
Download Termux and install it using adb install
Launch Termux on the panel.
Install Zigbee2MQTT
Install requirements to run Zigbee2MQTT.
pkg install git python openssl nodejs
Answer Y when asked.
Clone Zigbee2MQTT from official GitHub:
git clone --depth 1 https://github.com/Koenkk/zigbee2mqtt.git zigbee2mqtt
You can make your life easier, instead of typing it all up use this from adb:
adb shell input keyboard text 'git clone --depth 1 https://github.com/Koenkk/zigbee2mqtt.git zigbee2mqtt' && adb shell input keyevent 66
Keyevent 66 is the ENTER key.
Go to Zigbee2MQTT directory
cd zigbee2mqtt
Install nodejs dependencies:
npm ci
If everything went correctly the output of npm ci is similar to (the number of packages and seconds can differ on your device):
node-pre-gyp info ok
added 383 packages in 111.613s
Before we can start Zigbee2MQTT we need to edit the configuration.yaml file. This file contains the configuration which will be used by Zigbee2MQTT.
Open the configuration file:
nano ~/zigbee2mqtt/data/configuration.yaml
Set your MQTT broker location and credentials then change serial to the port of TYZS13 module:
serial:
  port: /dev/ttyS5
  adapter: ezsp
It is recommended to use a custom network key. This can be done by adding the following to your configuration.yaml. With this Zigbee2MQTT will generate a network key on next startup.
advanced:
  network_key: GENERATE
To enable the frontend add the following (see Zigbee2MQTT Frontend documentation for more settings):
frontend: true
Exit and save the file with Ctrl + X
Run Zigbee2MQTT with
npm start
Check if everything is running well and the frontend is available at http://[ip_address]:8080.
Start Zigbee2MQTT on boot
Download Termux:boot and install it with adb install.
Start the Termux:Boot app once by clicking on its launcher icon. This allows the app to be run at boot.
Create the ~/.termux/boot/ directory with
mkdir ~/.termux/boot/
Open a new file in that directory
nano ~/.termux/boot/zigbee2mqtt
Create the following script:
#!/data/data/com.termux/files/usr/bin/sh
termux-wake-lock
cd ~/zigbee2mqtt
npm start
Reboot.

Explore more like this

Convert Xiaomi MMC MHO-C401 E-Ink Bluetooth Sensor to Zigbee
Guide on installing Zigbee firmware on the Bluetooth temperature and humidity sensor with e-ink display. The best Zigbee temperature and humidity sensor with an e-ink display is a Bluetooth one....

Moes ES1 (ZSS-LP-HP02) Zigbee Human Presence Sensor Review
It was hard to resist the new Moes labelled sensor on AliExpress because it looked identical to the Linptech ES1 sensor which works with Xiaomi’s Mijia ecosystem but I avoided...
Comments