Convert Xiaomi MMC MHO-C401 E-Ink Bluetooth Sensor to Zigbee
Summary
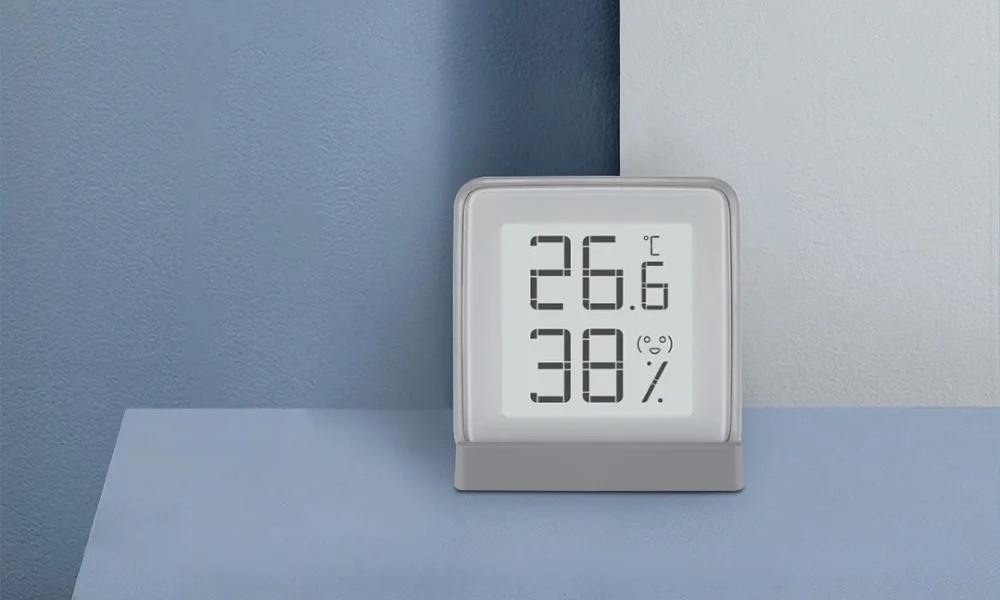
Guide on installing Zigbee firmware on the Bluetooth temperature and humidity sensor with e-ink display. The best Zigbee temperature and humidity sensor with an e-ink display is a Bluetooth one.
Full disclosure: This device is purchased with the help of your donations. Links in this article are affiliate links. By purchasing through them I also get a small commission that funds future projects!
Xiaomi MiaoMiaoCe MHO-C401 is available from the following stores:
Make sure you have a MHO-C401 sensor. The model name is displayed on the back of the box.
WARNING This process is not fool proof and something can go wrong at an inopportune time. This can leave the device inoperable and unable to flash with the web flasher but it will NOT be permanently bricked. It can always be flashed to its original firmware or Zigbee firmware using wires and a serial to USB adapter.
OTA Firmware Update
Open the web flasher by pvvx in a Chrome based browser (or Opera). Make sure you have the #enable-experimental-web-platform-features enabled by checking using the link for your web browser.
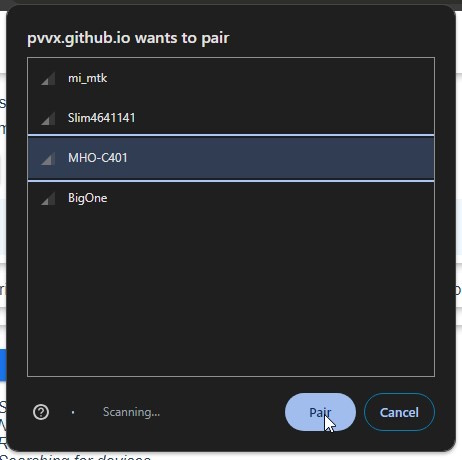
Click on Connect.

Select MHO-C401 from the list of discovered devices.
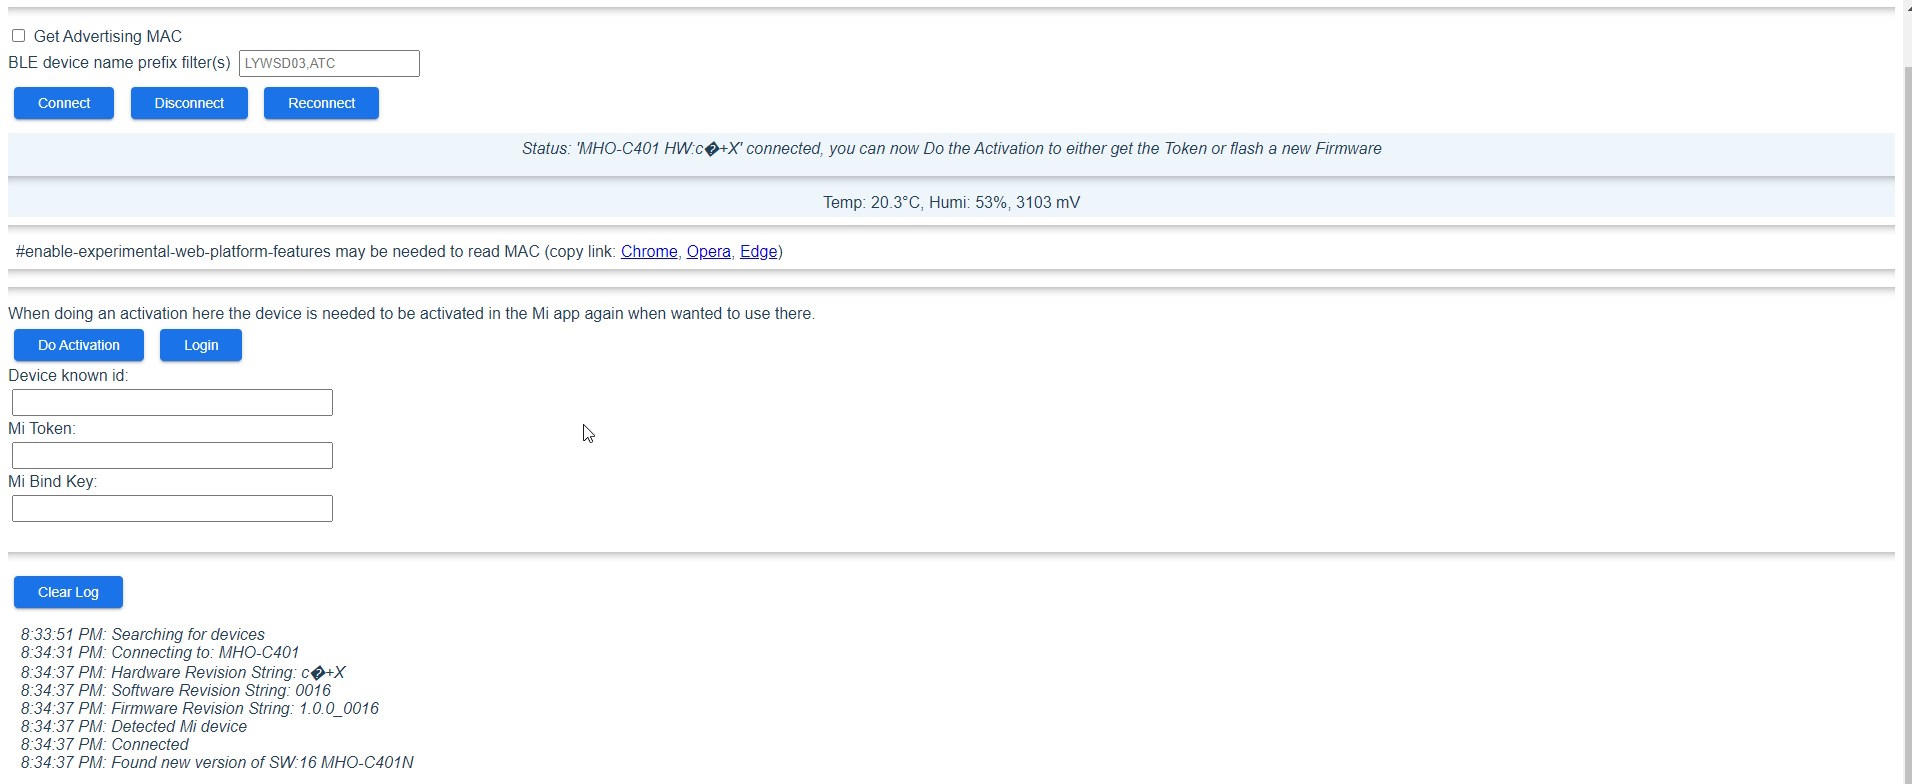
Once connected click on Do Activation and wait for the activation to complete
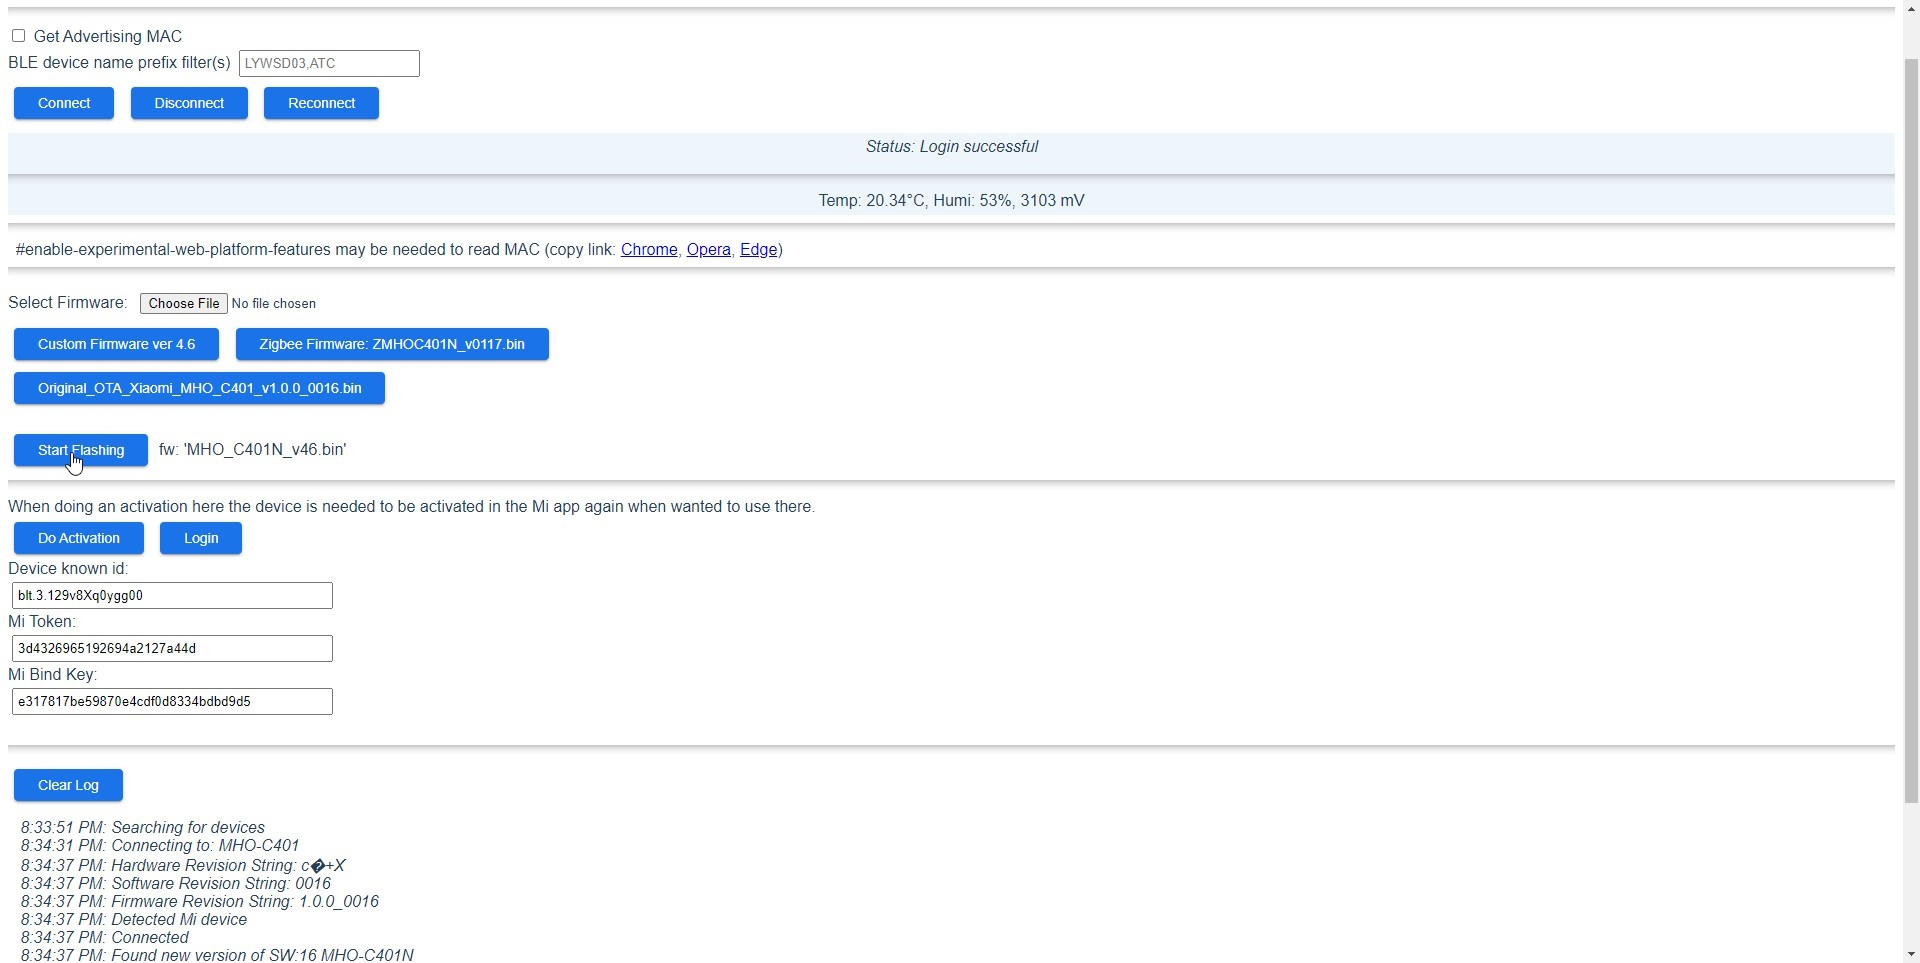
When activation completes the page will display options for firmware upgrade. Due to the firmware size you cannot go straight to Zigbee firmware and instead you first need to install custom firmware which was on version 4.6 at the time of writing this guide so click that option first.

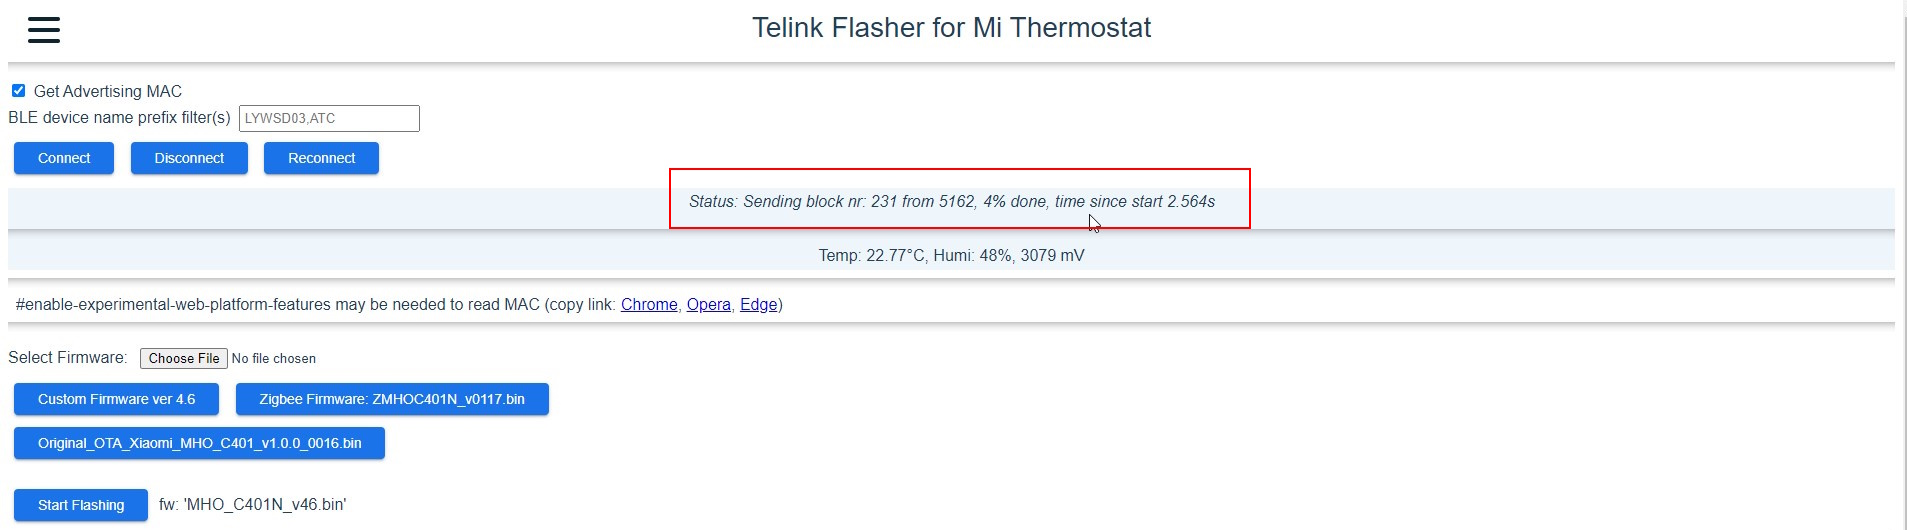
Now click Start Flashing
Watch the firmware update progress in this section of the page.
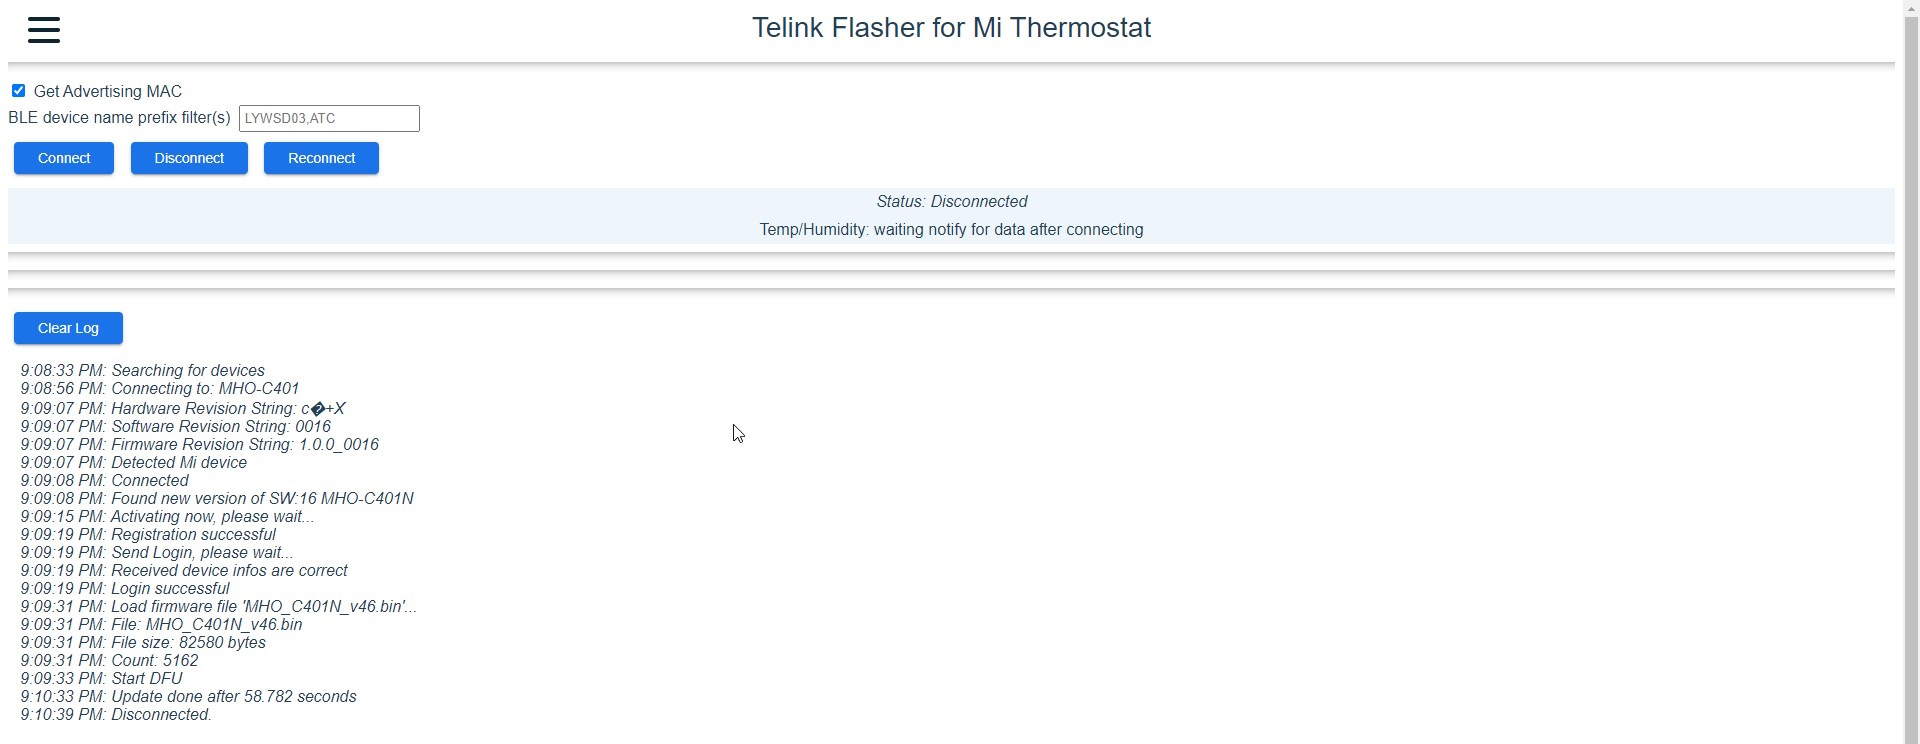
The log window will show “Update done after xx seconds” once complete.
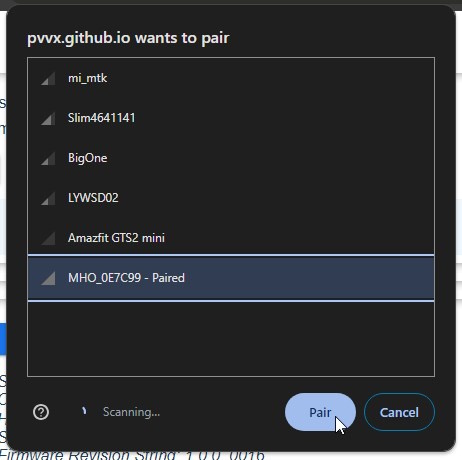
Now you need to reconnect to the sensor with the new firmware by again clicking Connect. It will no longer show up as “MHO-C401” and will now be “MHO_XXXXXX” where XXXXXX is derived from its MAC address.
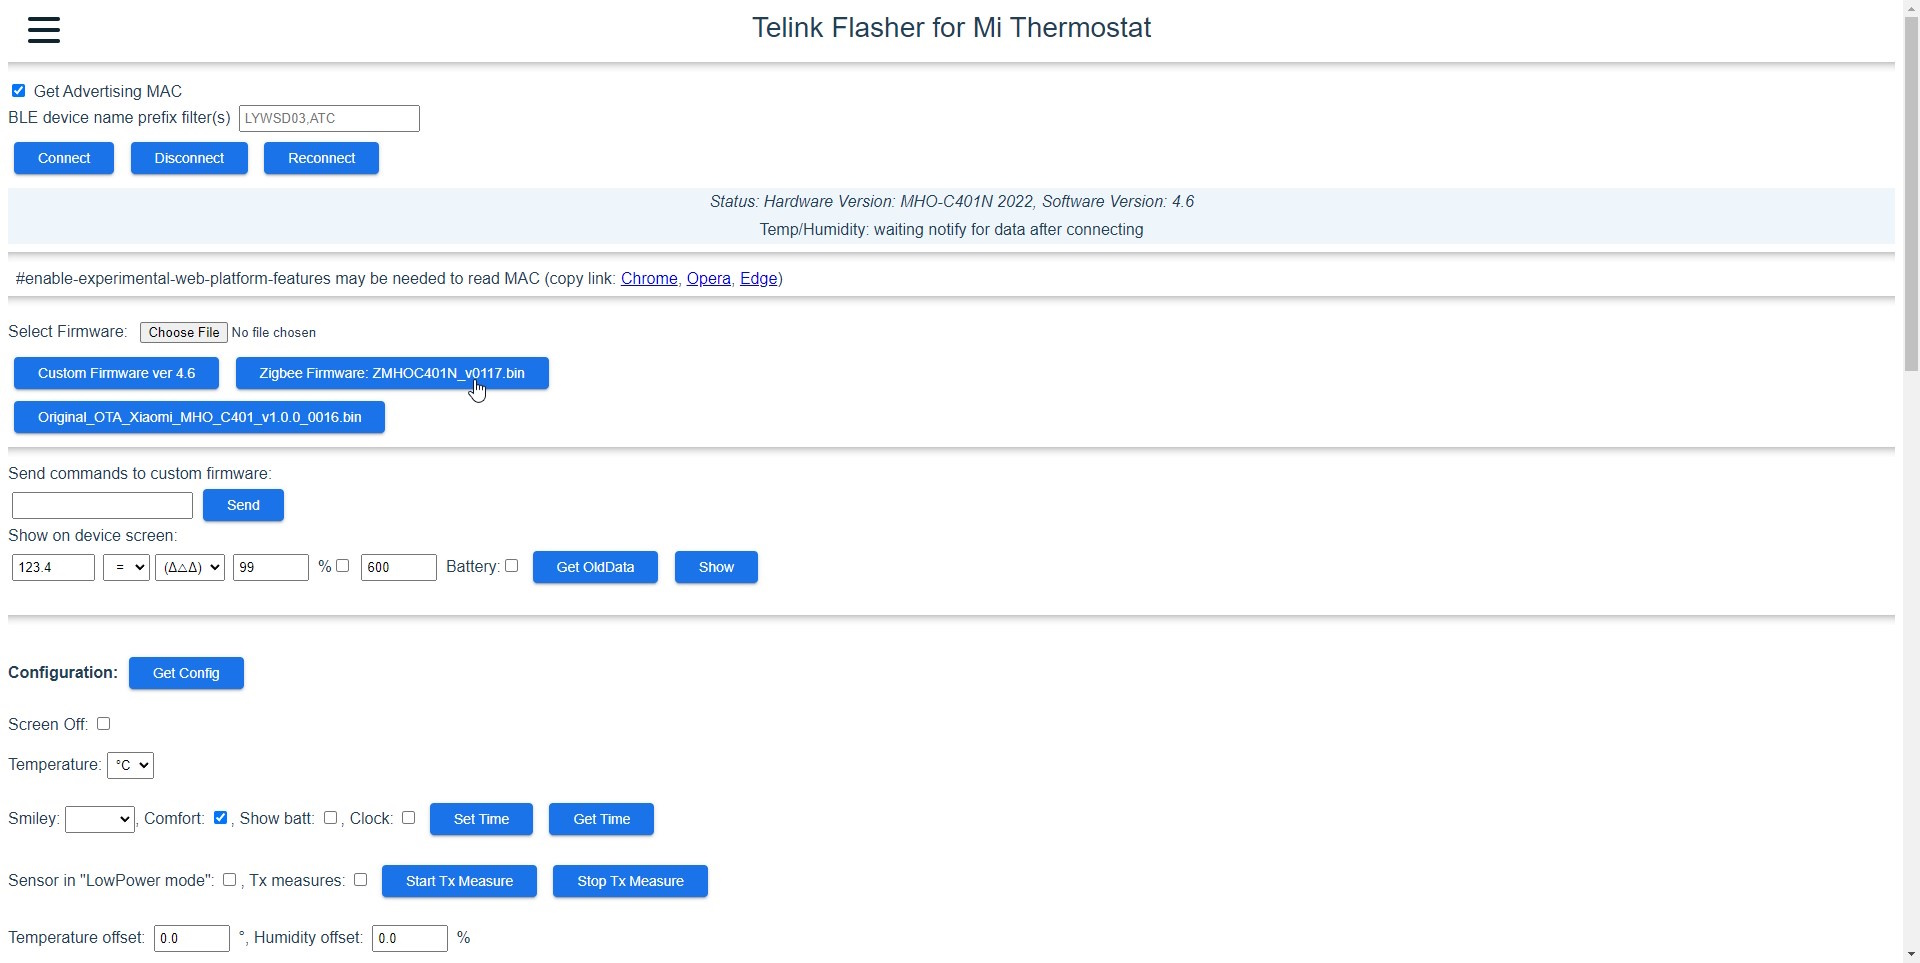
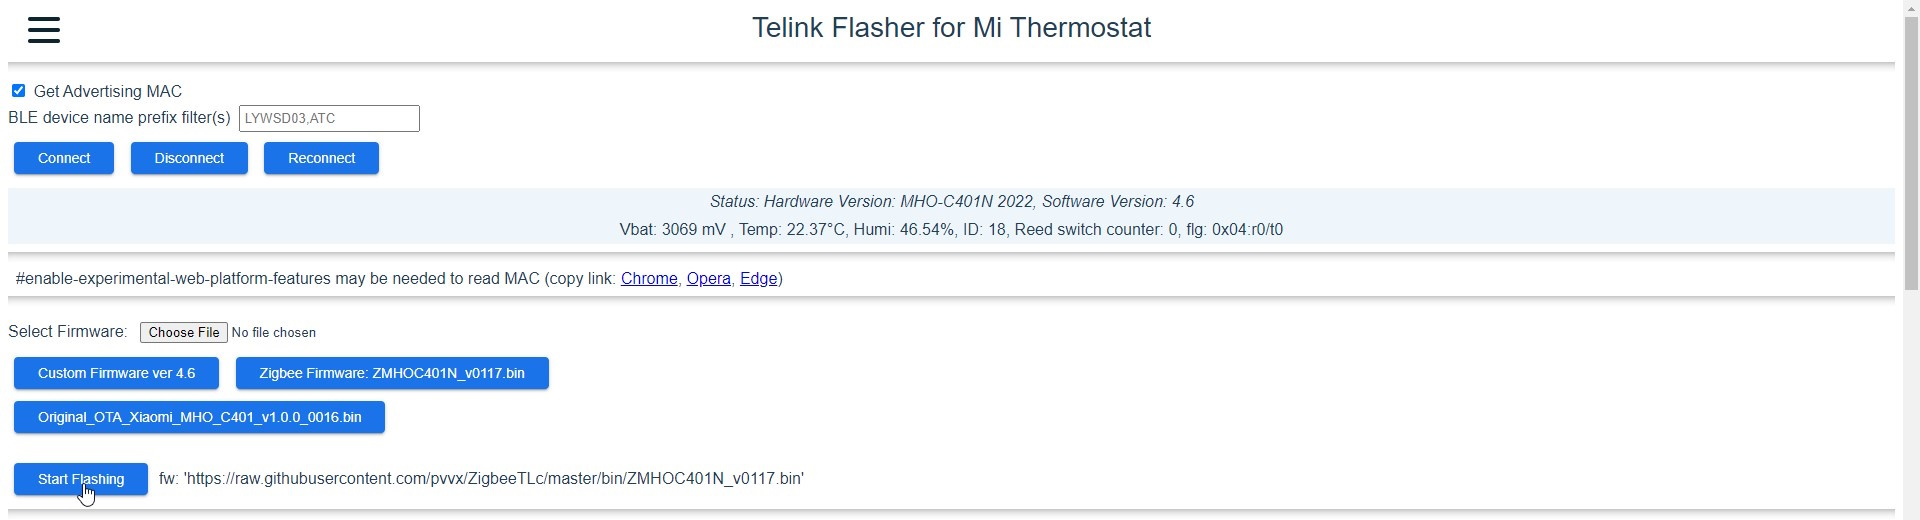
When connected the screen will show different options than with the original Xiaomi firmware. Now you can click on the Zigbee Firmware: option.
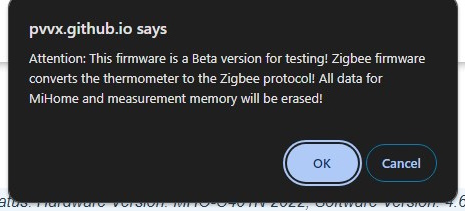
Confirm that you’re aware the data will be deleted.
Click on Start Flashing.
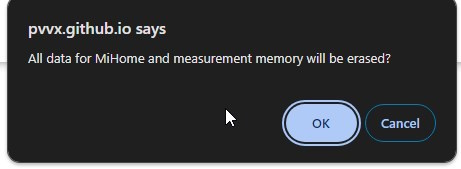
Confirm again.
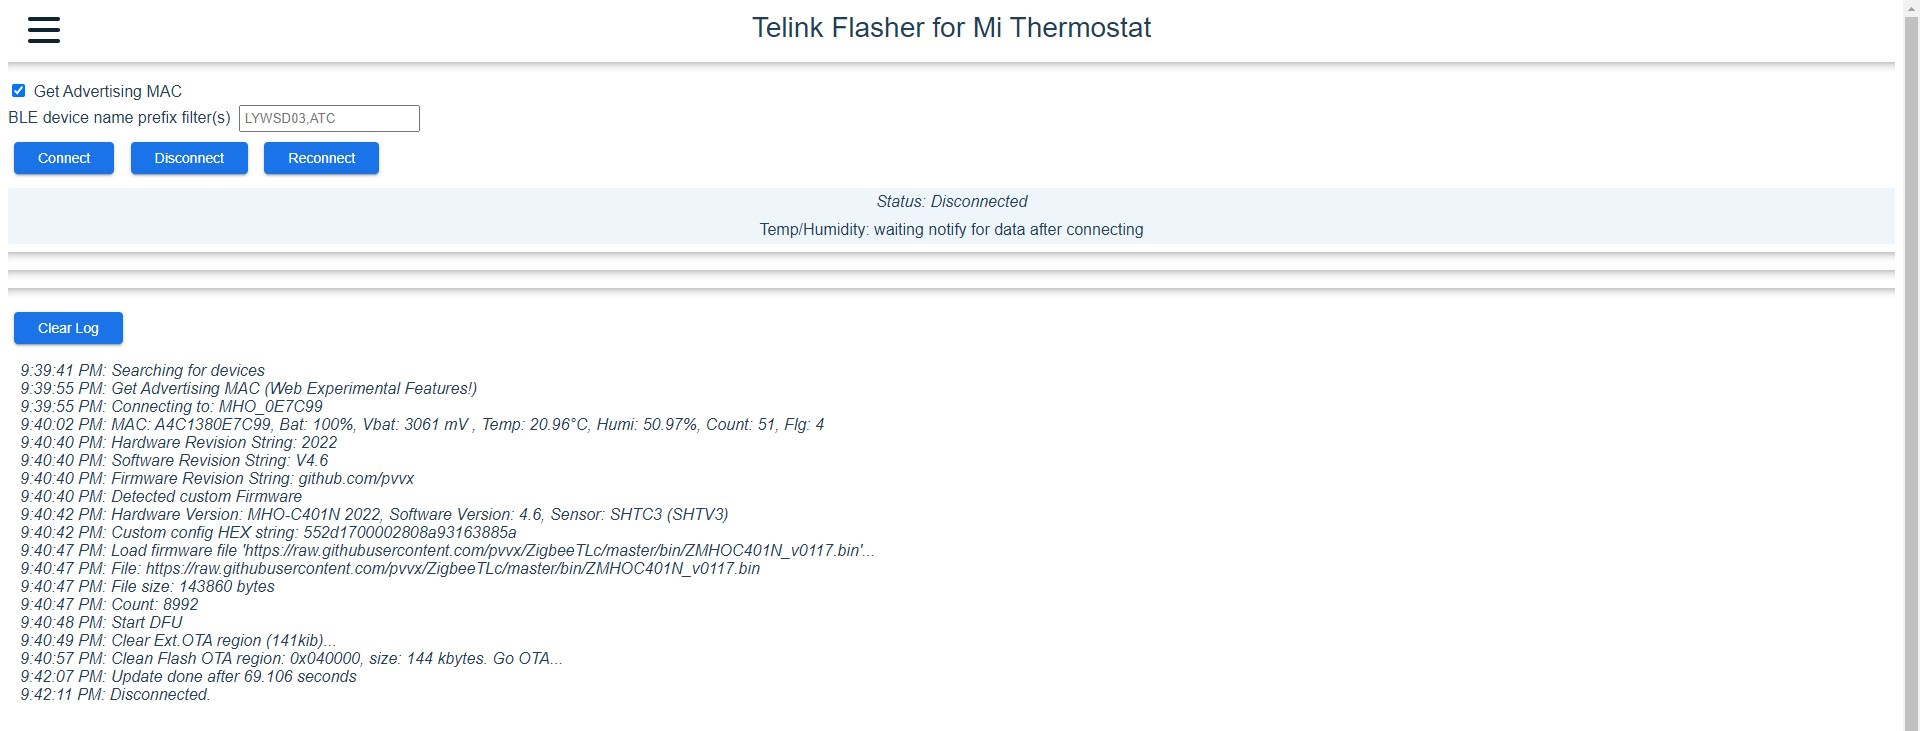
Watch the firmware update progress. First it will erase data then proceed to flash to the Zigbee firmware


Log window will show when the process is completed and will display “Update done after xx seconds” if the firmware upgrade is successful.
The device will now be in pairing mode and you can join it to your Zigbee coordinator.
I’ve also recorded the flashing process as a YouTube video if that makes it easier for you.
Troubleshooting
If an operation fails try to connect again. If that doesn’t work, remove the battery for a few seconds and insert it back again then connect.
Features
When paired it will display the link icon left of the humidity reading.
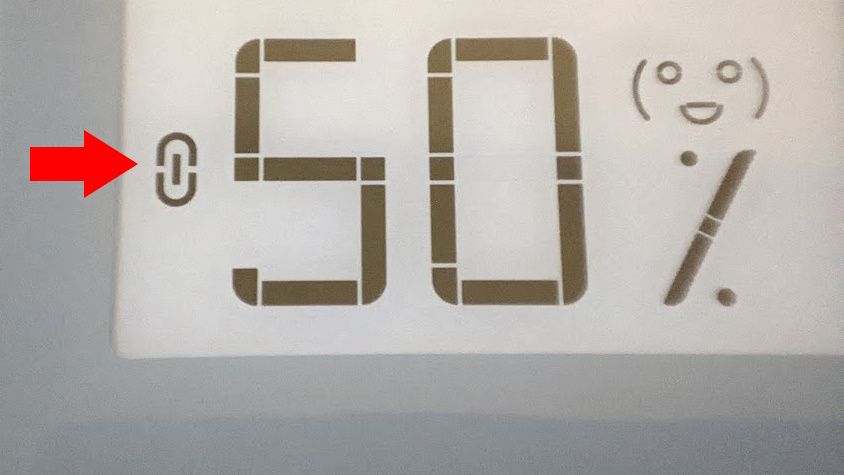
When the “BT” icon is displayed it signifies a connection loss or that the device is not registered to a Zigbee network.
![]()
When the “Identify” command is called or the back button is short pressed the “BT” icon will flash.
The button at the back has the following functionality with the new firmware:
- Short press - transmits temperature, humidity and battery readings.
- Short 2 seconds hold switches temperature display between Celsius and Fahrenheit.
- Long hold for 7+ seconds resets the device in pairing mode. It will remain in pairing mode until paired, even if you reinsert the battery.
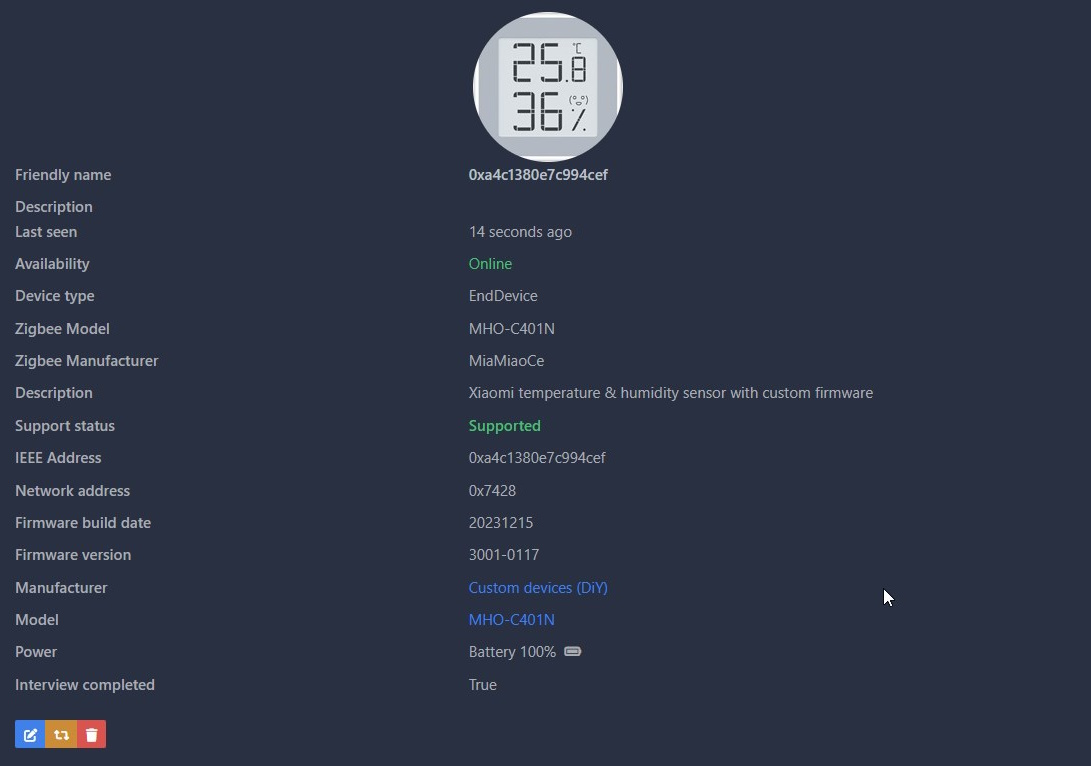
ZHA in Home Assistant
Your new Zigbee sensor will be discovered by Home Assistant when using ZHA integration.
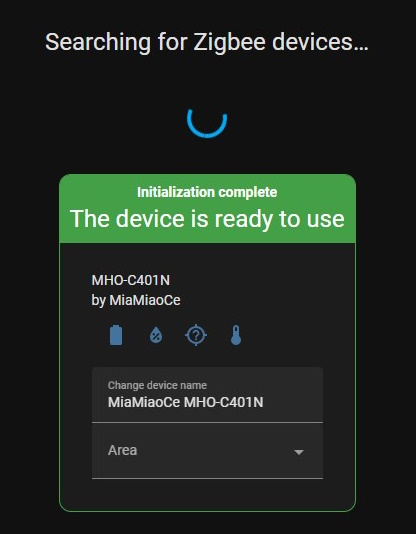
Home Assistant will add temperature. humidity and battery entities.
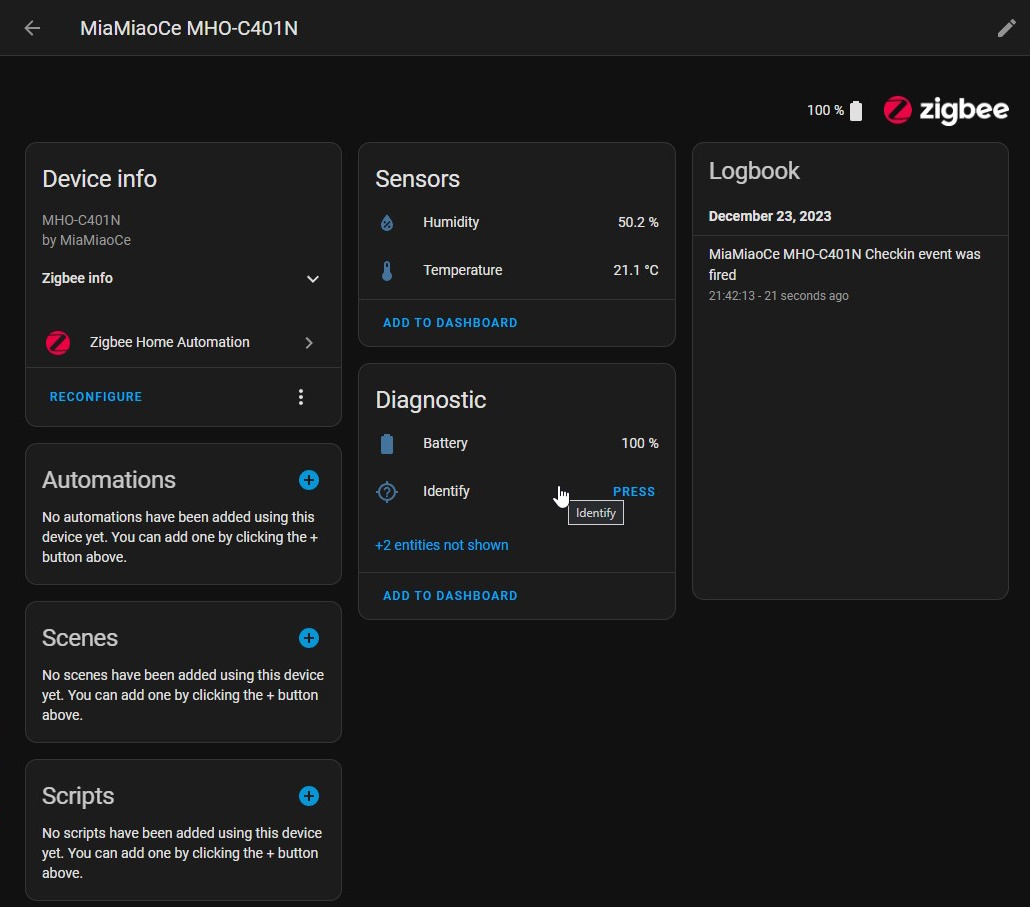
Settings
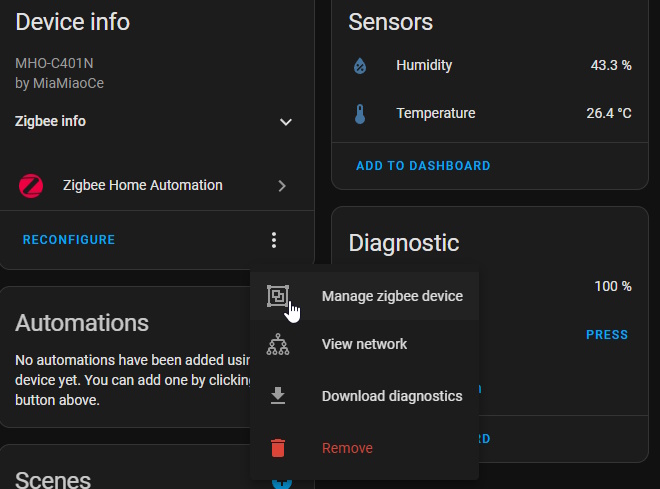
To configure device options such as unit display, on-screen smiley, etc, click on the three dots right of the RECONFIGURE option.

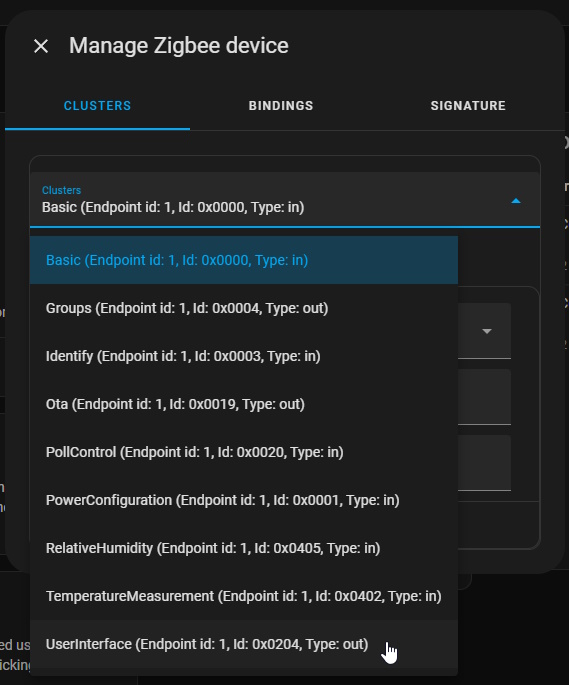
Select Manage Zigbee device.
In the “Clusters” dropdown select UserInterface
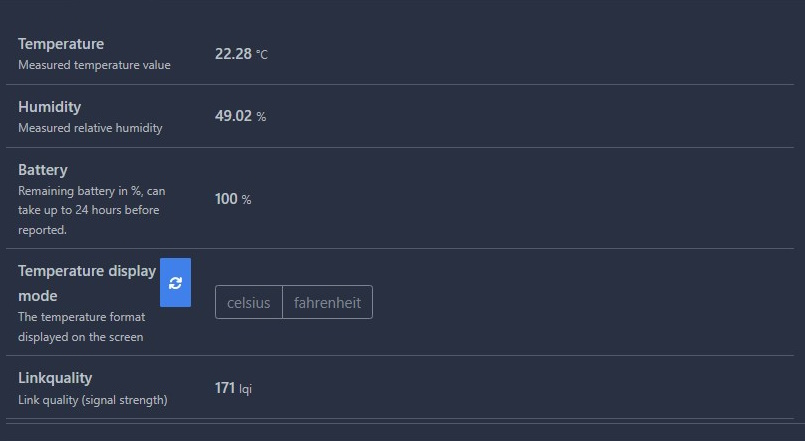
Displayed Temperature Unit
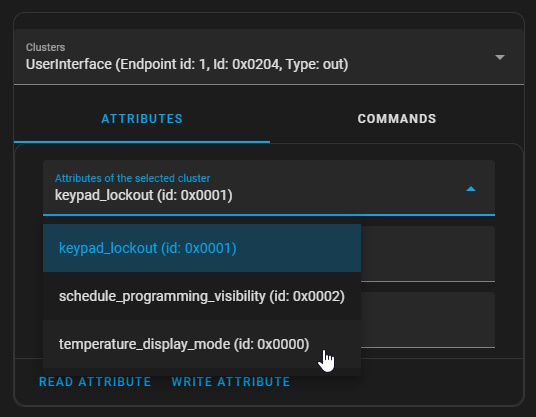
To change temperature unit on the display open “Attributes of the selected cluster” dropdown and select “temperature_display_mode (id: 0x0000)”.
Clicking on READ ATTRIBUTE will show the current configuration. The current setting is shown in the “Value” field:
TemperatureDisplayMode.Metricis for CelsiusTemperatureDisplayMode.Imperialfor Fahrenheit
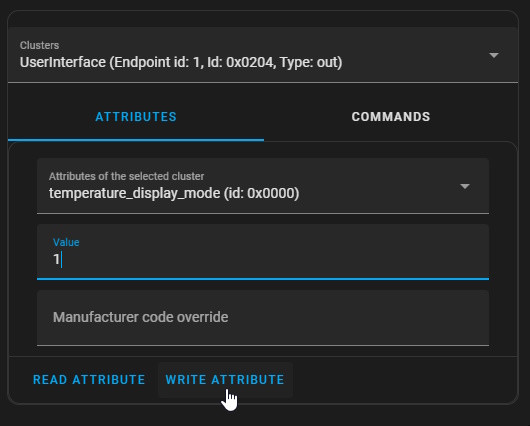
To change the setting enter in the same “Value” field:
- 0 for Celsius
- 1 for Fahrenheit
and click on WRITE ATTRIBUTE.
After a few seconds you can check if the setting was successful by reading the attribute again.
Smiley Display
Same as the previous option but select “schedule_programming_visibility (id: 0x0002)”.
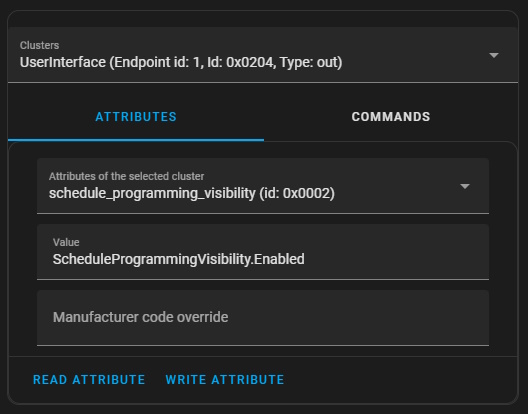
Clicking on READ ATTRIBUTE will show the current configuration. The current setting is shown in the “Value” field:
ScheduleProgrammingVisibility.Enabledwill display the smiley according to the comfort parametersScheduleProgrammingVisibility.undefined_0x01for no smiley on display
To change the setting enter in the same “Value” field:
- 0 for displaying the smiley
- 1 for not displaying the smiley
Comfort Levels for Temperature and Humidity
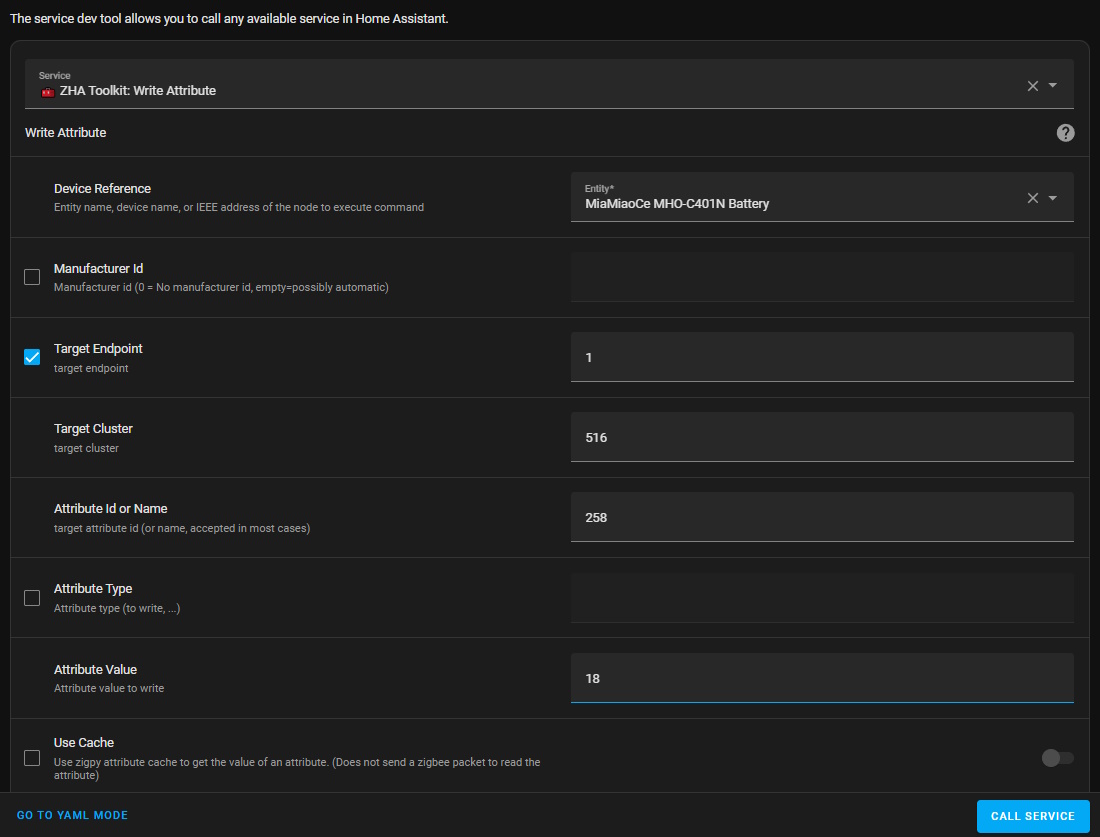
To set comfort levels of temperature and humidity which will change the smiley display you need to install ZHA Toolkit first to get the required write attribute service.
Open the Services tab with this link 
Find the “ZHA Toolkit: Write Attribute service”. Select an entity that belongs to the MHO-C401N. “Target Endpoint” is always 1 and “Target Cluster” is always 516.
To set Attribute ID to:
258for minimum comfort temperature in 1° steps in range of-127..+127259for maximum comfort temperature in 1° steps in range of-127..+127260for minimum comfort humidity in 1% steps in range of0..100261for maximum comfort humidity in 1% steps in range of0..100
Click CALL SERVICE to send the new configuration. If successful the button will show a green checkmark.
Video of the setting process:
OTA Upgrade / Revert to BLE firmware
pvvx’s firmware has the option to upgrade the firmware OTA and that includes “upgrading” back to the BLE version of the firmware.
First you need to create a folder for the update files and add it to configuration.yaml
zha:
  zigpy_config:
    ota:
      otau_directory: /config/zigpy_ota
In this example a directory named zigpy_ota is placed in the default HA /config directory.
Download an upgrade file named 1141-0208-xxxxxxxx-ZMHOC401N.zigbee (xxxxxxxx is the version number) from the /bin folder of the GitHub repository.
To revert to BLE download this .zigbee file.
Place the downloaded file to the created directory. Restart Home Assistant to update the configuration. The OTA process should trigger during restart and start upgrading the device. Enable debug logging for ZHA integration and check in logs for the OTA process progress. This upgrade can take upwards to 25 minutes.
When the upgrade is complete delete the file from the OTA directory.
If the update doesn’t start you can trigger it manually using the services tab: .
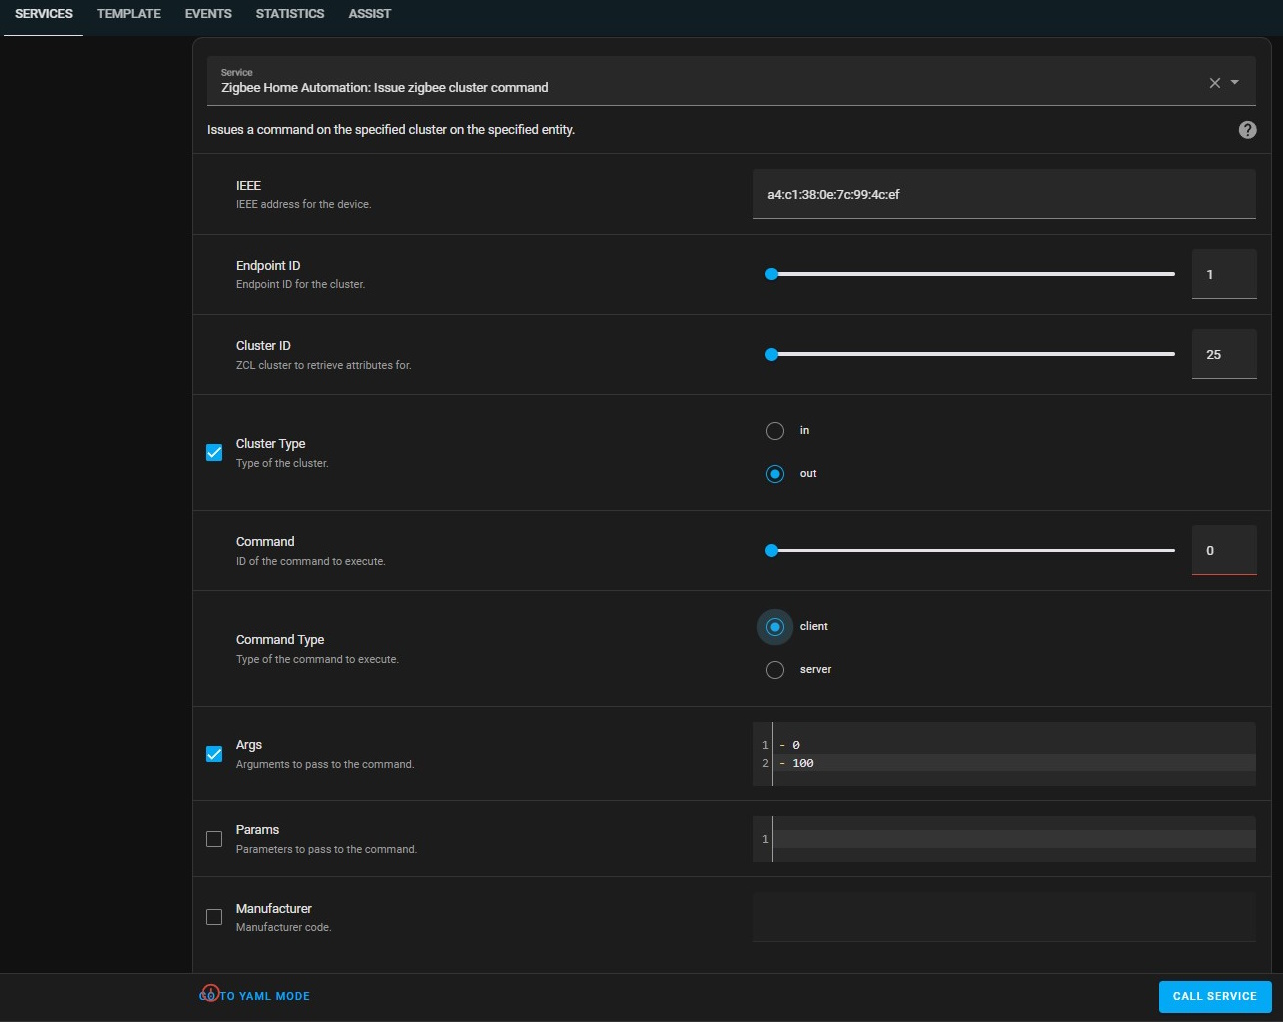
service: zha.issue_zigbee_cluster_command
data:
  ieee: "ieee address"
  endpoint_id: 1
  cluster_type: out
  command_type: client
  cluster_id: 25
  command: 0
  args:
    - 0
    - 100
If you’ve already installed ZHA Toolkit its easy to run the update with its “Trigger Device’s Firmware Update” service.
Zigbee2MQTT
Naturally, it is also supported in Zigbee2MQTT and pairs without issues.
The smiley display and comfort configuration options are not implemented at the time of writing this guide.
Final Words
The Zigbee firmware is a nice upgrade if you don’t have any BT receivers already but have a developed network. The custom BLE firmware by pvvx has a lot more features and configuration options. Using the Zigbee firmware will reduce battery life due to higher power demands of the protocol. Ultimately it doesn’t matter much in the long run since you can always revert back to BLE from Zigbee if you don’t like it.

Explore more like this

Moes ES1 (ZSS-LP-HP02) Zigbee Human Presence Sensor Review
It was hard to resist the new Moes labelled sensor on AliExpress because it looked identical to the Linptech ES1 sensor which works with Xiaomi’s Mijia ecosystem but I avoided...
Kaiweets HT118A Digital Multimeter Review
If you’re into tinkering with electronics one of the tools you can’t go without is a multimeter.
Comments