Zemismart ZM25TQ Roller Shade Motor Review
Review of the Zemismart ZM25TQ roller shade motor and how to integrate it in Home Assistant using Tuya integration.
Full disclosure: This is a review sample sent to me free of charge by Zemismart. Review is not influenced by that fact and is solely my opinion.
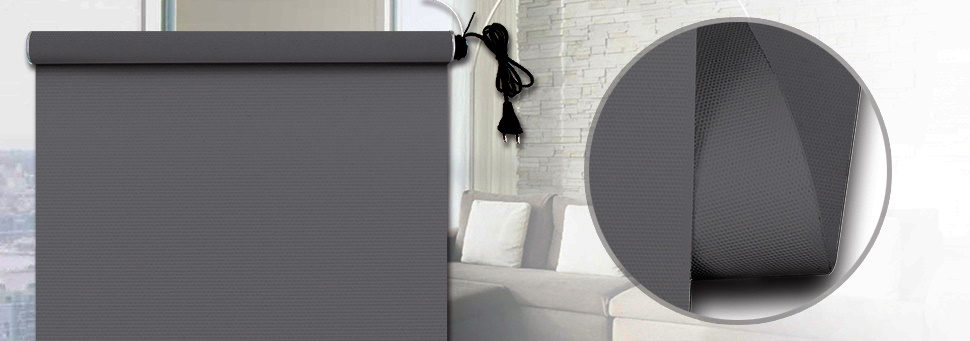
Zemismart ZM25TQ is a reversible motor fit inside a tube and is intended for retrofitting existing roller shades with the inner diameter of 36mm to 38mm. It is controllable over Wi-Fi using Tuya app or with the supplied 433 mHZ RF remote.
You can get it from AliExpress, Amazon.com or Amazon.co.uk. You can also buy it complete with shades.
A similarly priced ZigBee version of the same model exists if you’re more in that ecosystem. I assume the hardware is the same and they just switch the ZigBee module for the Wi-Fi one.
Can we flash it?
Tuya you say? Great! Let’s Tuya-Convert it to Tasmota!
…
Five minutes later:
WARNING: it appears this device does not use an ESP82xx and therefore cannot install ESP based firmware
Well that’s just peachy, no easy Tasmota flash for this one. Well, let’s see what it can do with the intended way of control: using the Tuya app.
Assembly
Who knew 38mm tubes for blinds would be difficult to find locally? I had to source some aluminum tubes from the hardware store to slide the tubular motor in, then attach the blinds using some double sided tape. The motor comes with all the required mounting gear and it is was to install in the window.
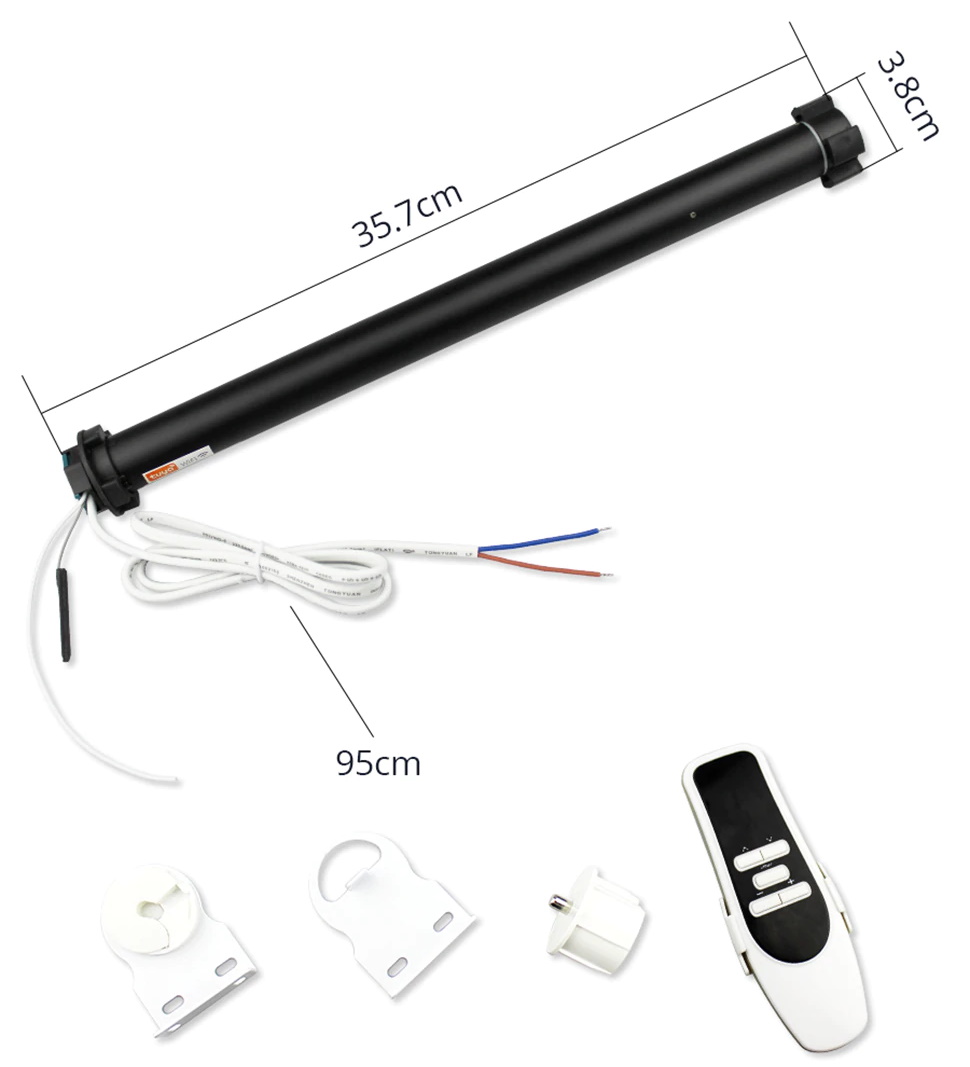
My motor came with the EU Type C plug but the seller assured me they have different plug types available. One problem could be the short cable which would require you to have a plug less than 1m away from the blinds which is not the case in most of the houses. They could’ve thought that part through a bit more… In this case having a plug already attached only makes the job of extending it more difficult.
Once working it is fairly fast and very quiet when running. Here it is on a 140mm wide shade roll with a thick walled 40mm aluminum tube.
Since there are people way better at video production than me, here’s TheHookUp’s Rob with the same roller shades motor in action:
While here give him a follow and thumbs up!
Tuya App
To add the motor to the Tuya app, the “Motor set” button on the tube has to be pressed three times inside 5 seconds while powered up, after which, the motor does a short spin in both directions to signal it is in pairing mode.
Sadly the Tuya app installs it as a Curtain motor which isn’t so bad but the device menu features a curtains graphic with, again, curtain icons for open, close and pause which bugs me slightly.
Motor Calibration
Before being able to use all the features of the motor you have to calibrate its start and end positions. Unfortunately, the app only shows a warning that a calibration is needed but does not give any options to do it or, at least, link to some instructions. For that you have to use the supplied remote and provided instructions leaflet. But wait, the remote in the booklet is completely different from the one I got!? Grrr…
Instructions refer to a “SET” button on the remote and the graphic points to the bottom of the remote. My remote is completely different and there is no button labelled “SET” anywhere on it. I have to be honest, it took me at least 10 minutes to figure out there’s a black dot on the back side that can be pushed. Lo and behold it is the totally unlabeled “SET” button. We’re back in business!
And whaddaya know, the instructions work, phew!
First you need to pair the remote by pressing Motor Set once and holding Up button on the remote until the motor whirrs.
To calibrate positions move blinds to fully open, press Motor Set button, hold Up on the remote until the motor whirrs, move the blinds to your preferred middle position, press Motor Set button then hold Stop button until the motor whirrs and finally repeat the process for fully closed using Down button.
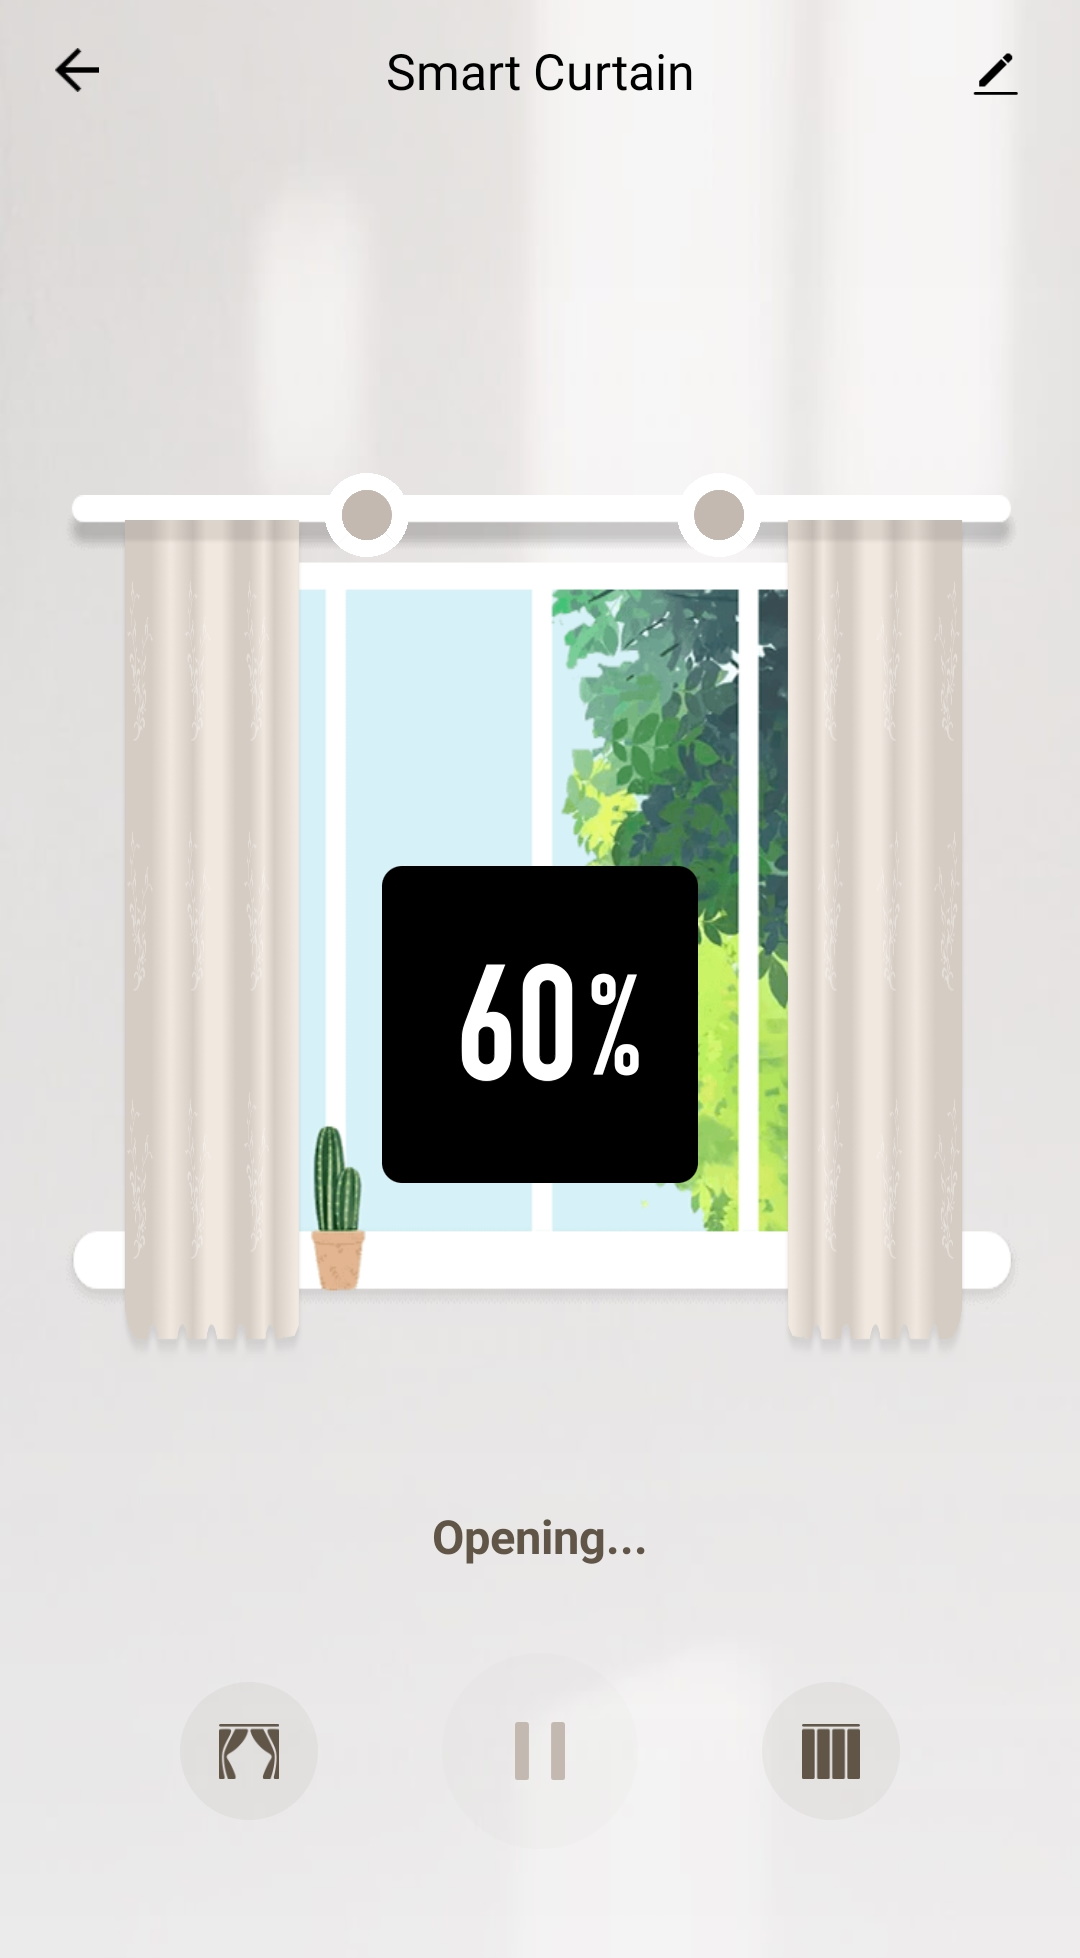
Now you get the blinds position displayed in percentage and you can set them to any position using the slider on the curtains. After everything is working in the app it is time to integrate it in Home Assistant.
Home Assistant Integration
Since the device is locked (for now winkwink) into using Tuya’s app we have to use the Tuya integration. It is actively developed and, most importantly, supports covers.

It is fully configurable using the Integrations menu in the GUI so setting everything up is just a matter of entering your Tuya login and password (Hopefully you created the account using a throwaway email address, just in case), your country code and selecting the app you used (in this case Tuya).
The integration will find all the supported devices and list them.

Enter the Smart Curtains device page and you’ll see a Smart Curtain entity with open, stop and close controls. You can edit its properties by clicking on its name, I’ve changed the entity name and its icon to something more appropriate.
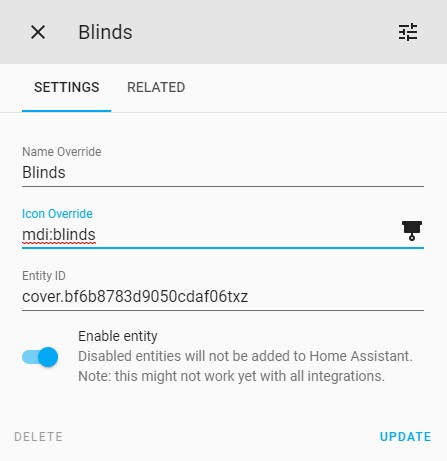
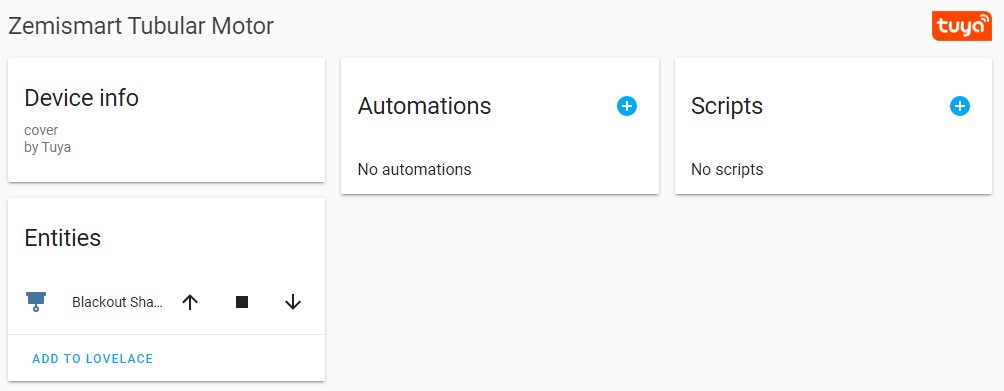
Albeit an easy solution it is far from perfect. You only get open, stop and close commands and no positional data or setting position like in the app. Worst of all still uses the cloud and there is a small delay which, arguably, does not matter in this use case but you notice it and it nags you.
In the next part of the review we’ll do some surgery and get Tasmota on it !

Explore more like this

Moes ES1 (ZSS-LP-HP02) Zigbee Human Presence Sensor Review
It was hard to resist the new Moes labelled sensor on AliExpress because it looked identical to the Linptech ES1 sensor which works with Xiaomi’s Mijia ecosystem but I avoided...
Comments