ZY-M100 Tuya Human Presence Sensor Review

Summary
This is what an affordable good presence sensor is.
Full disclosure: This device is purchased with the help of your donations. Links in this article are affiliate links. By purchasing through them I also get a small commission that funds future projects!
I’ve mentioned this one as the superior alternative to the Cheapest Tuya Presence Sensor and now it’s time to dig deeper into it.
The device was purchased from AliExpress.
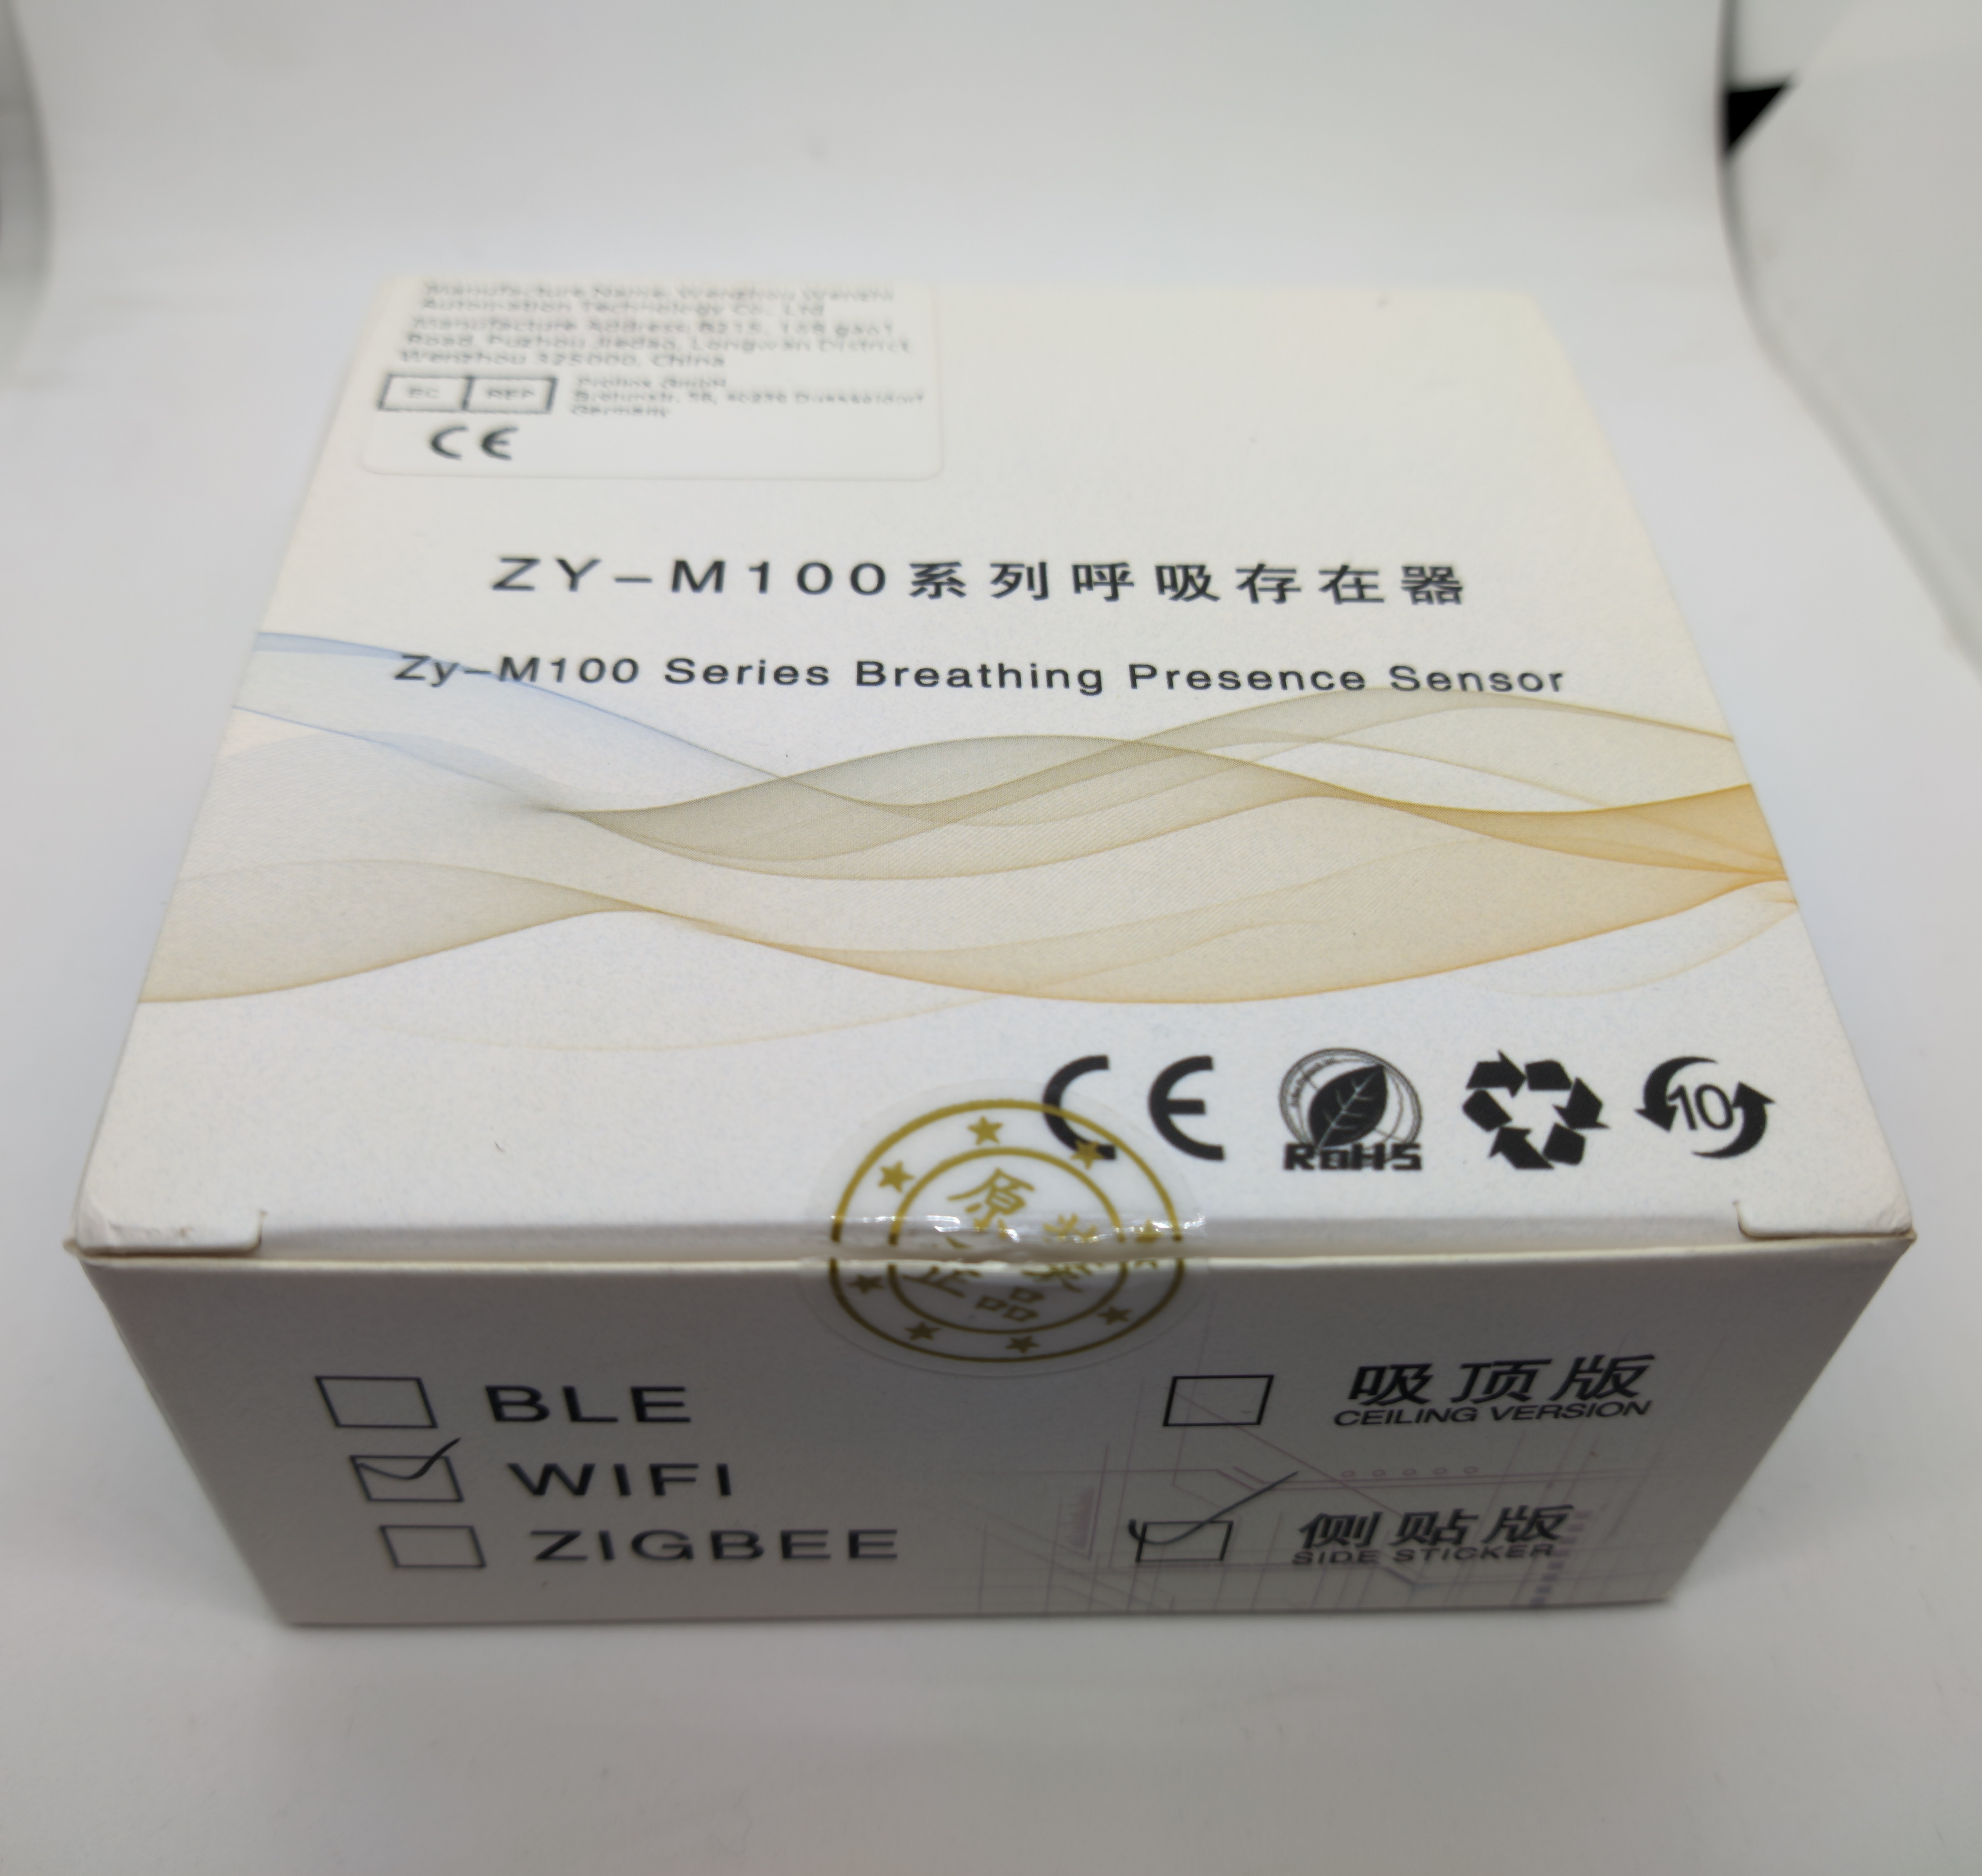
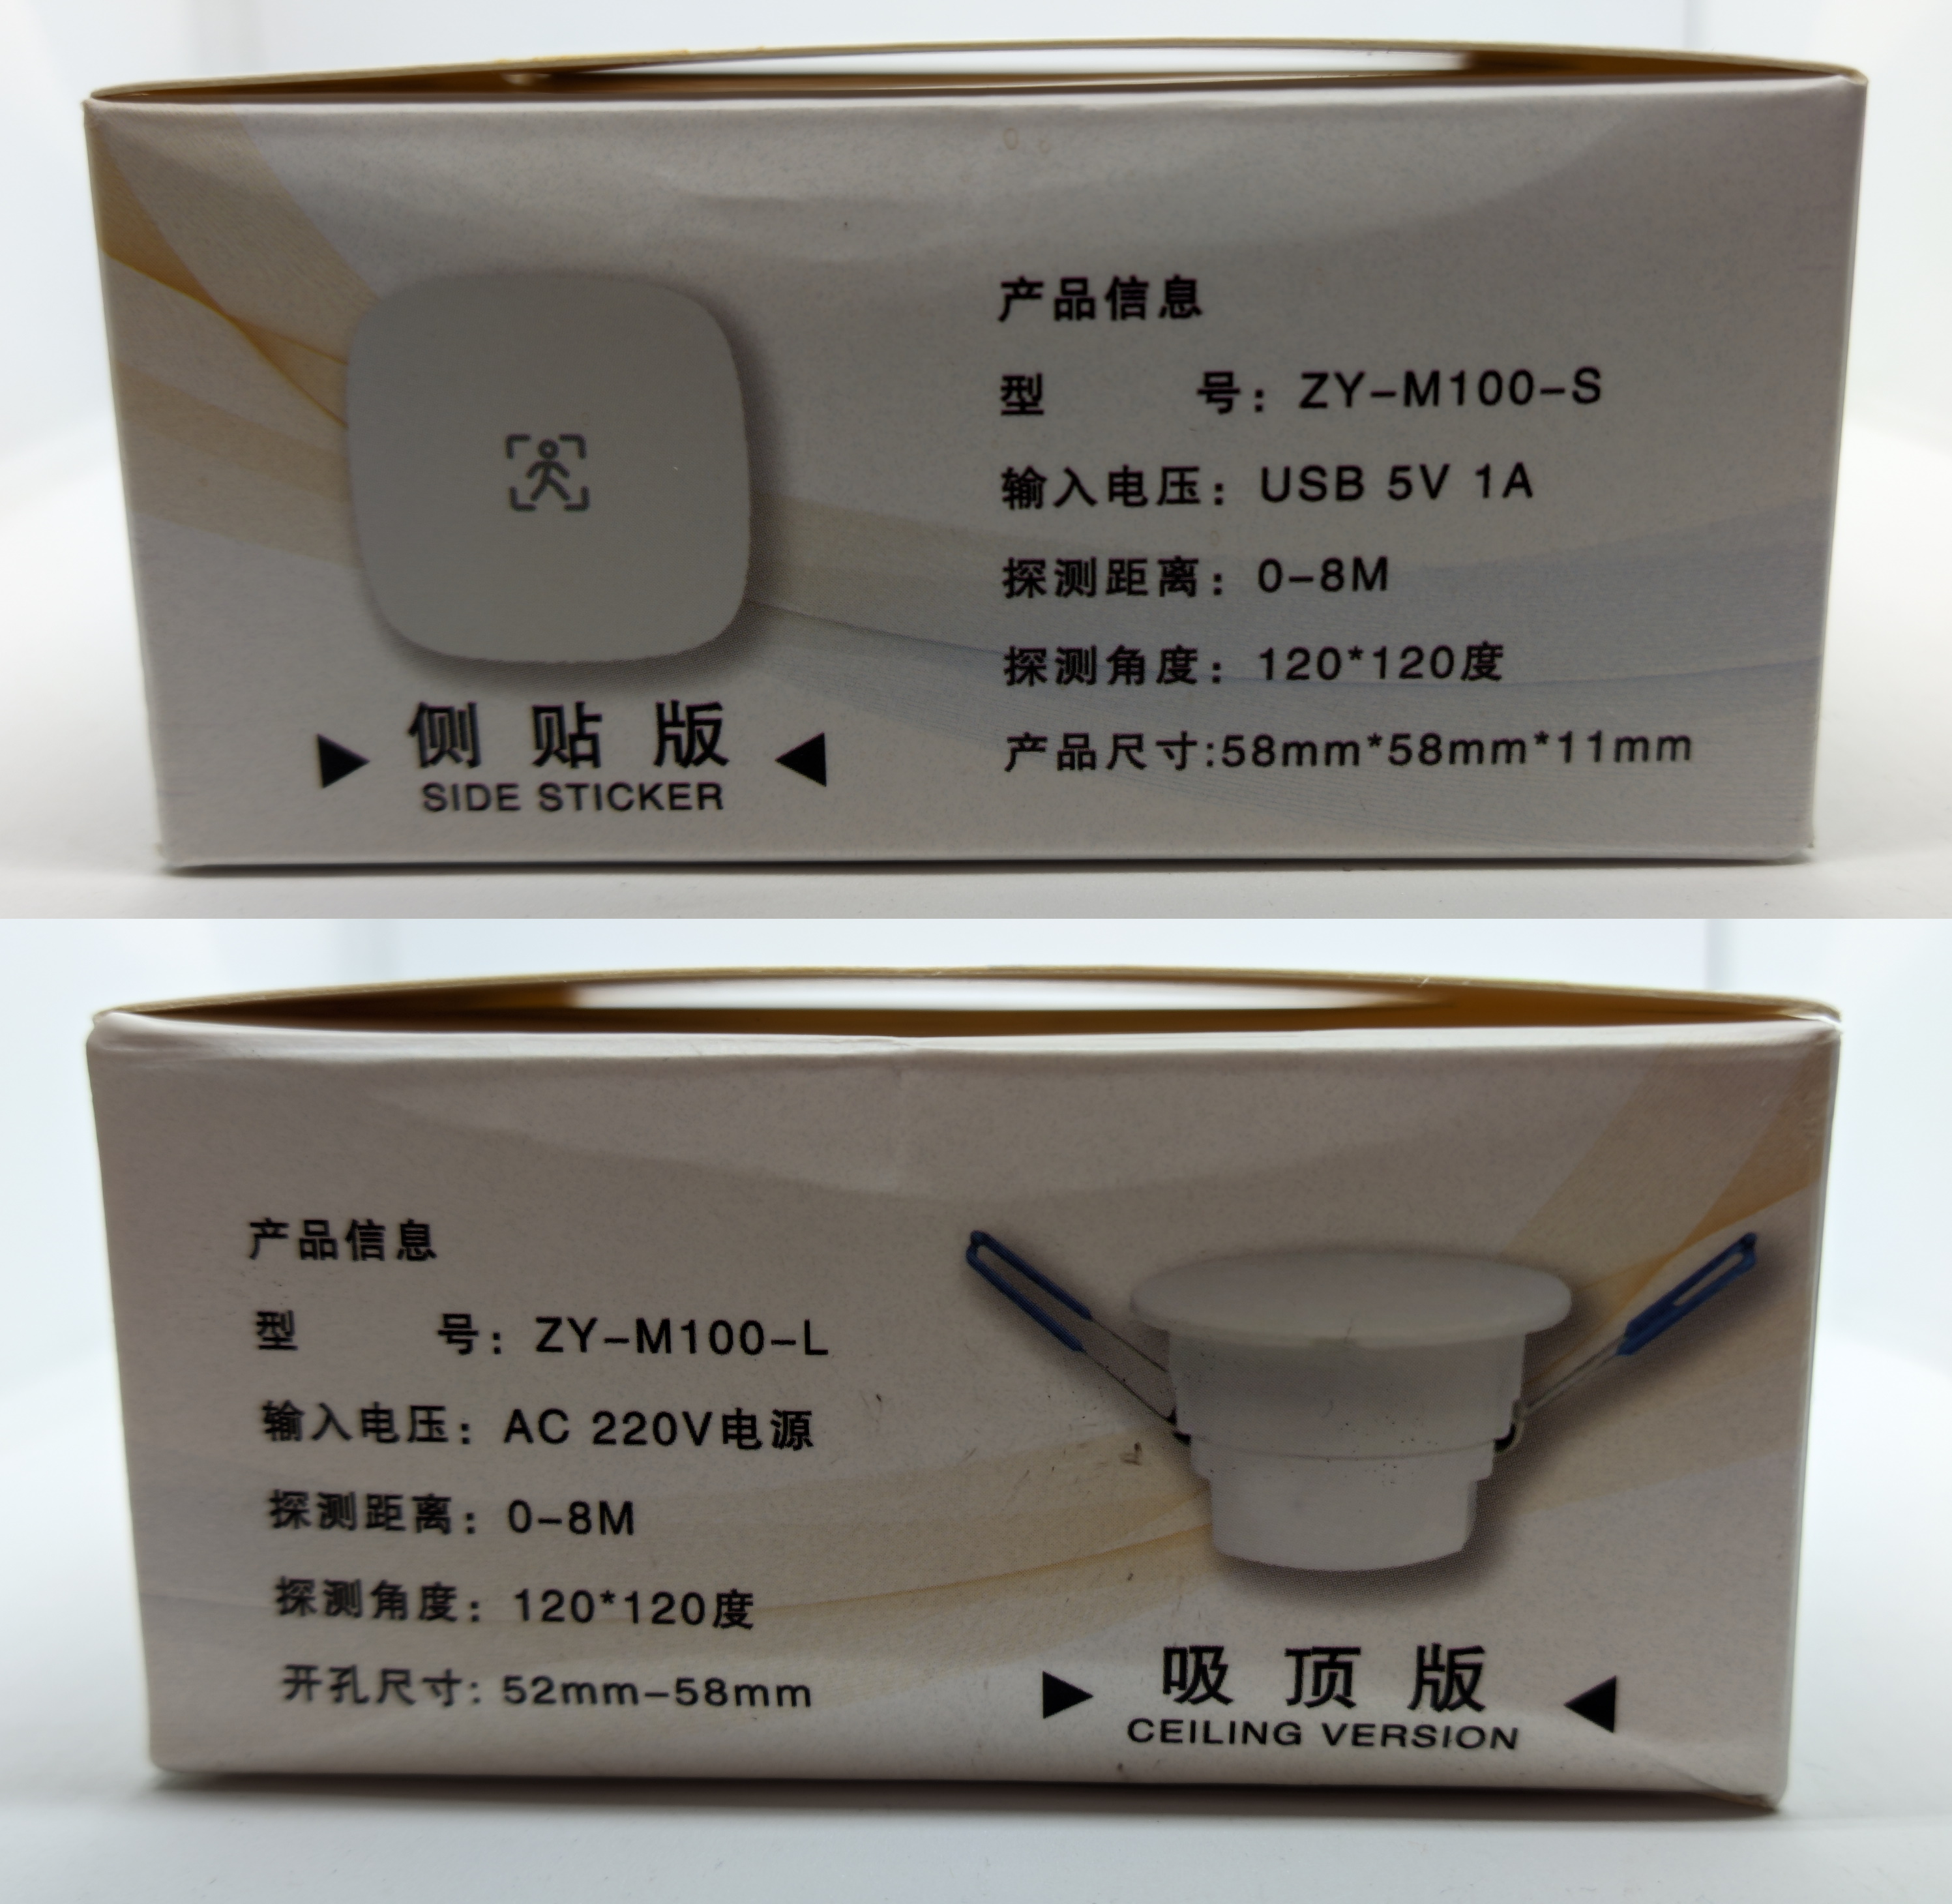
The ZY-M100 presence sensor comes in two mounting options: ceiling and wall mounted. Both of those can be either Wi-Fi, Zigbee or BLE. I got the wall mount WiFi version because it was the cheapest for 33.68$ after coupons and store discounts (that’s with 25% EU VAT included) and I wanted to see if I can flash it with Tasmota.
Unboxing
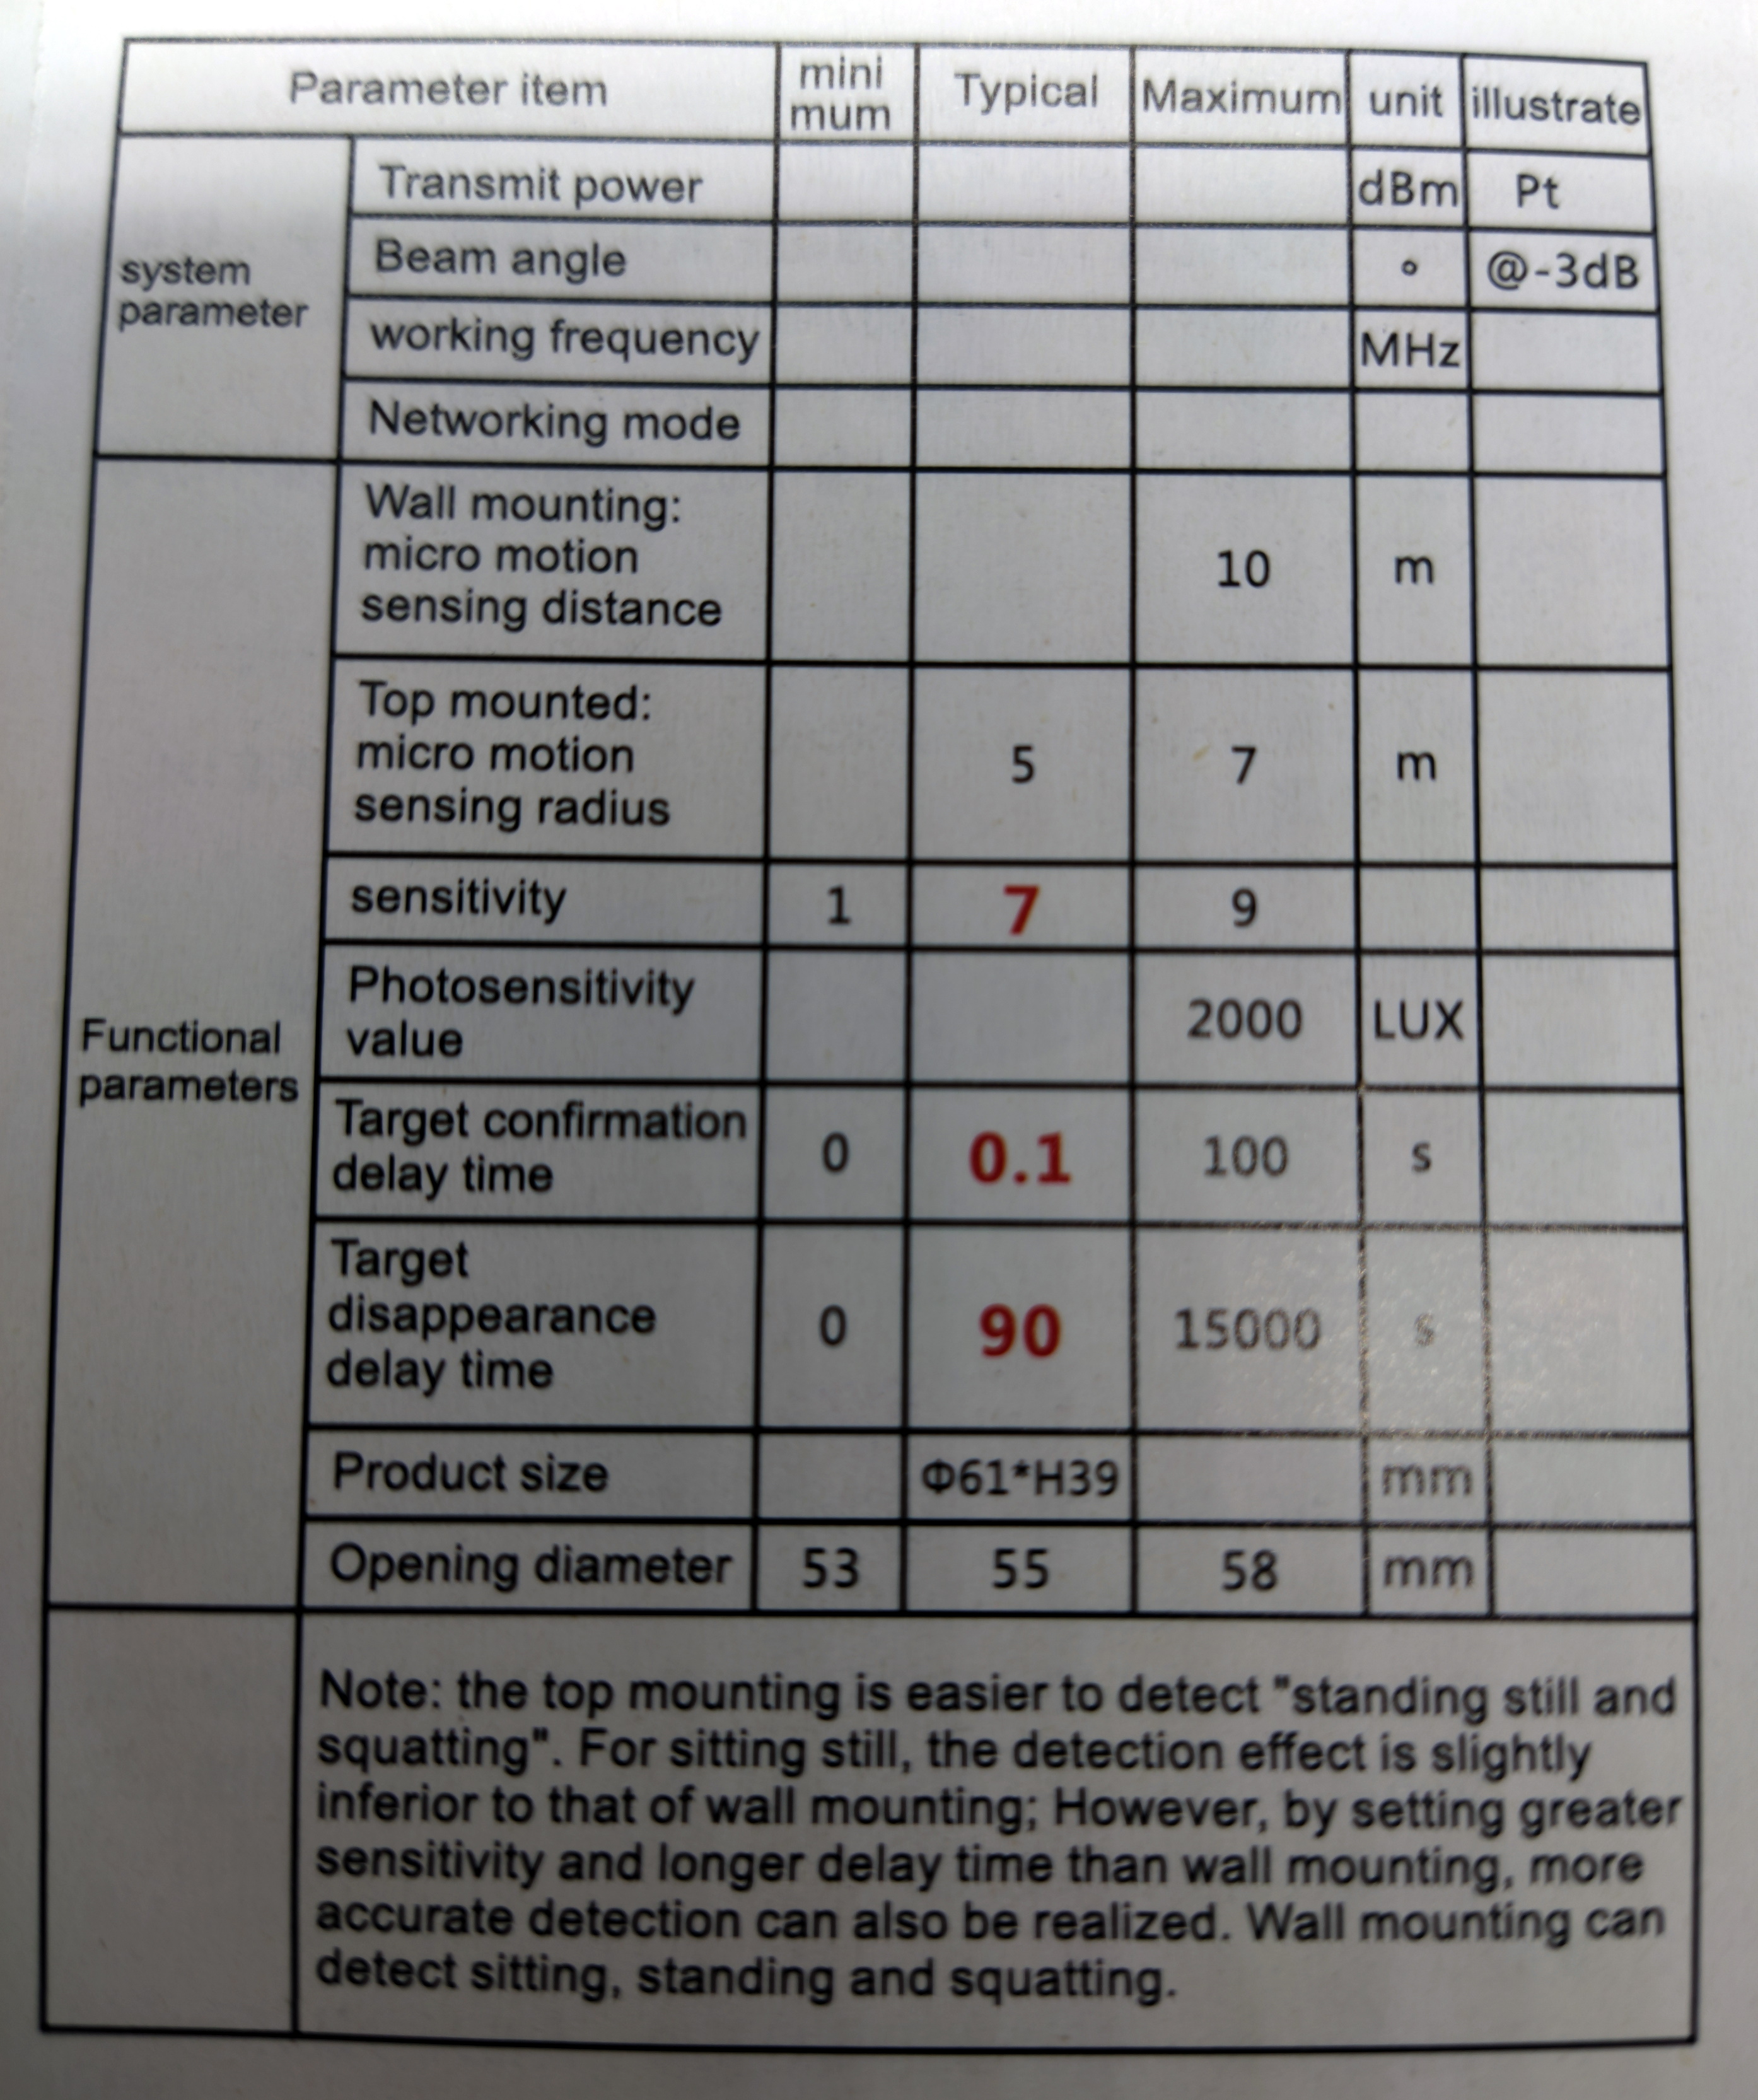
It came in a box labelled with the device model and the title of “Breathing Presence Sensor”. The box sides show both versions with some specifications. In my experience this is an indicator of a higher level of quality than the typical cheap white label Tuya stuff.
Inside the box is, of course, the sensor itself, an USB cable, short manual and cheap double sided mounting tape.
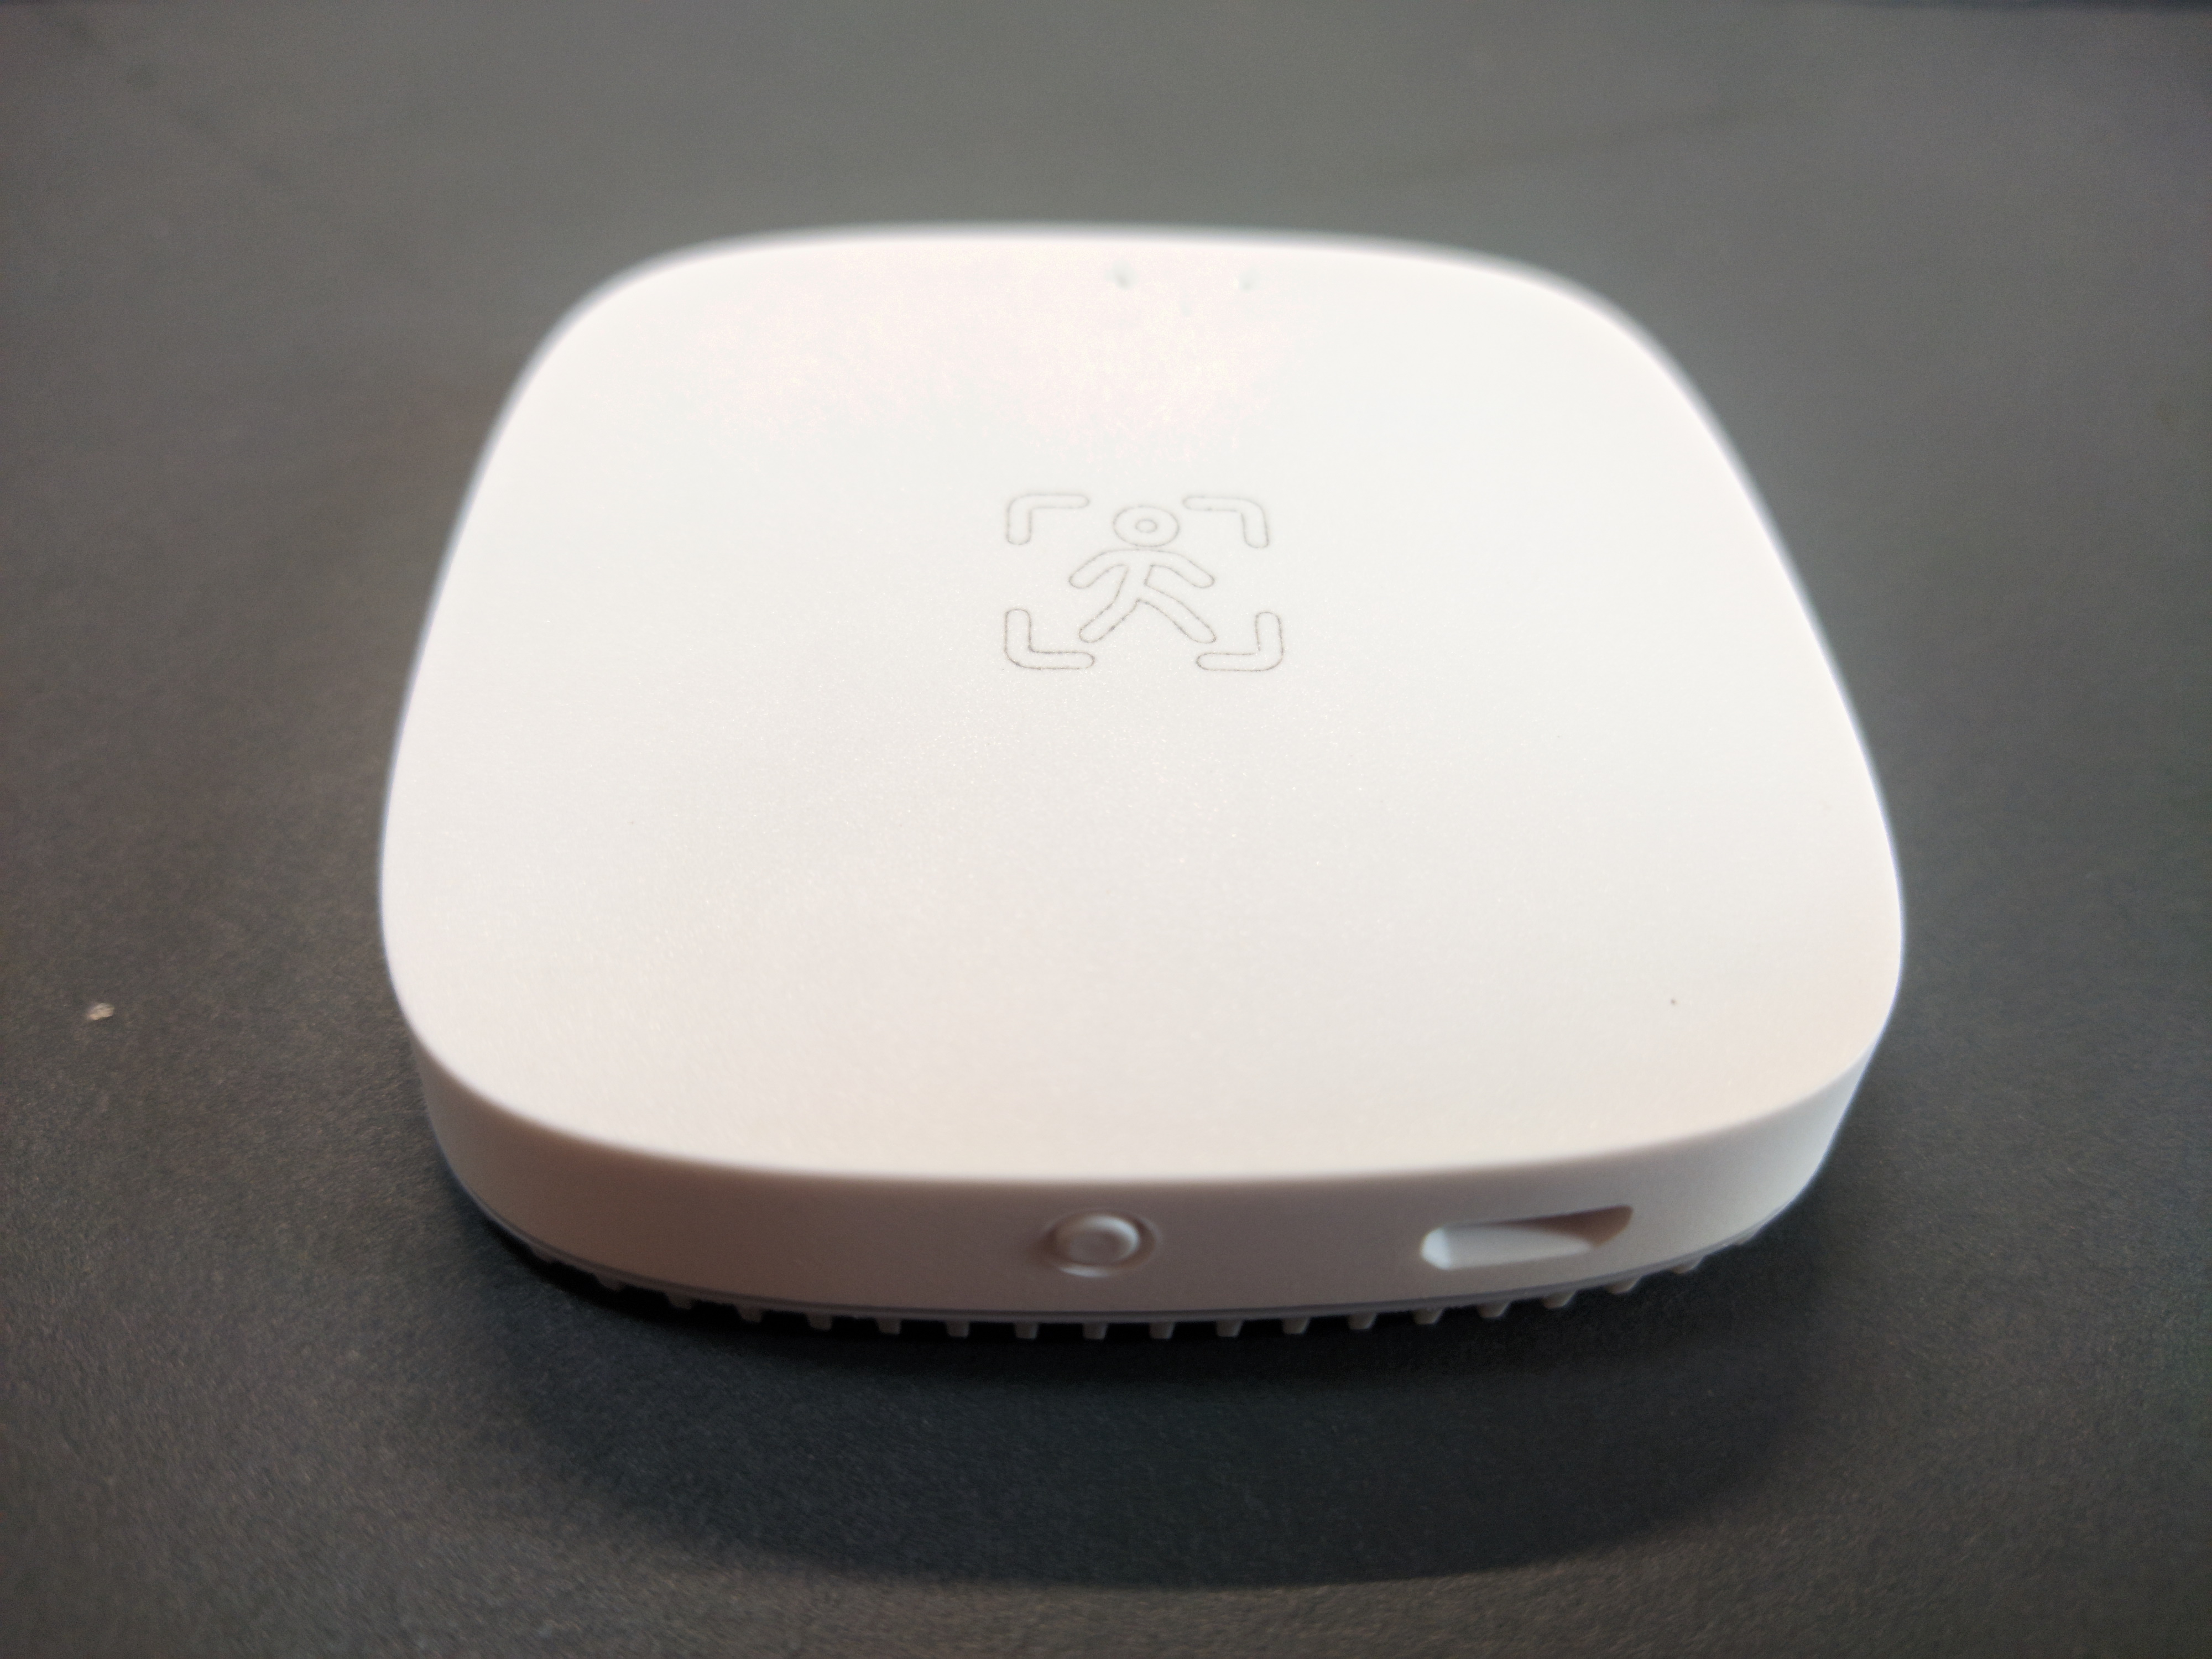

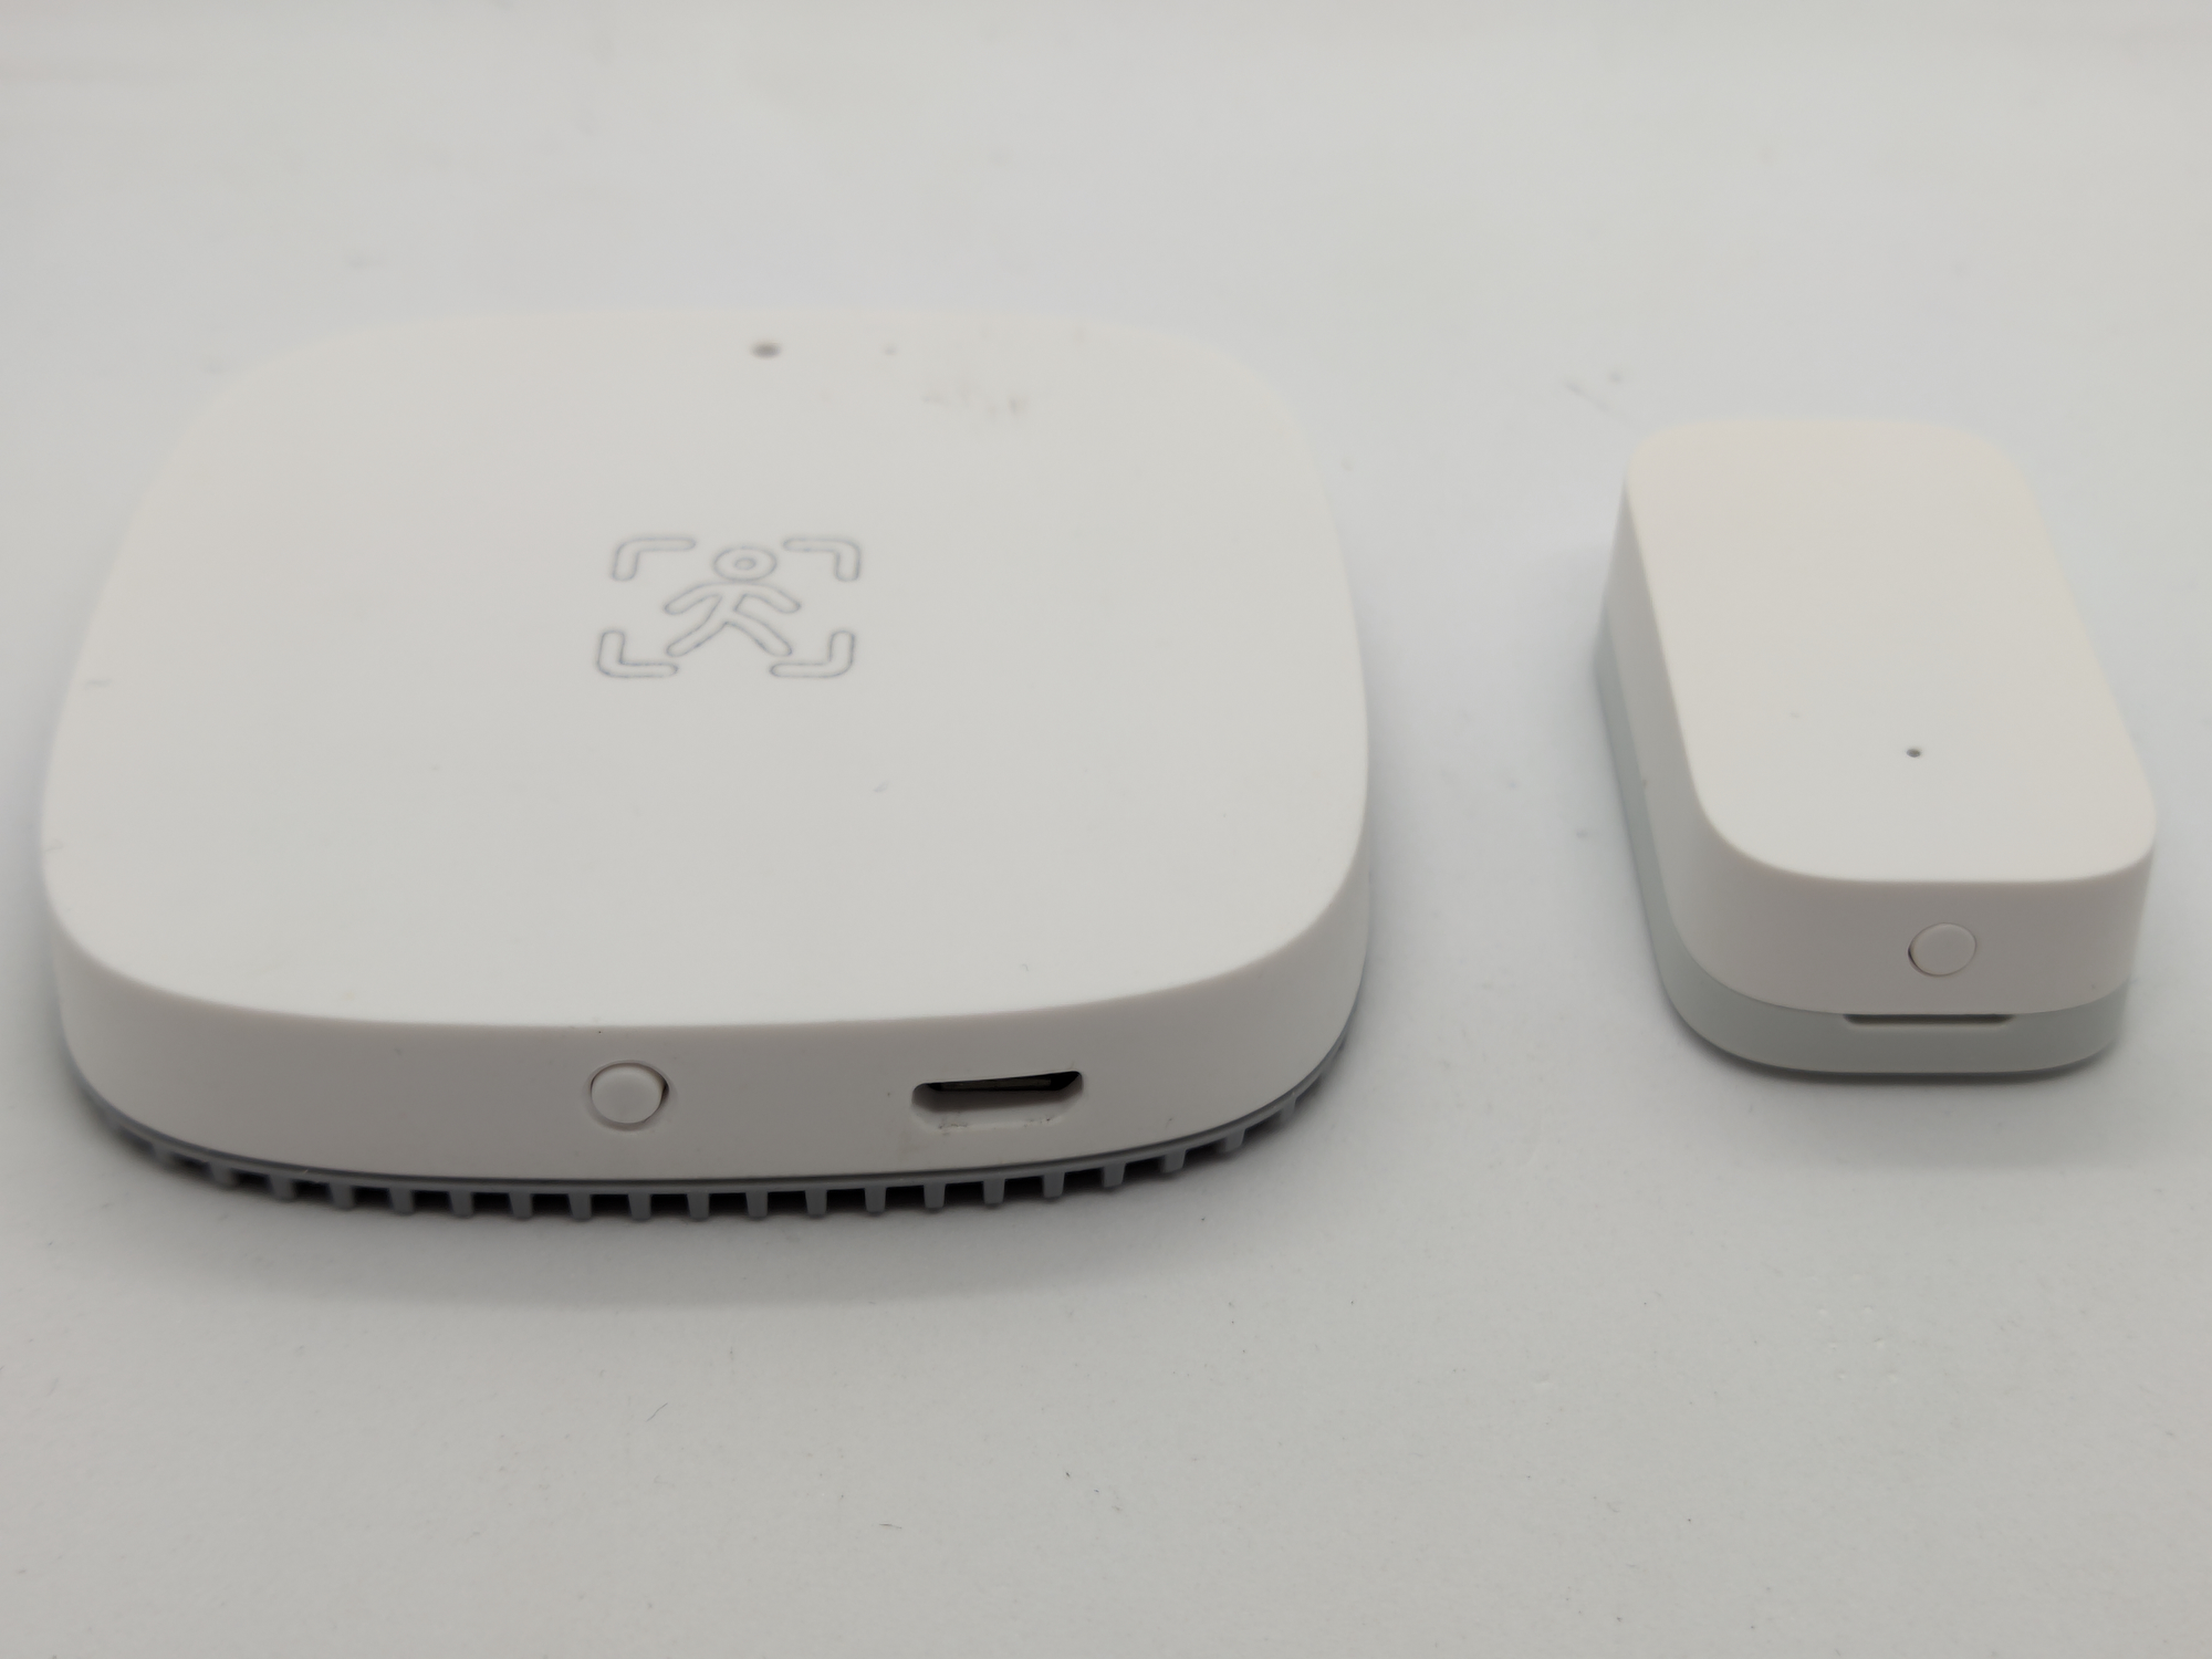
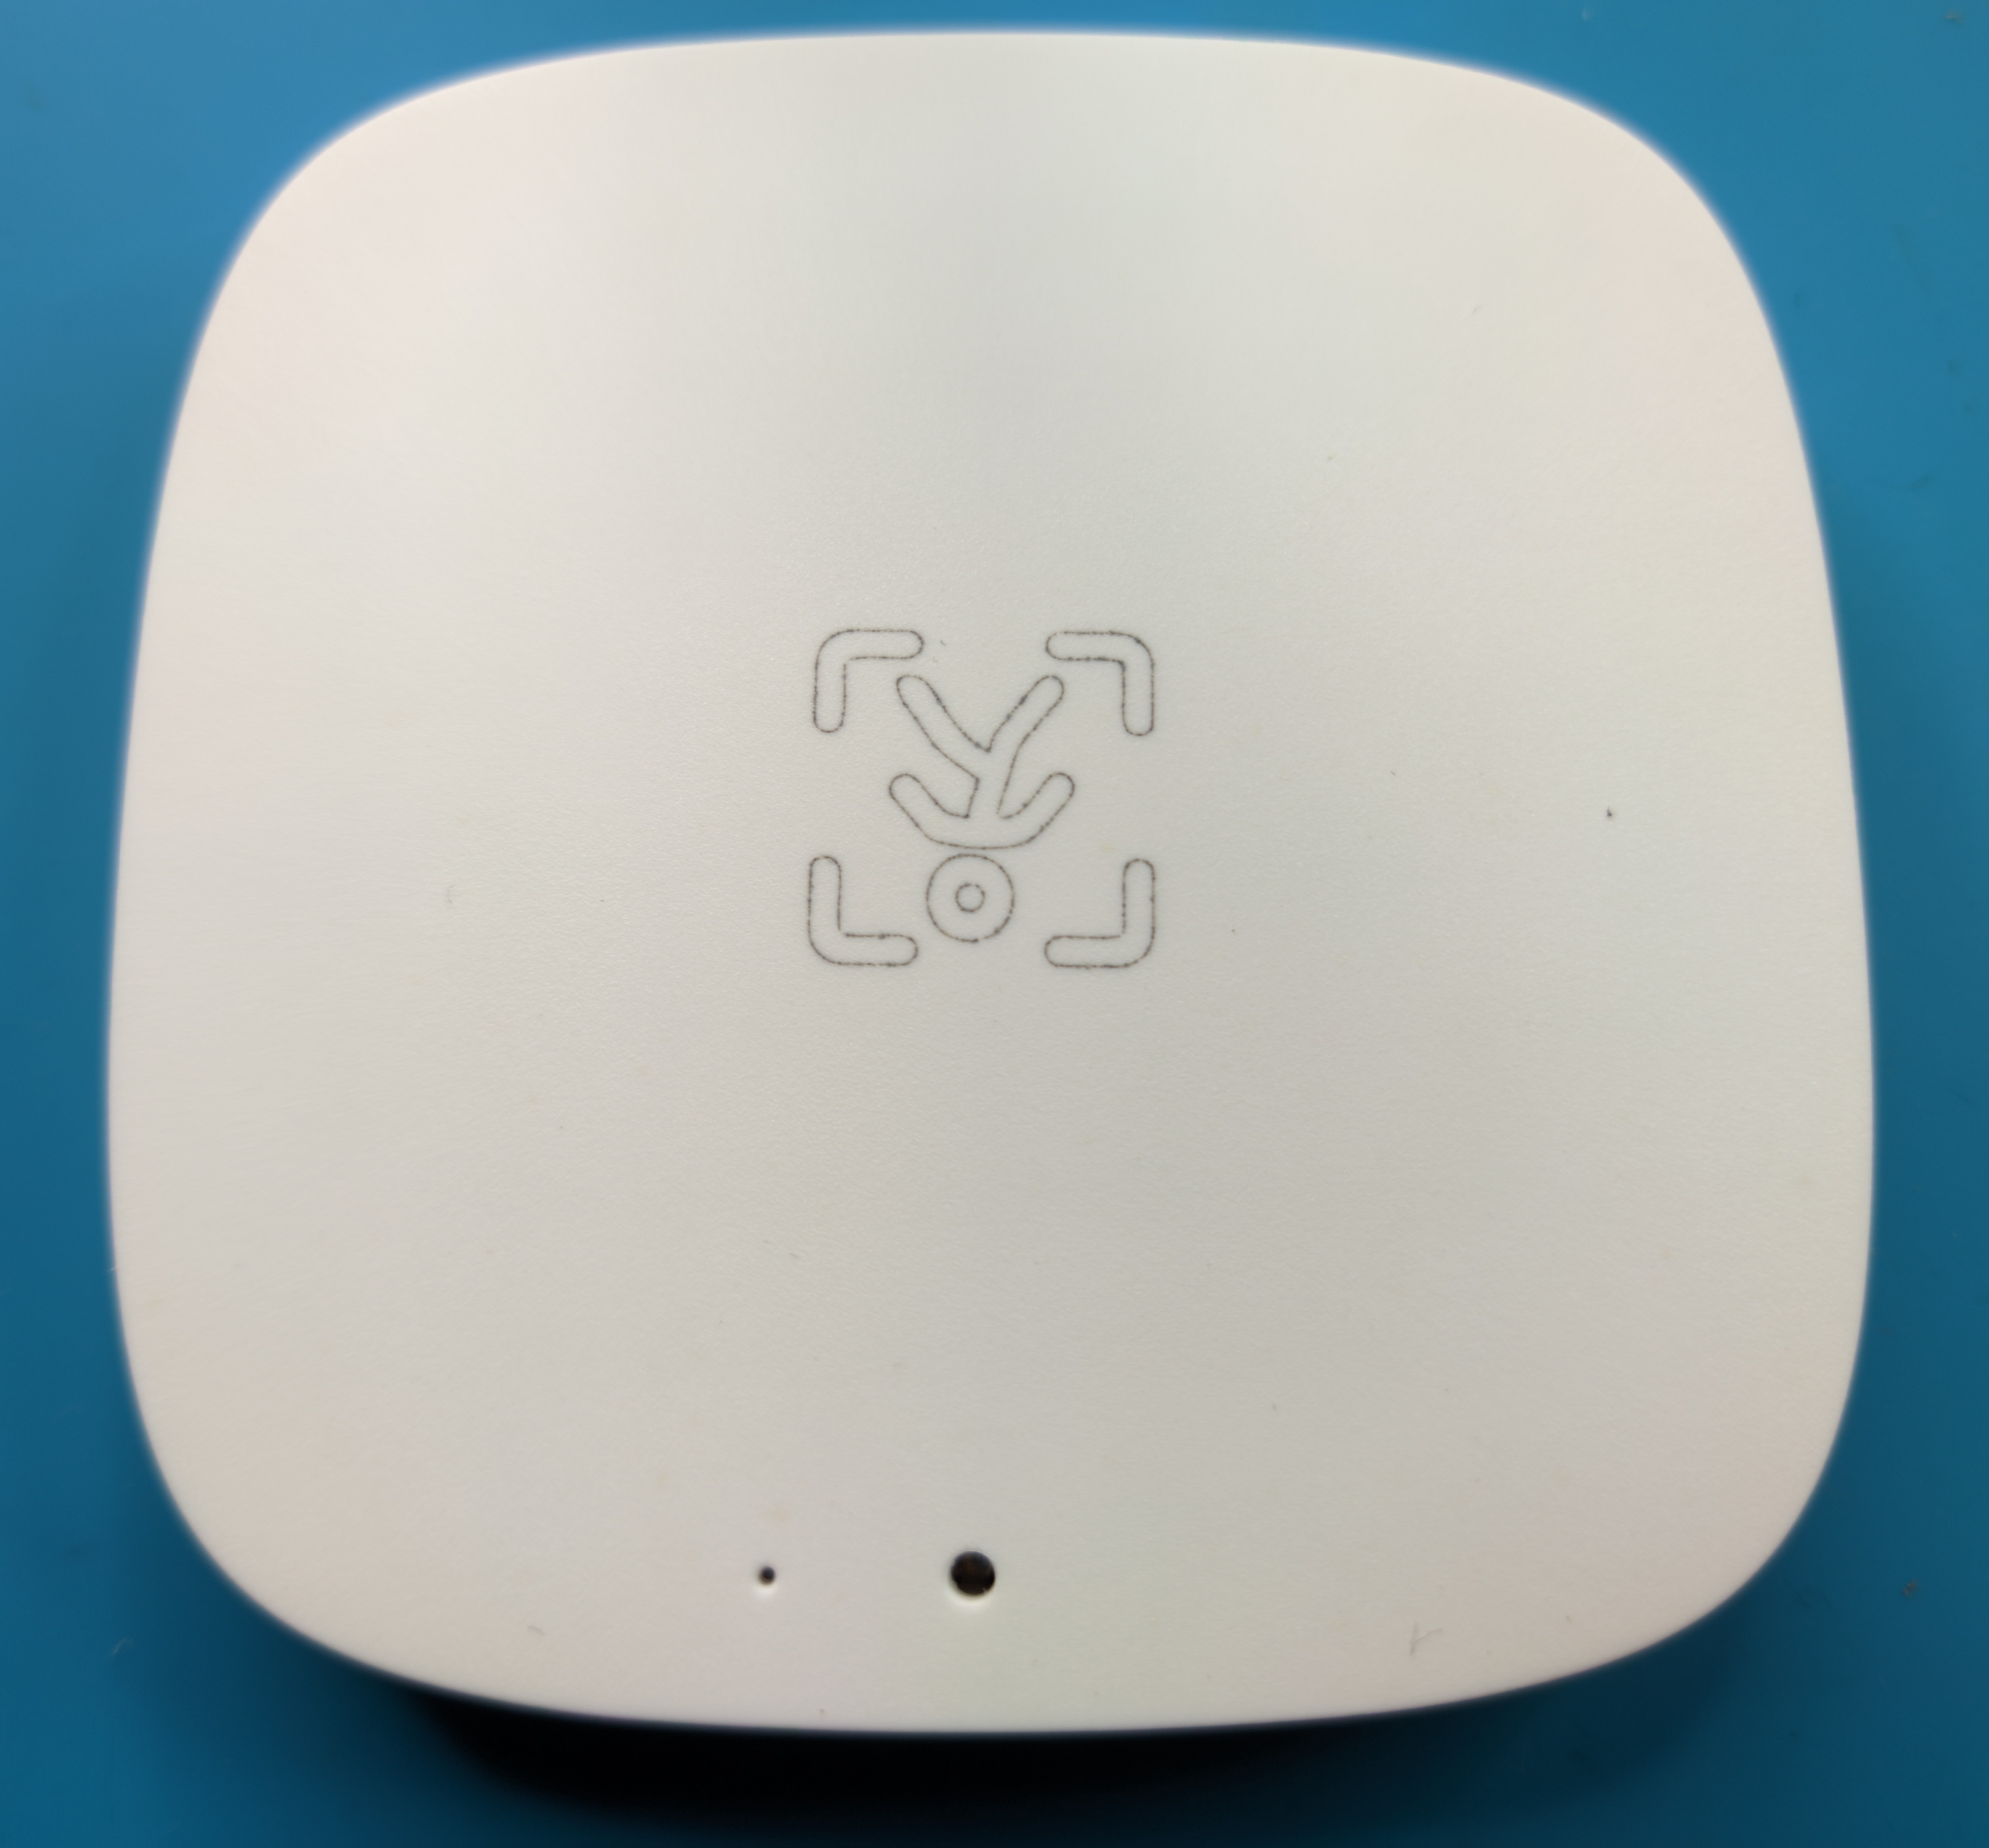
The presence sensor is nicely sized and thin which lends itself well to wall mounting. The plastic used has a solid feel with an off white and gray color combination. The texture of the plastic and the color scheme is very Aqara like but not quite the same level of quality. Although the case is repurposed from a gateway type device it looks like it’s designed for this.
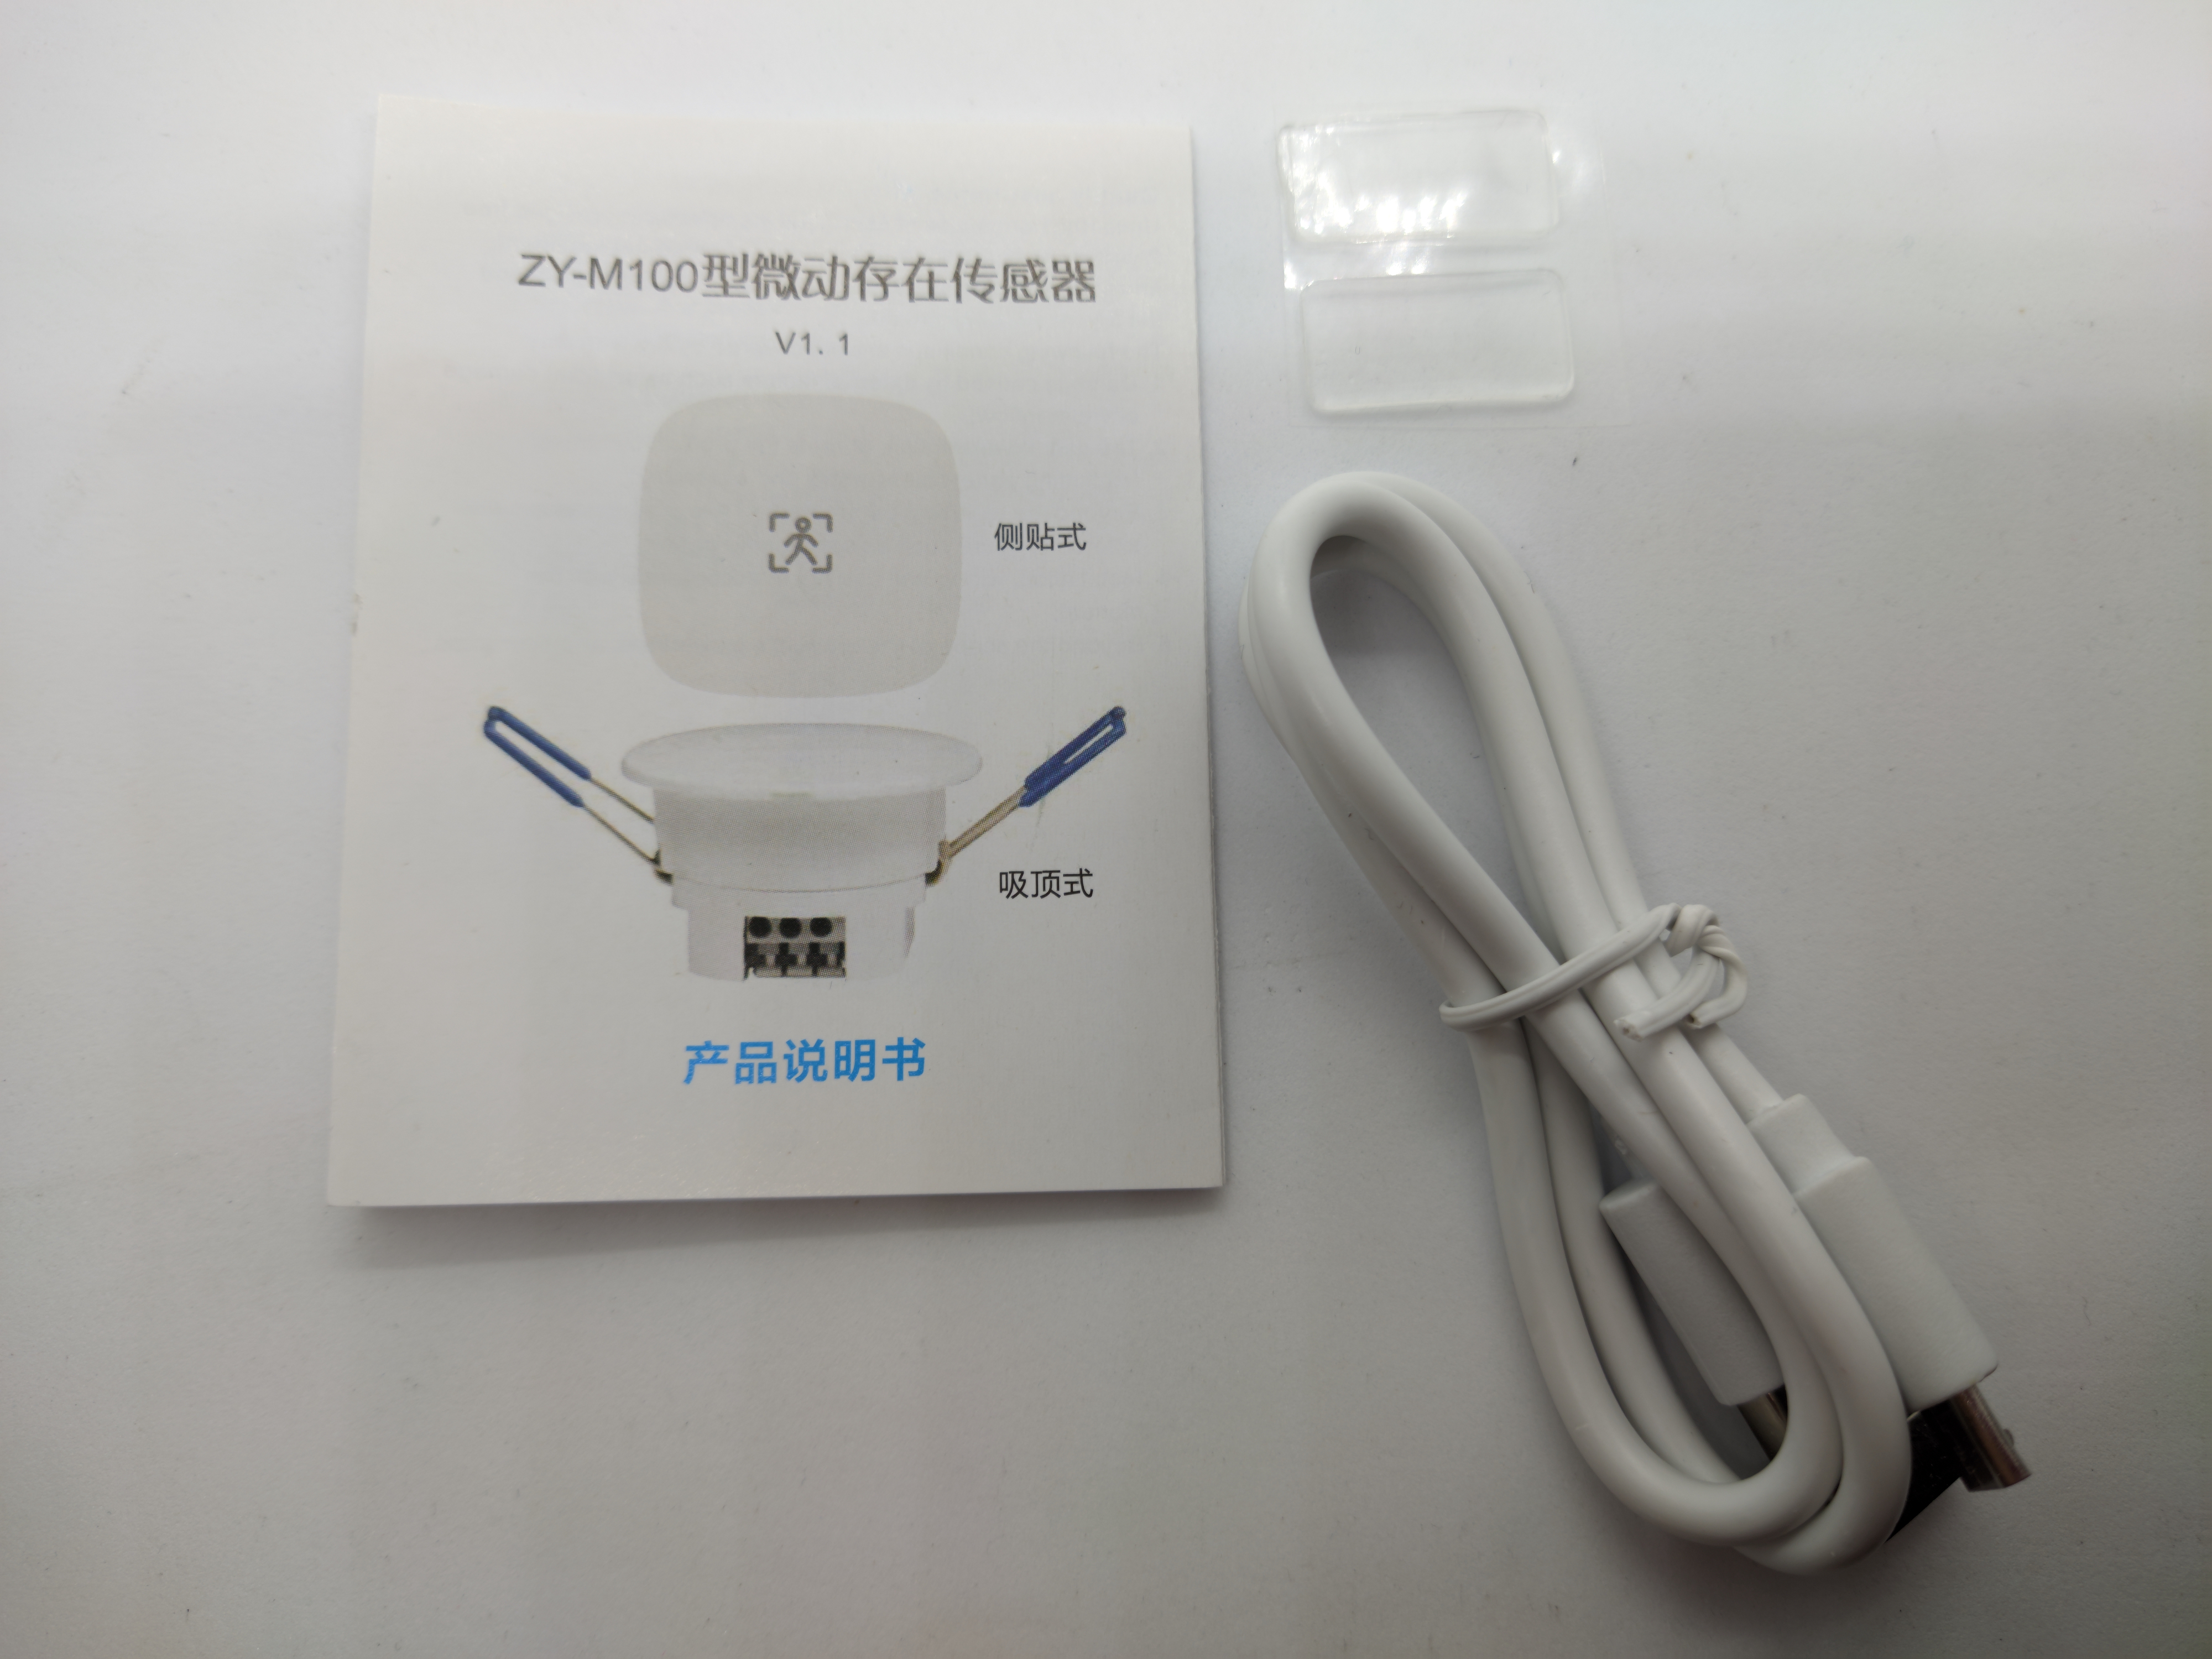
The short manual is in English and Chinese but it covers the pairing instructions and some important information about installation radar coverage. A little suspicious thing is that the manual refers 12V power suplpy, perhaps that’s for the ceiling mount version.
Wall mounted version is powered via a USB cable with standard 5V. Yes, you need access to constant power to use this device which might be considered a disadvantage but keep in mind, you can install it behind f.e. furniture since the mmWave radar penetrates through walls and obstacles.
Smart Life App
Holding the reset button for about 5 seconds puts the device in pairing mode indicated by the flashing red LED. After being discovered by the Smart Life app it is added as “ZY-M100-WIFI存在感应器” which Google translates as “presence sensor”.
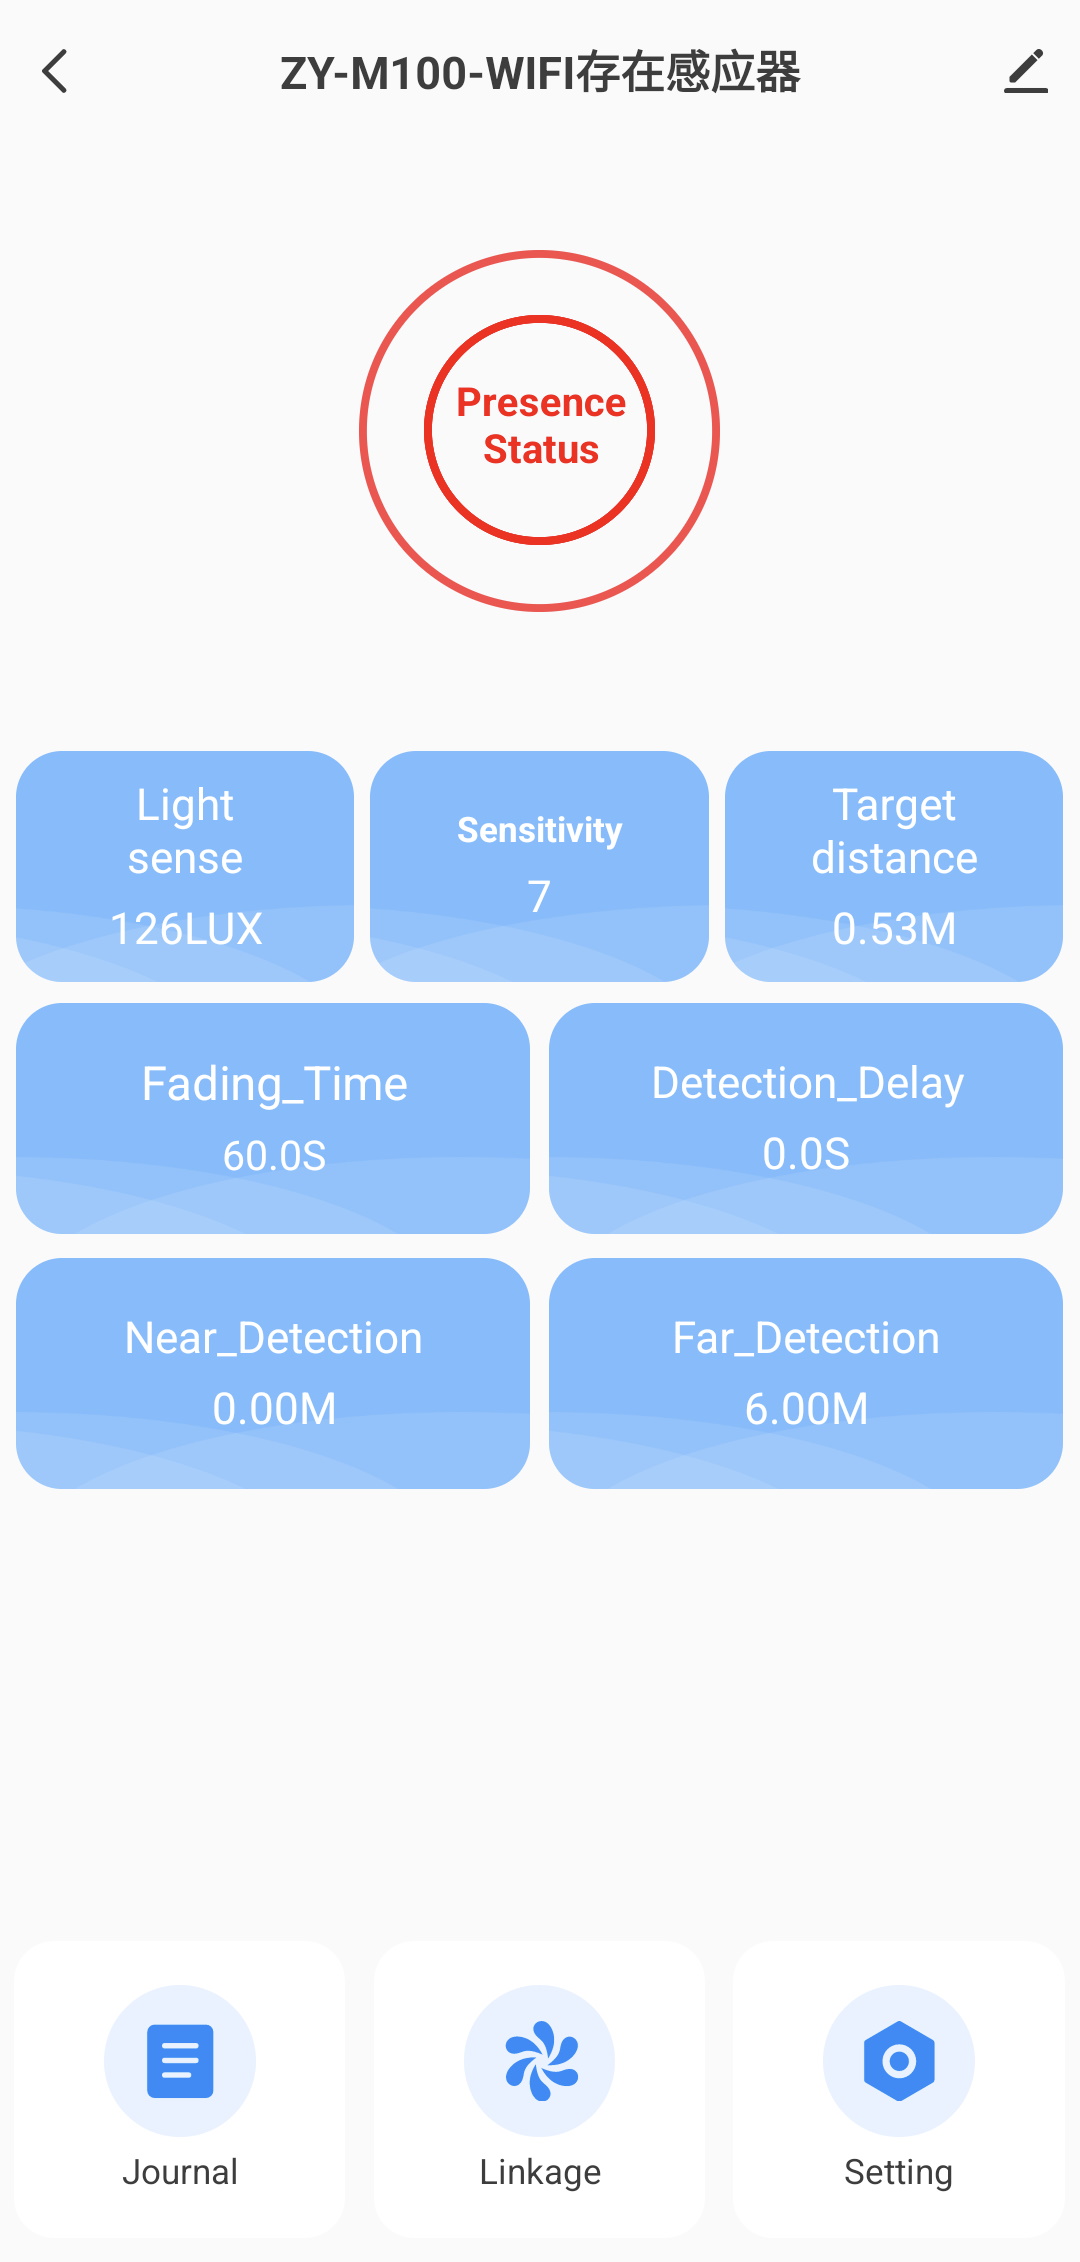
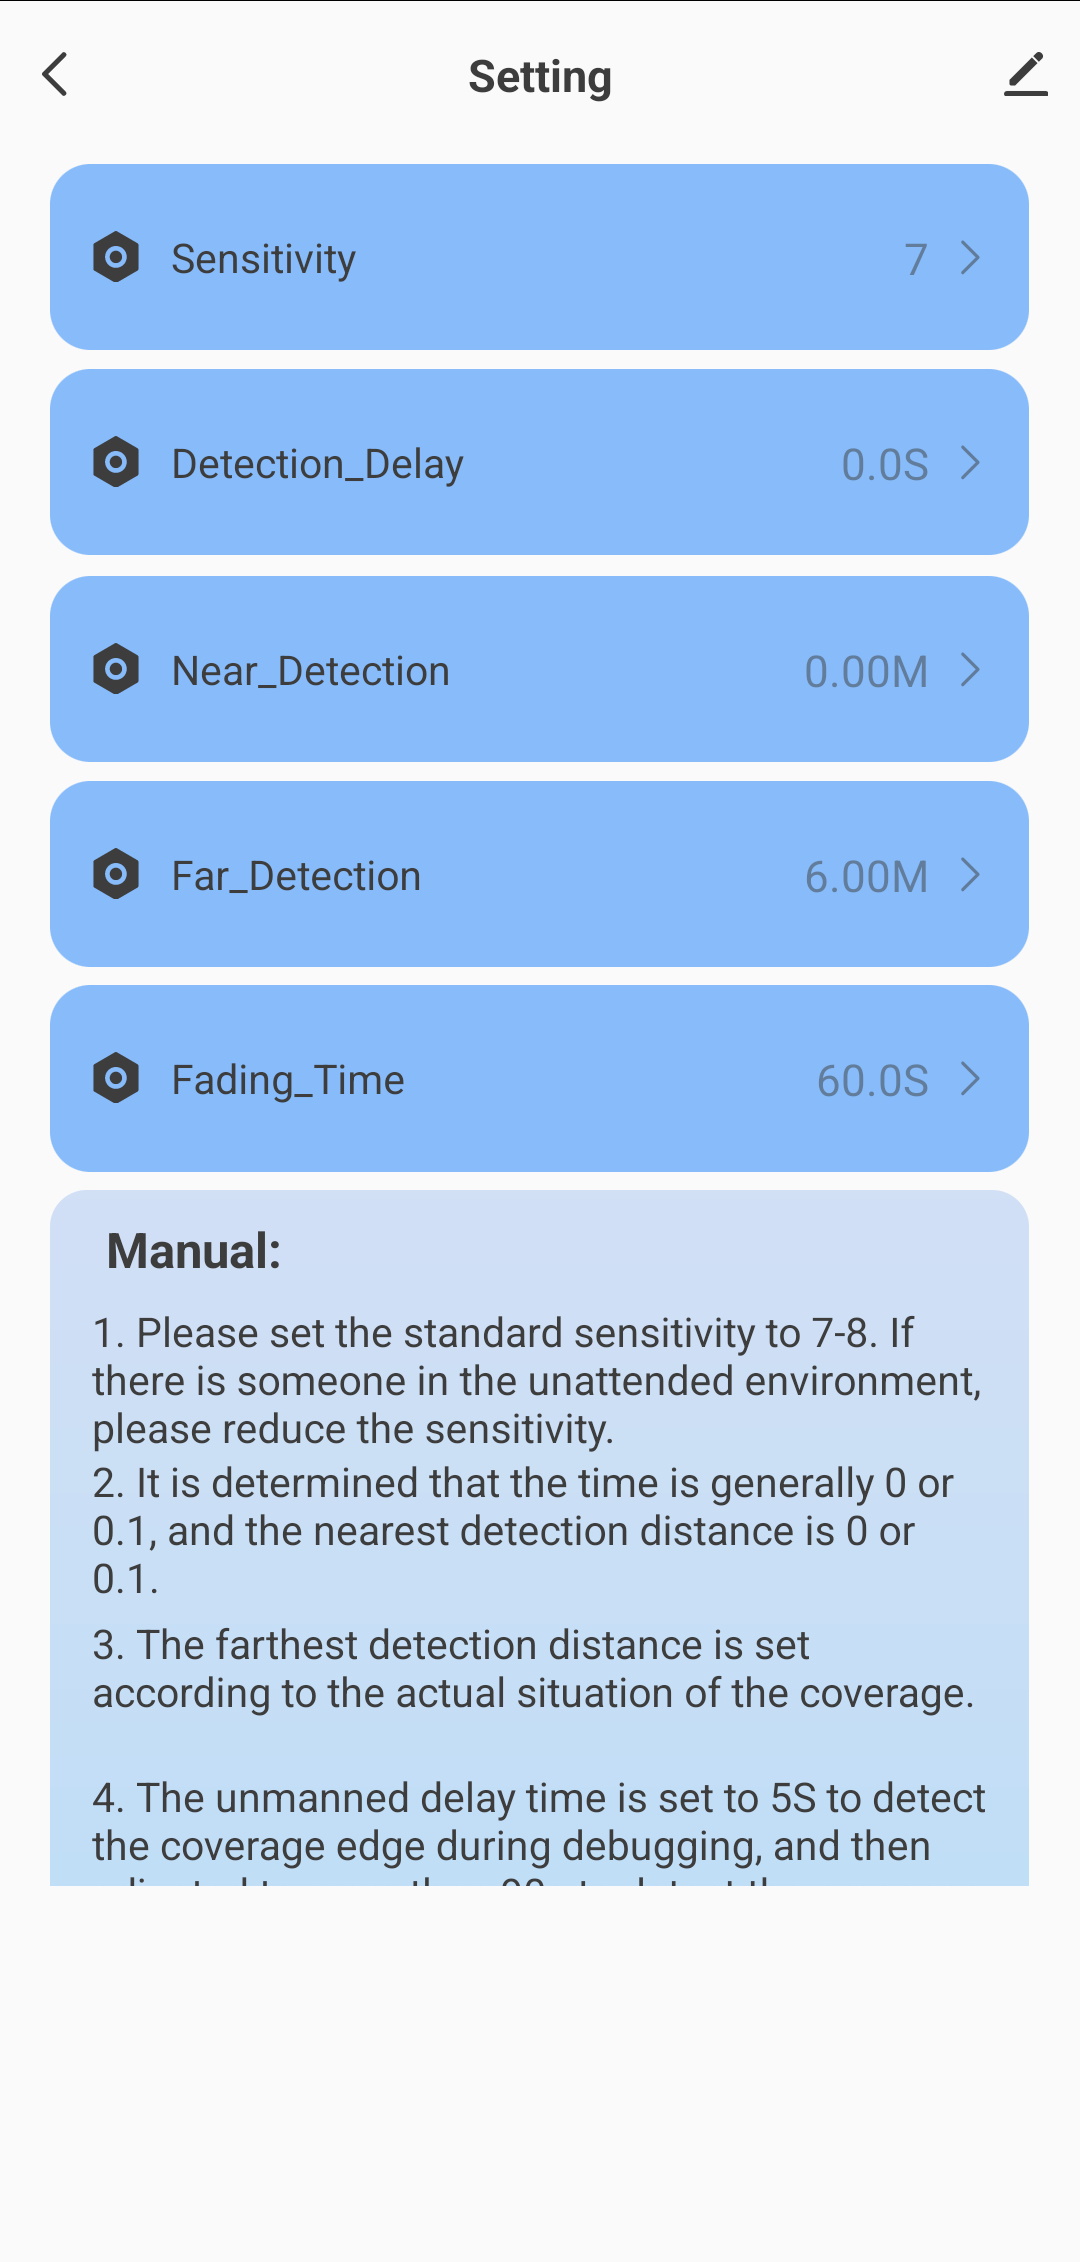
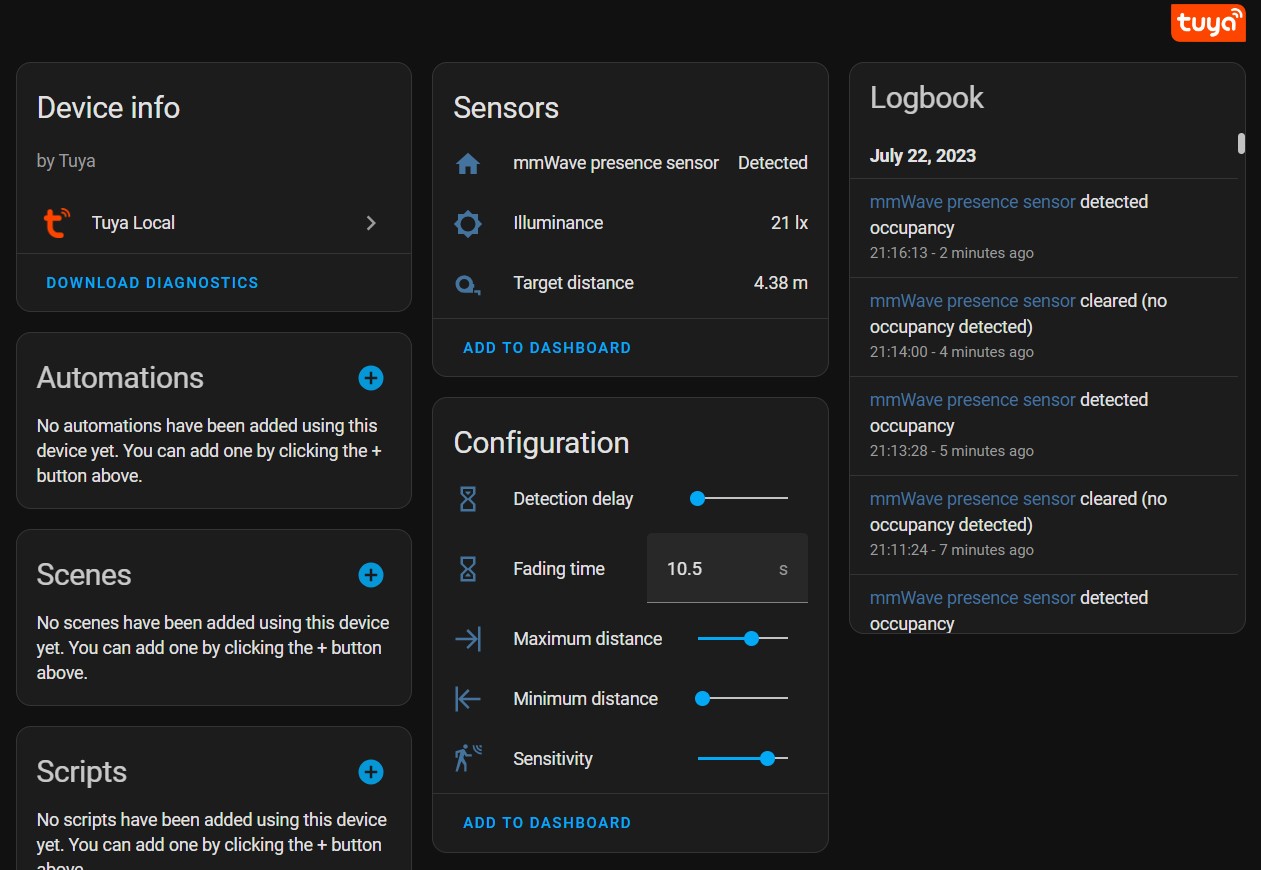
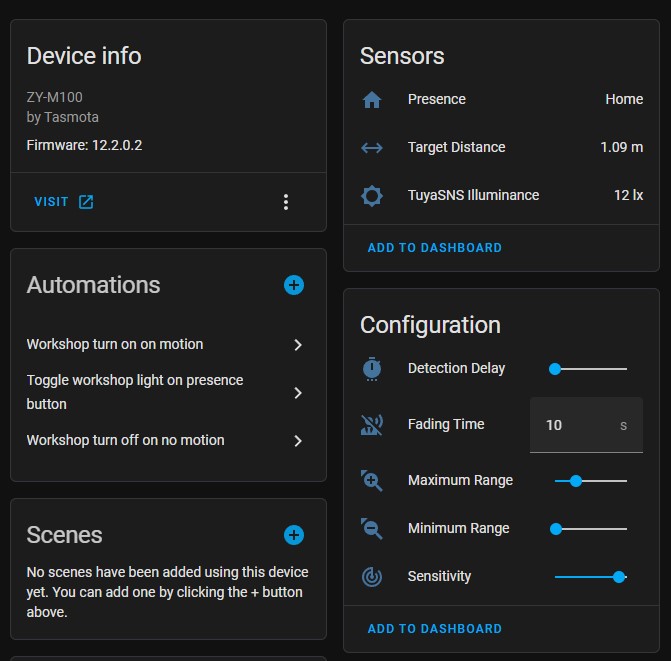
It naturally shows detected presence but it also displays distance of the target and light values in lux. In the settings menu you can adjust sensitivity, minimum and maximum distance for detection as well as delays until presence or lack of it is reported. Those adjustments allow you to freely tweak the behaviour of the presence detection to your needs or preferences.
Presence detection is very fast even with the Tuya cloud lag, comparable to the average PIR sensor and most importantly, reliable. There were no false triggers at all unless you introduce mmWave radars natural enemy, a fan, into it’s detection radius.
Non-presence detection sometimes takes a bit longer to trigger than the configured fading time, but the lights never turn off while someone is present in the room. As you can see in this excerpt from Home Assistant history presence and non presence are solid blocks of red and green.
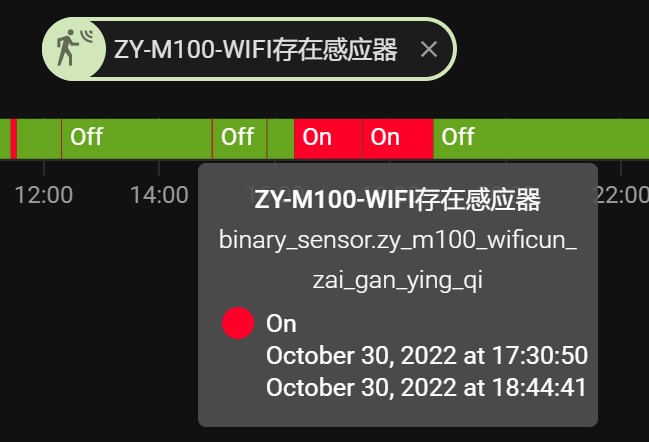
The only time it technically “misreports” is when you adjust a setting the radar chip restarts into off state and remains as off for a couple of seconds. In normal day to day operation it’s accurate (unless someone sneak in a spinning fan into the room).
Let’s See What Makes It Tick
The case is easily opened after unscrewing the three hex screws. To remove the PCB release it from the two white clips.
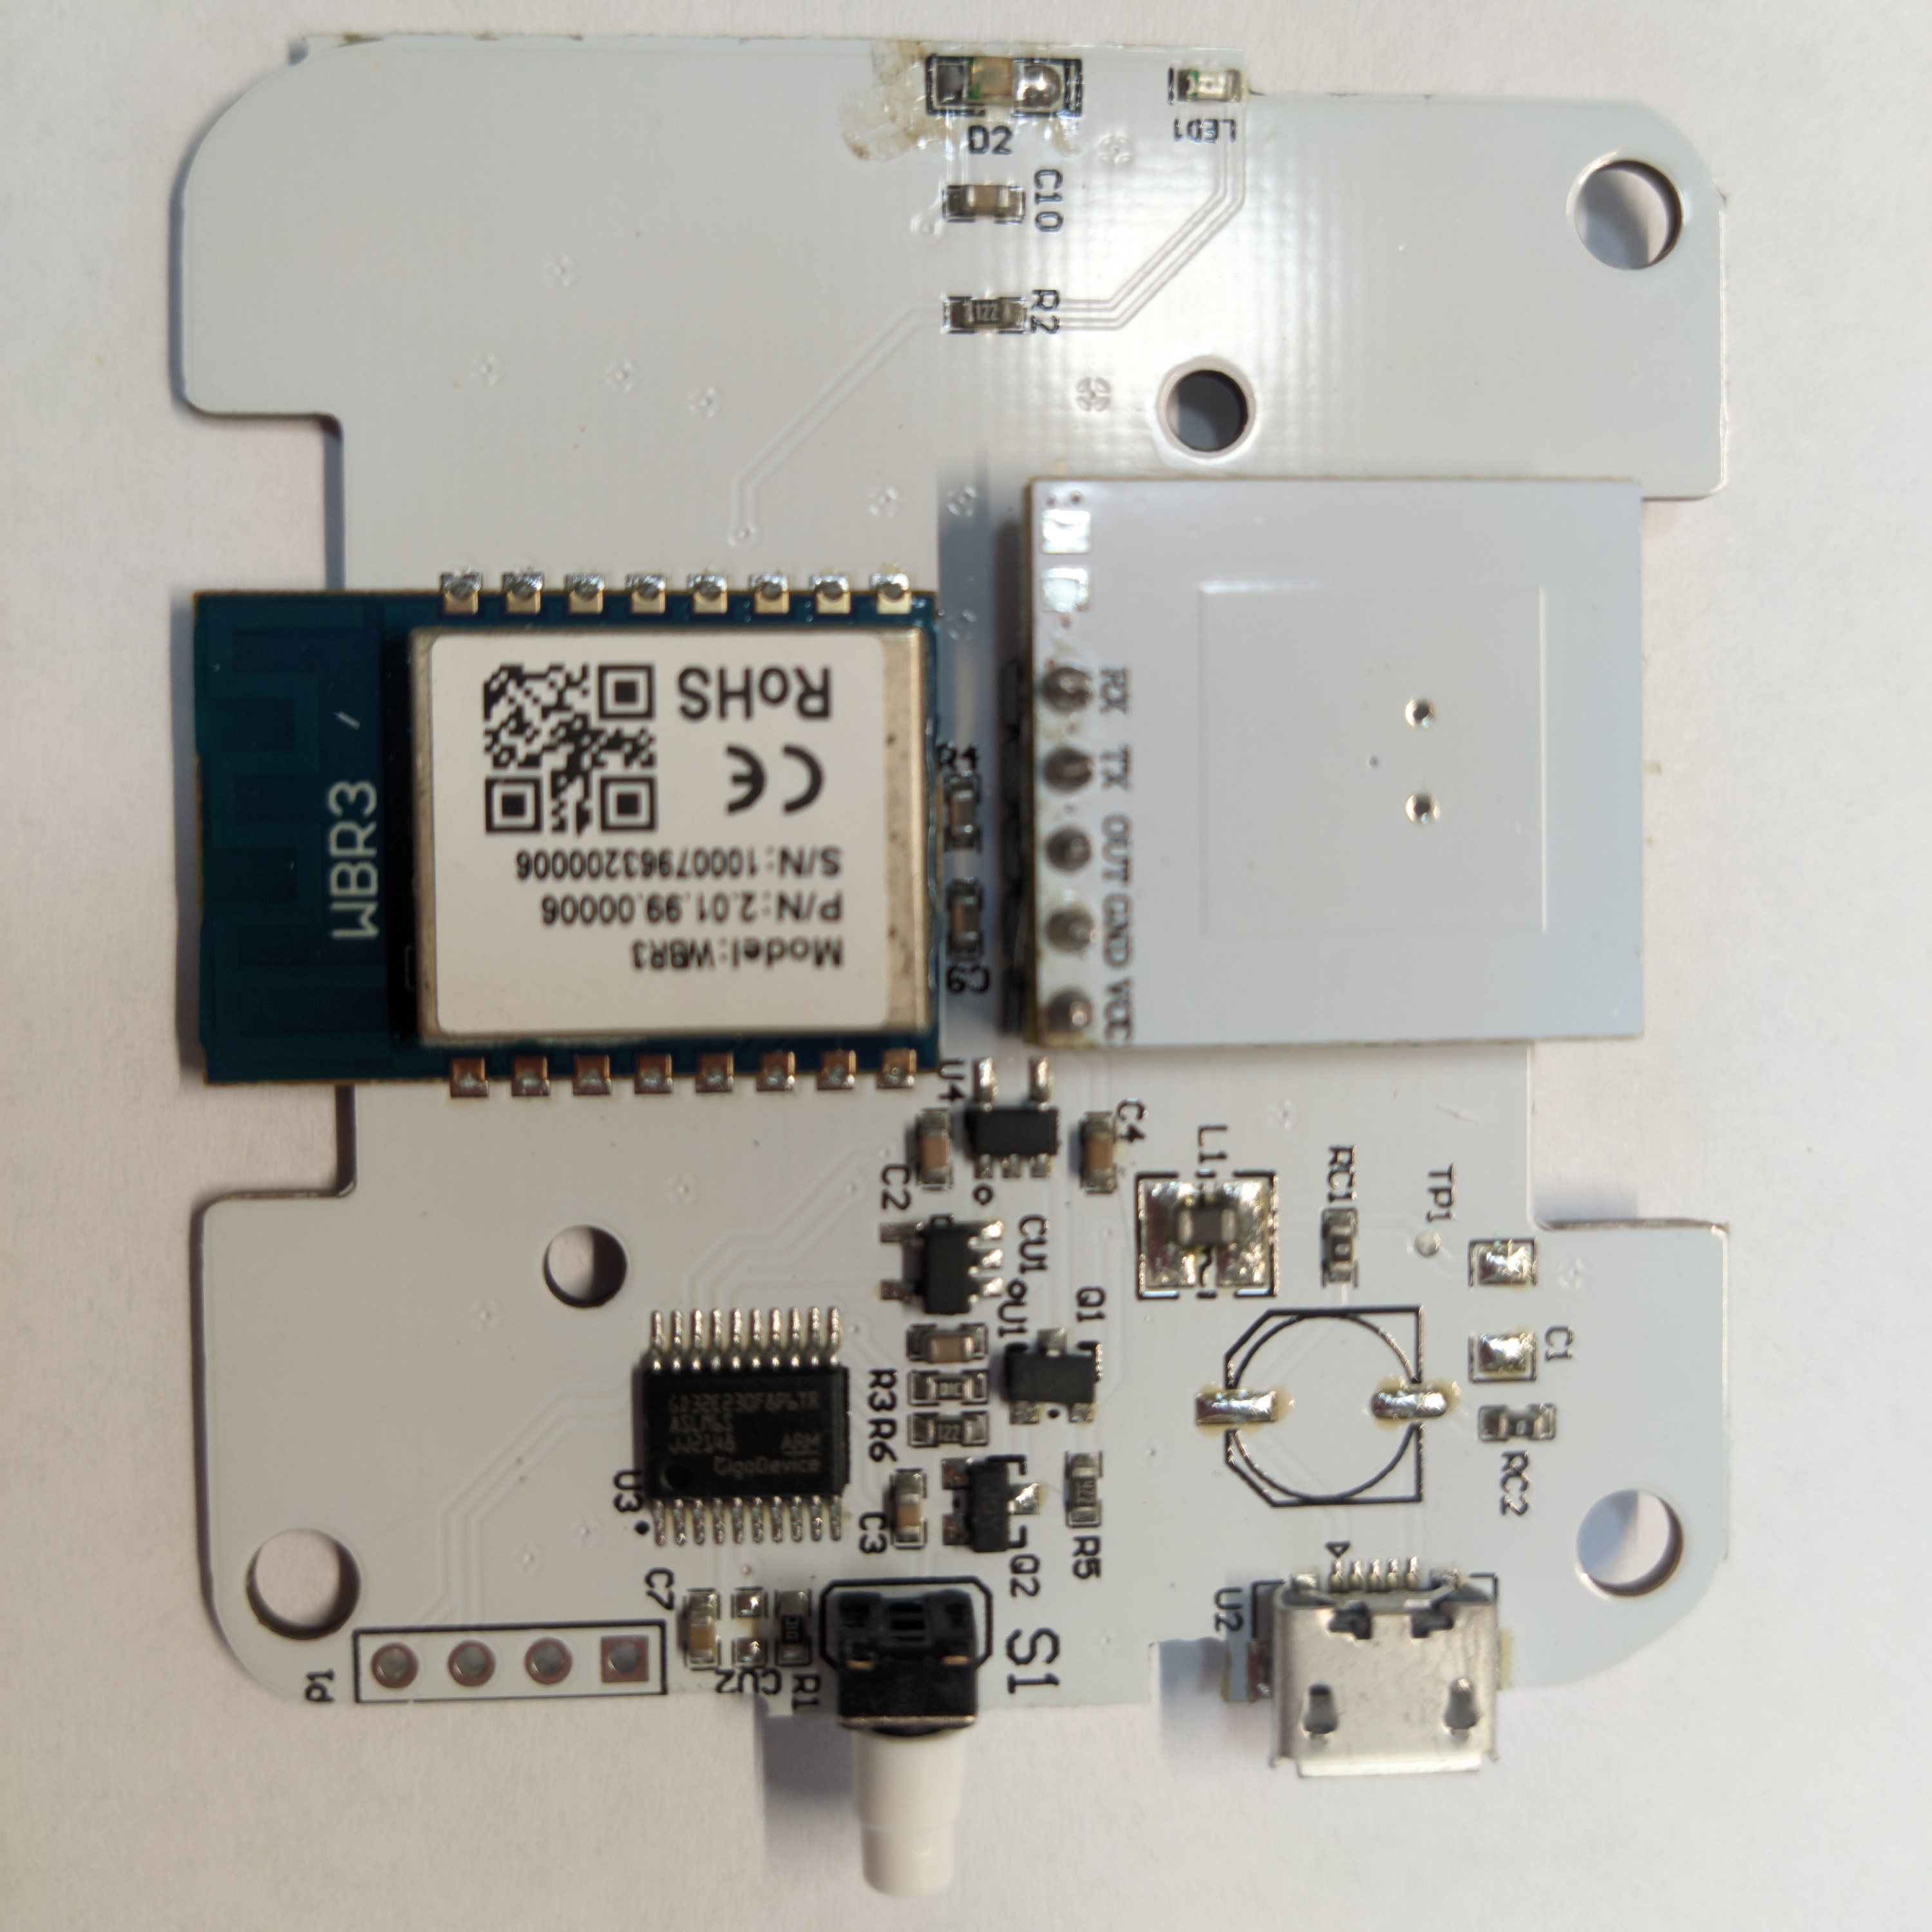
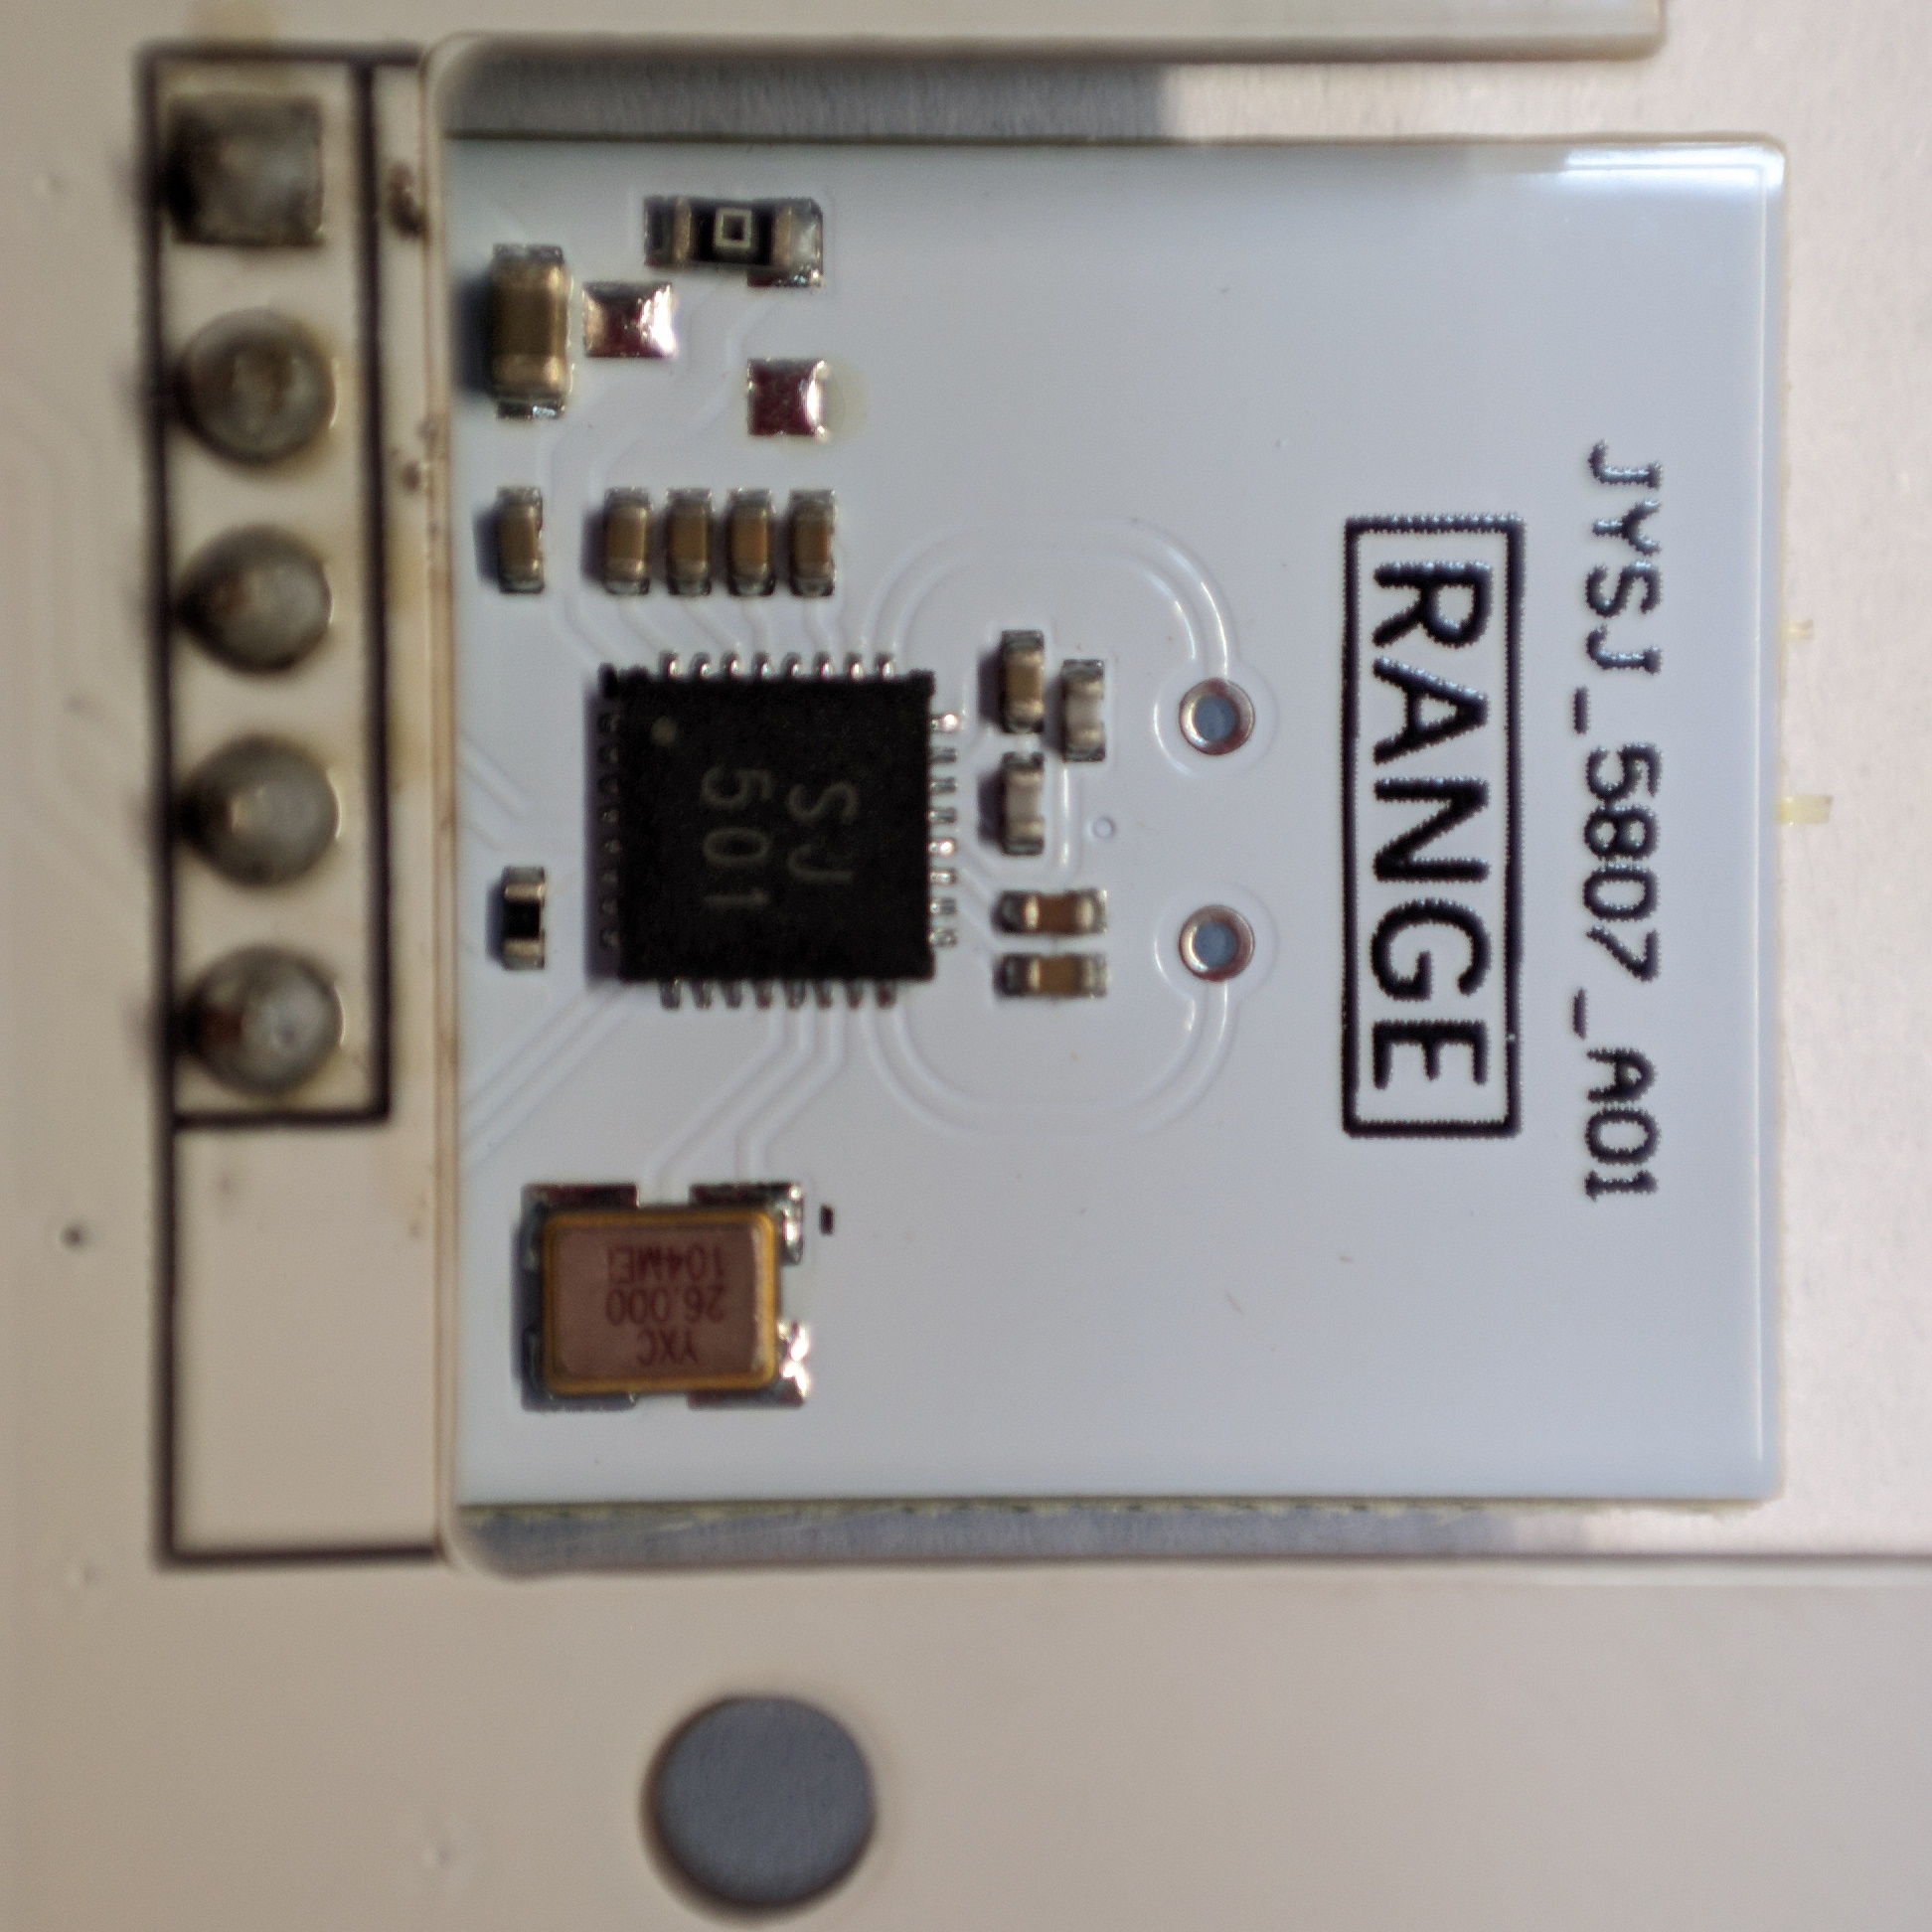

The radar used is a LeapMMW MR5G21 (manufacturer link, datasheet) 5.8GHz micro-motion presence detection module. LeapMMW is the manufacturer of the more advanced 24Ghz and very popular DFRobot SEN0395 which can also be found on AliExpress and they indeed do make good stuff.
A GigaDevice GD32E230F8P6TR MCU (datasheet) is the brains of the sensor while a Tuya WBR3 is only a communication module providing Wi-Fi to the device. Because of this we know other versions (Zigbee and BLE) have identical components but replace the Wi-Fi module.
Light sensor is marked D2 at the top next to LED1
Integrations
Tuya Local Custom Component for Home Assistant (recommended)
A custom component Tuya Local is the simplest way to integrate the ZY-M100 in Home Assistant.
You need to pair it with the Smart Life app first to generate the credentials needed for local control. Then use my script tuya-uncover to find out the device id and local key.
Install Tuya Local and add the ZY-M100 using the above credentials. You can block it off from internet access in your router to stop it from talking to Tuya cloud.
It is incredibly fast and triggers instantaneously because all communication is local.
Home Assistant Official Tuya Integration
Tuya Integration in Home Assistant added a new device automatically:
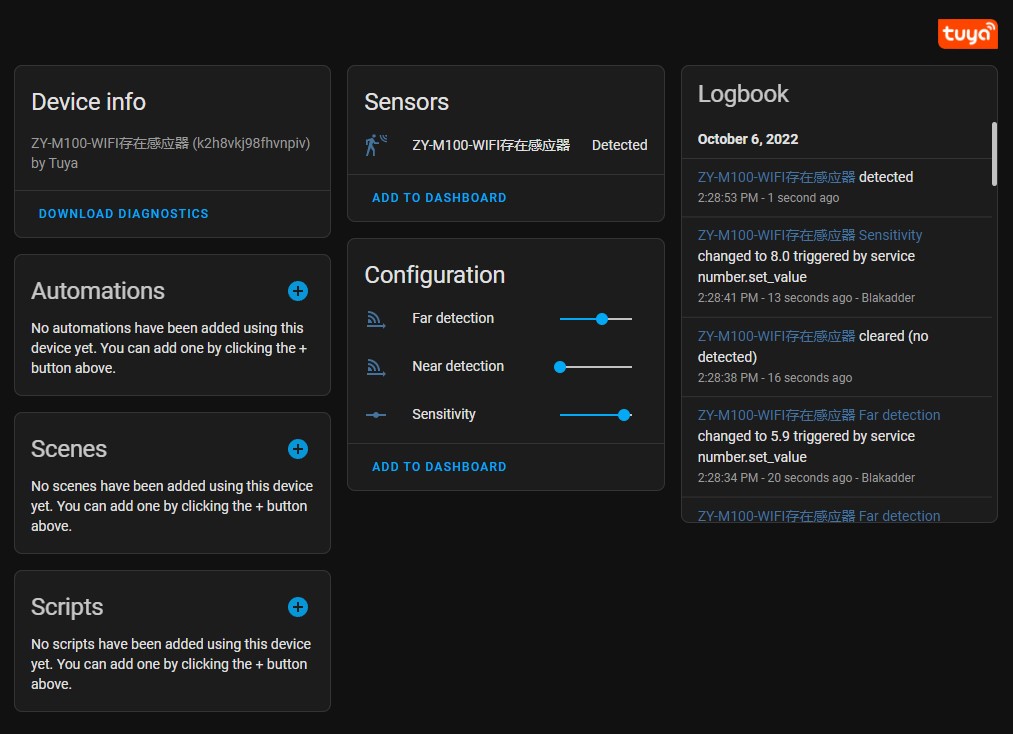
The integration is lacking the options to set detection delay and fading time, you’ll still need to use the app to adjust those.
ZHA
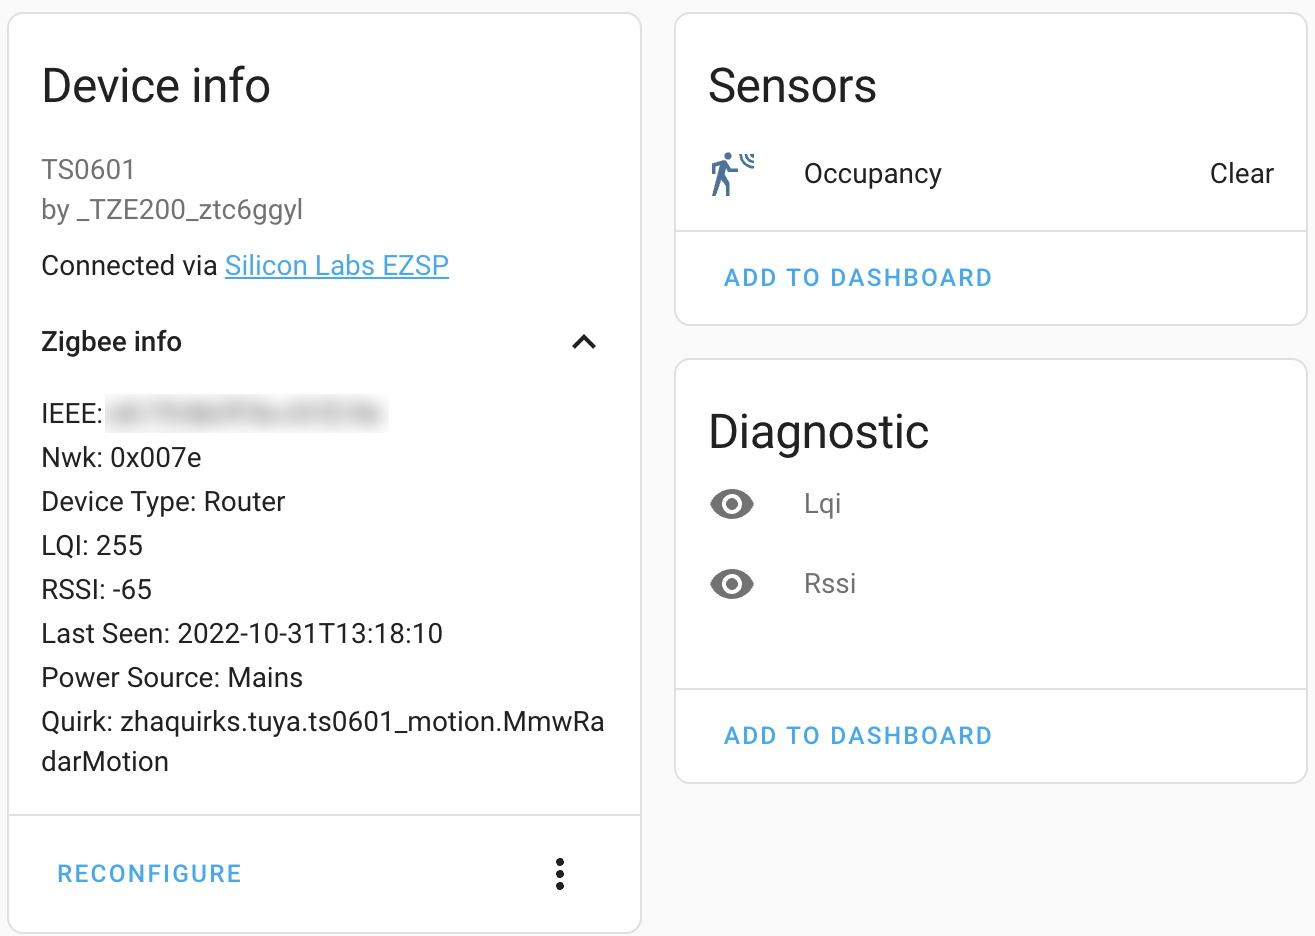
ZHA Home Assistant integration only creates a binary sensor for presence.
Zigbee2MQTT
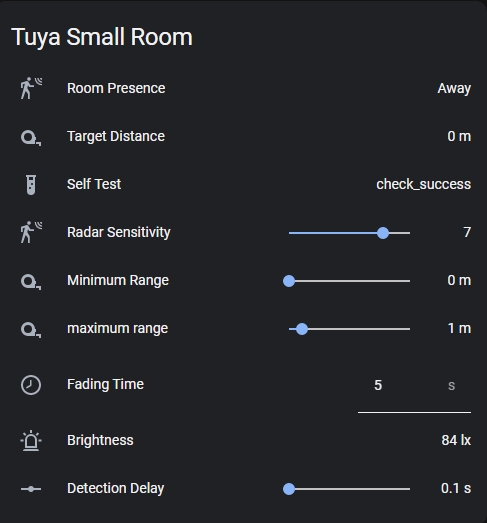
Zigbee versions are fully supported by Zigbee2MQTT and have all the options available
Tasmota
Yes, you can run Tasmota (and probably ESPHome) on it but you need to replace the Wi-Fi (or even Zigbee) module with a compatible one. See the guide on replacing a Tuya module for the procedure and tools required.
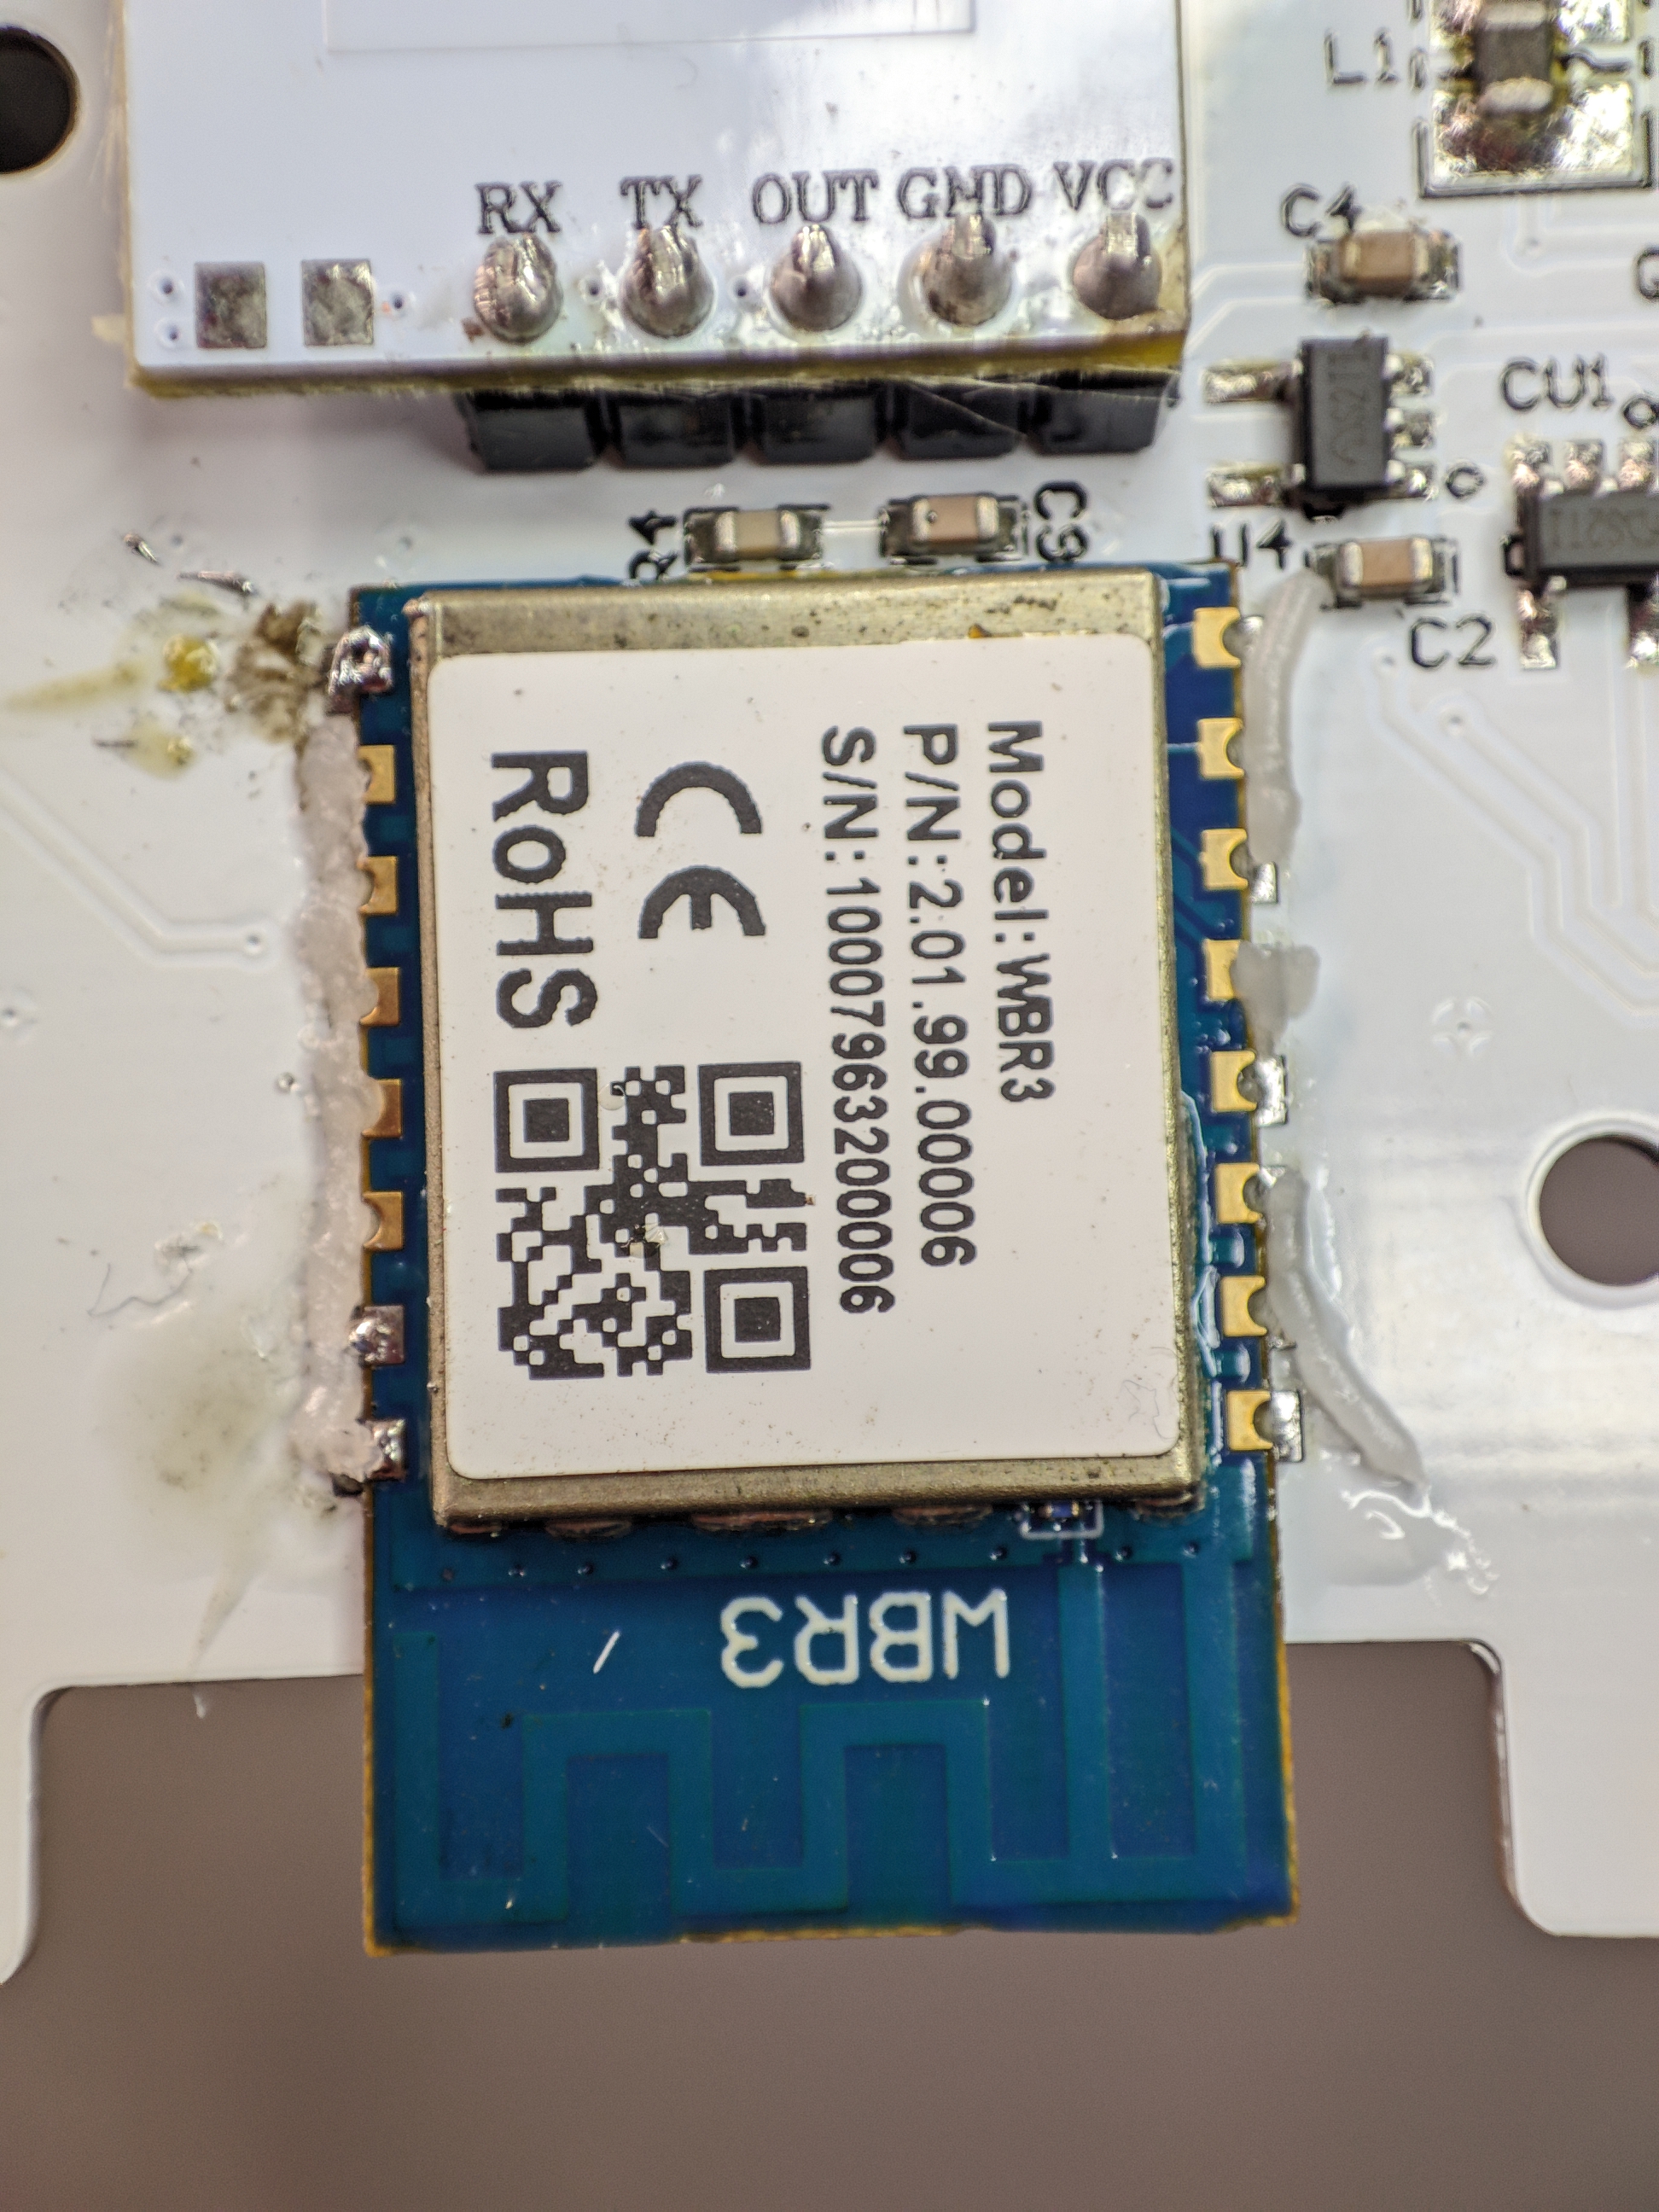
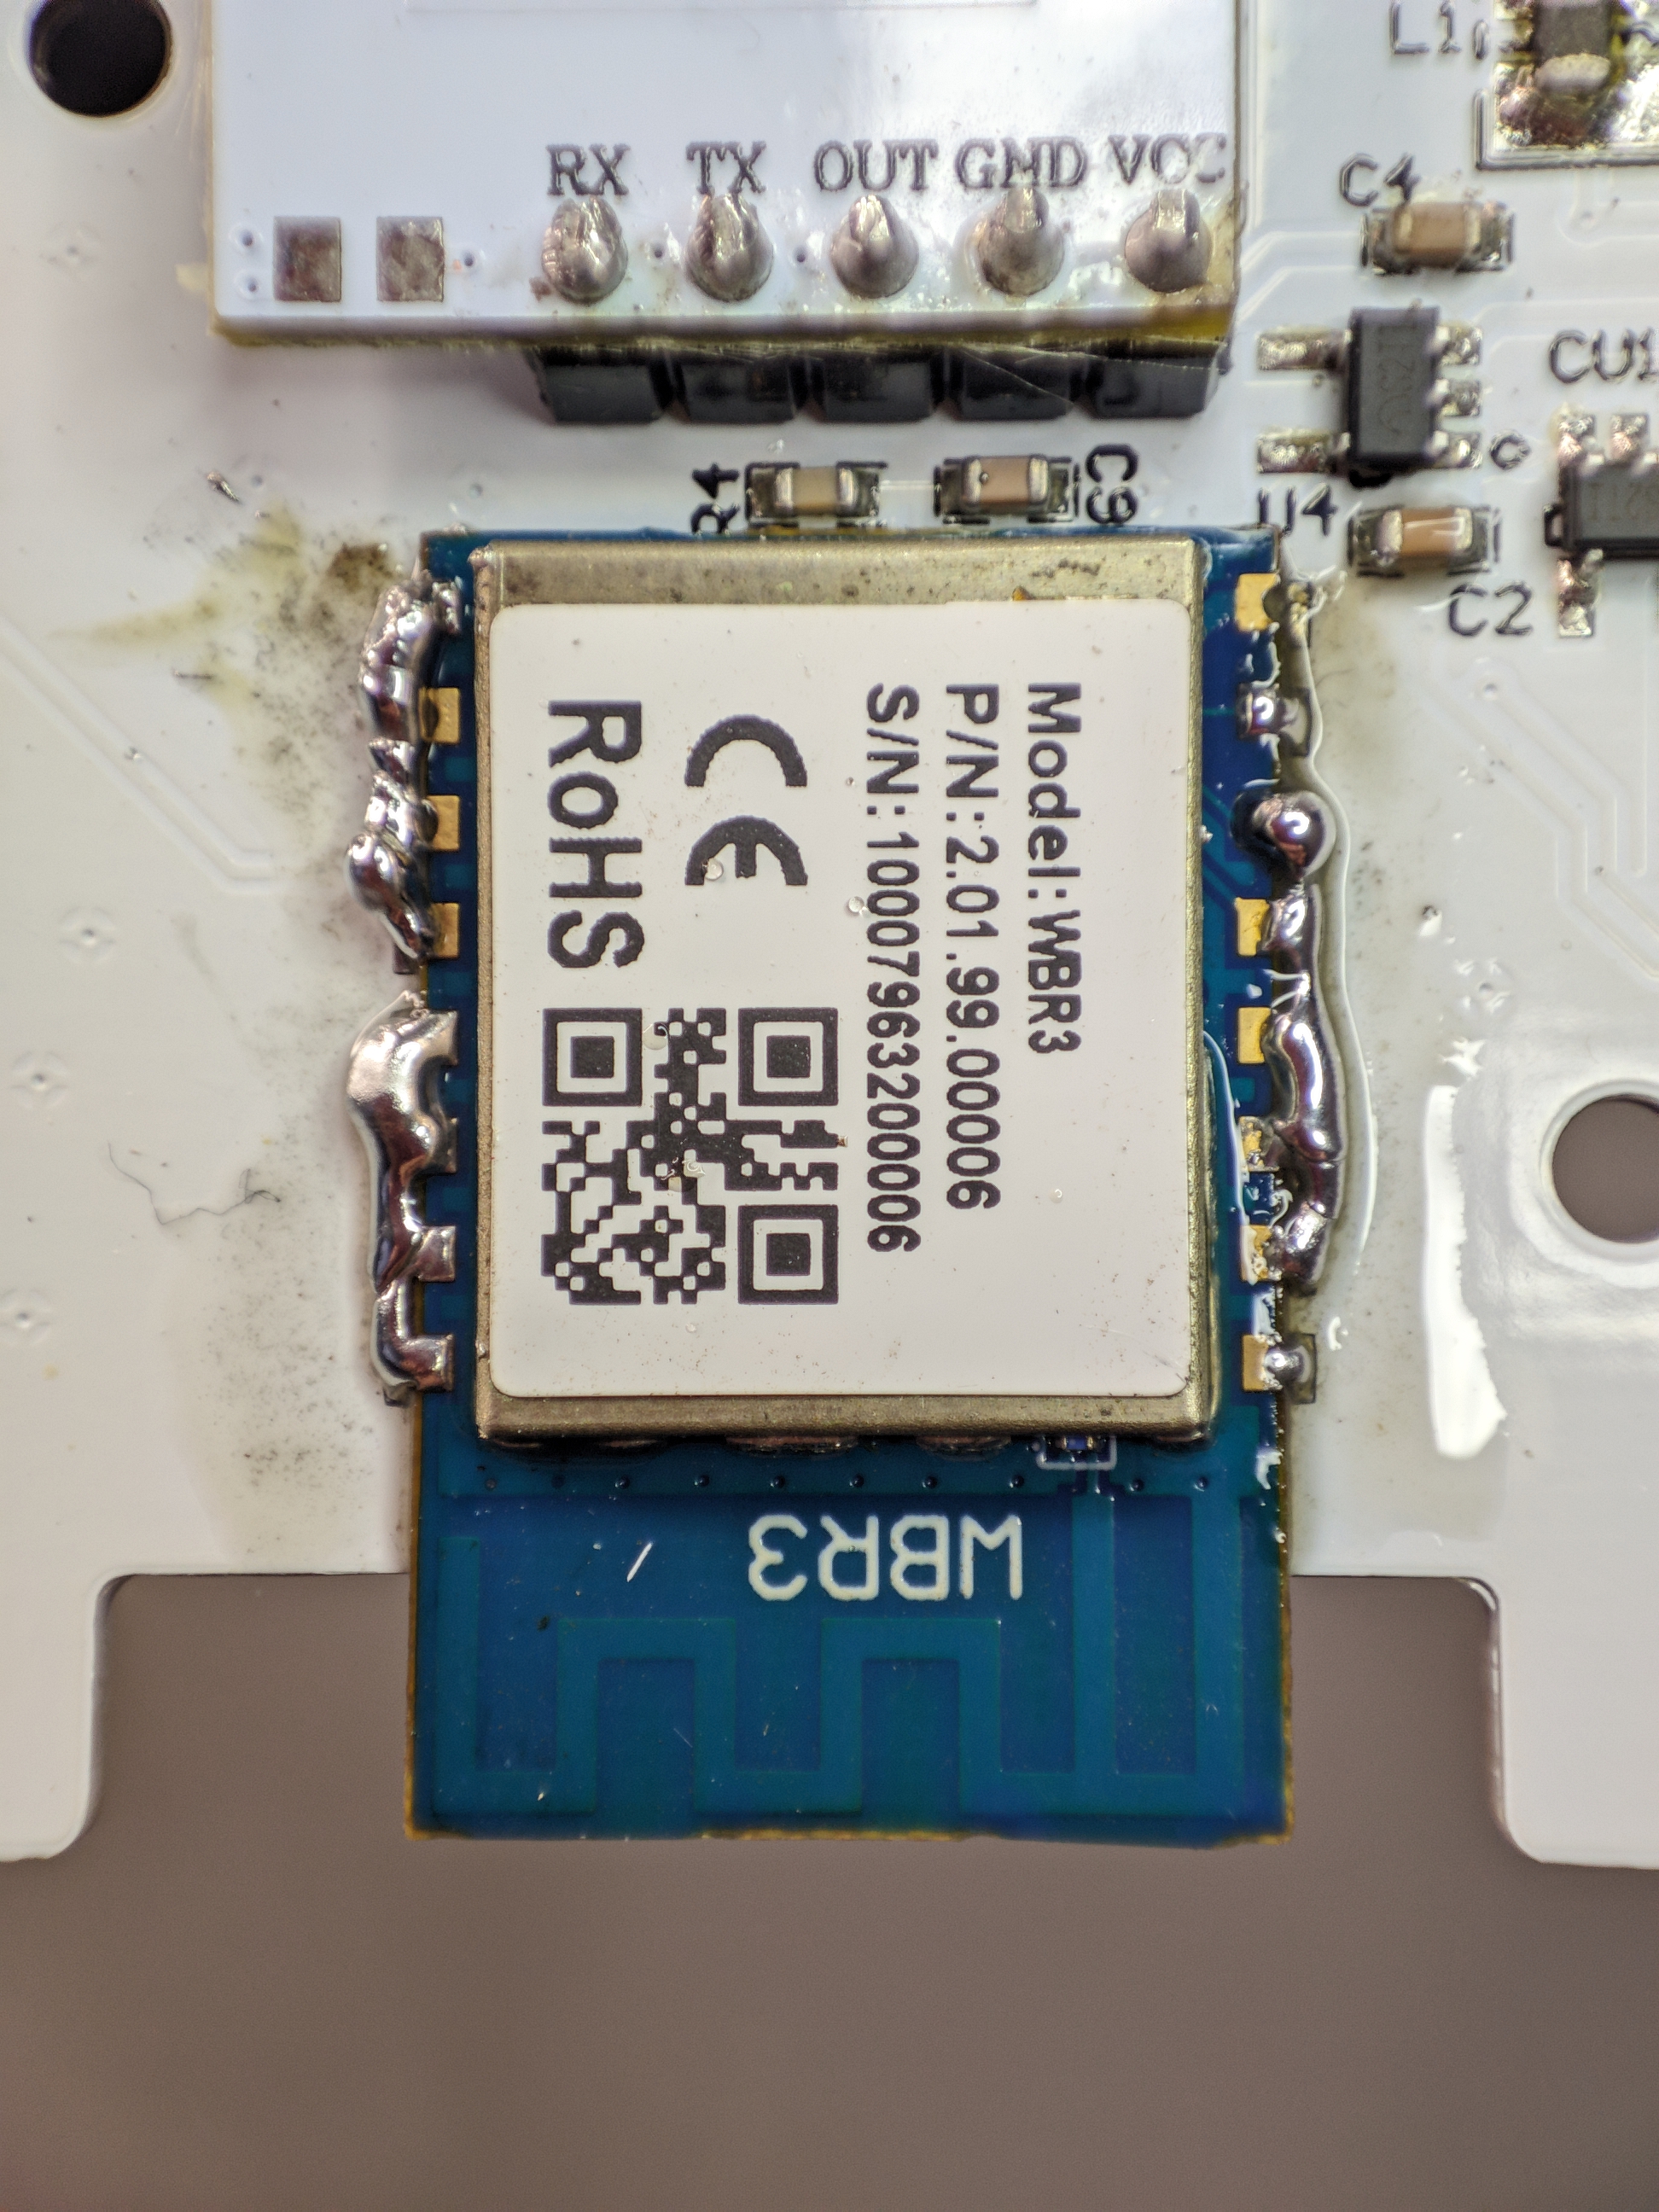
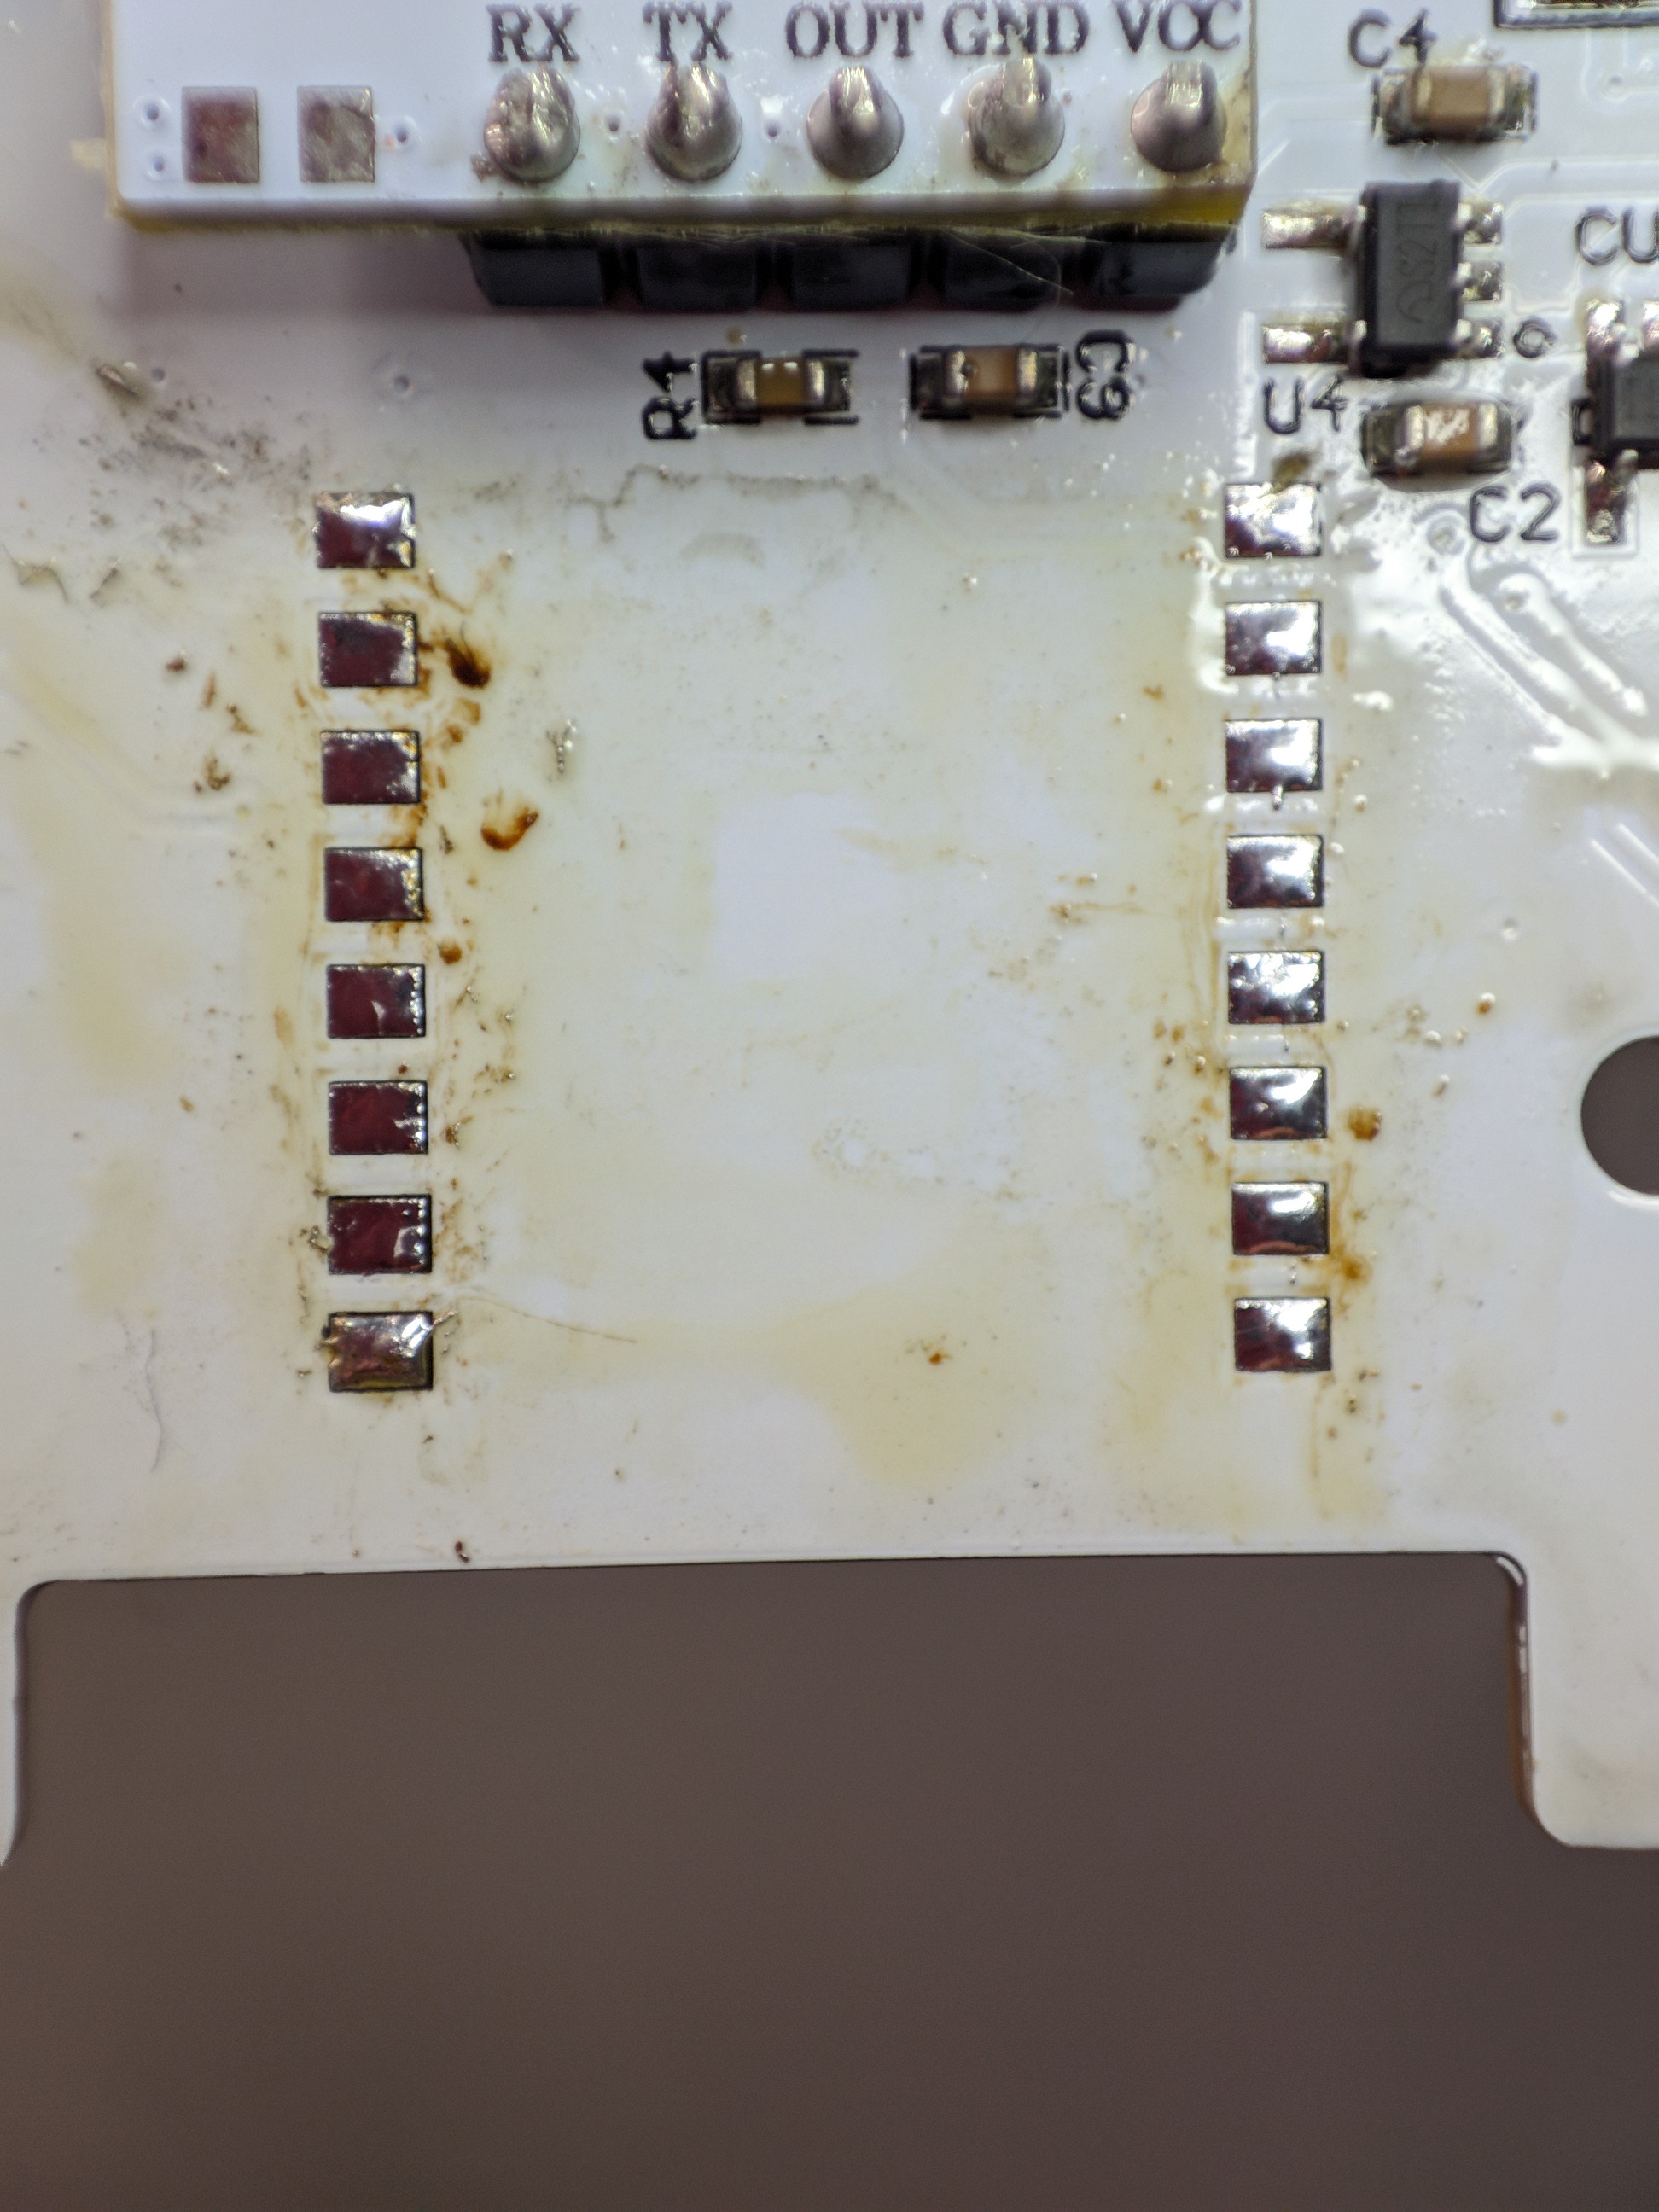
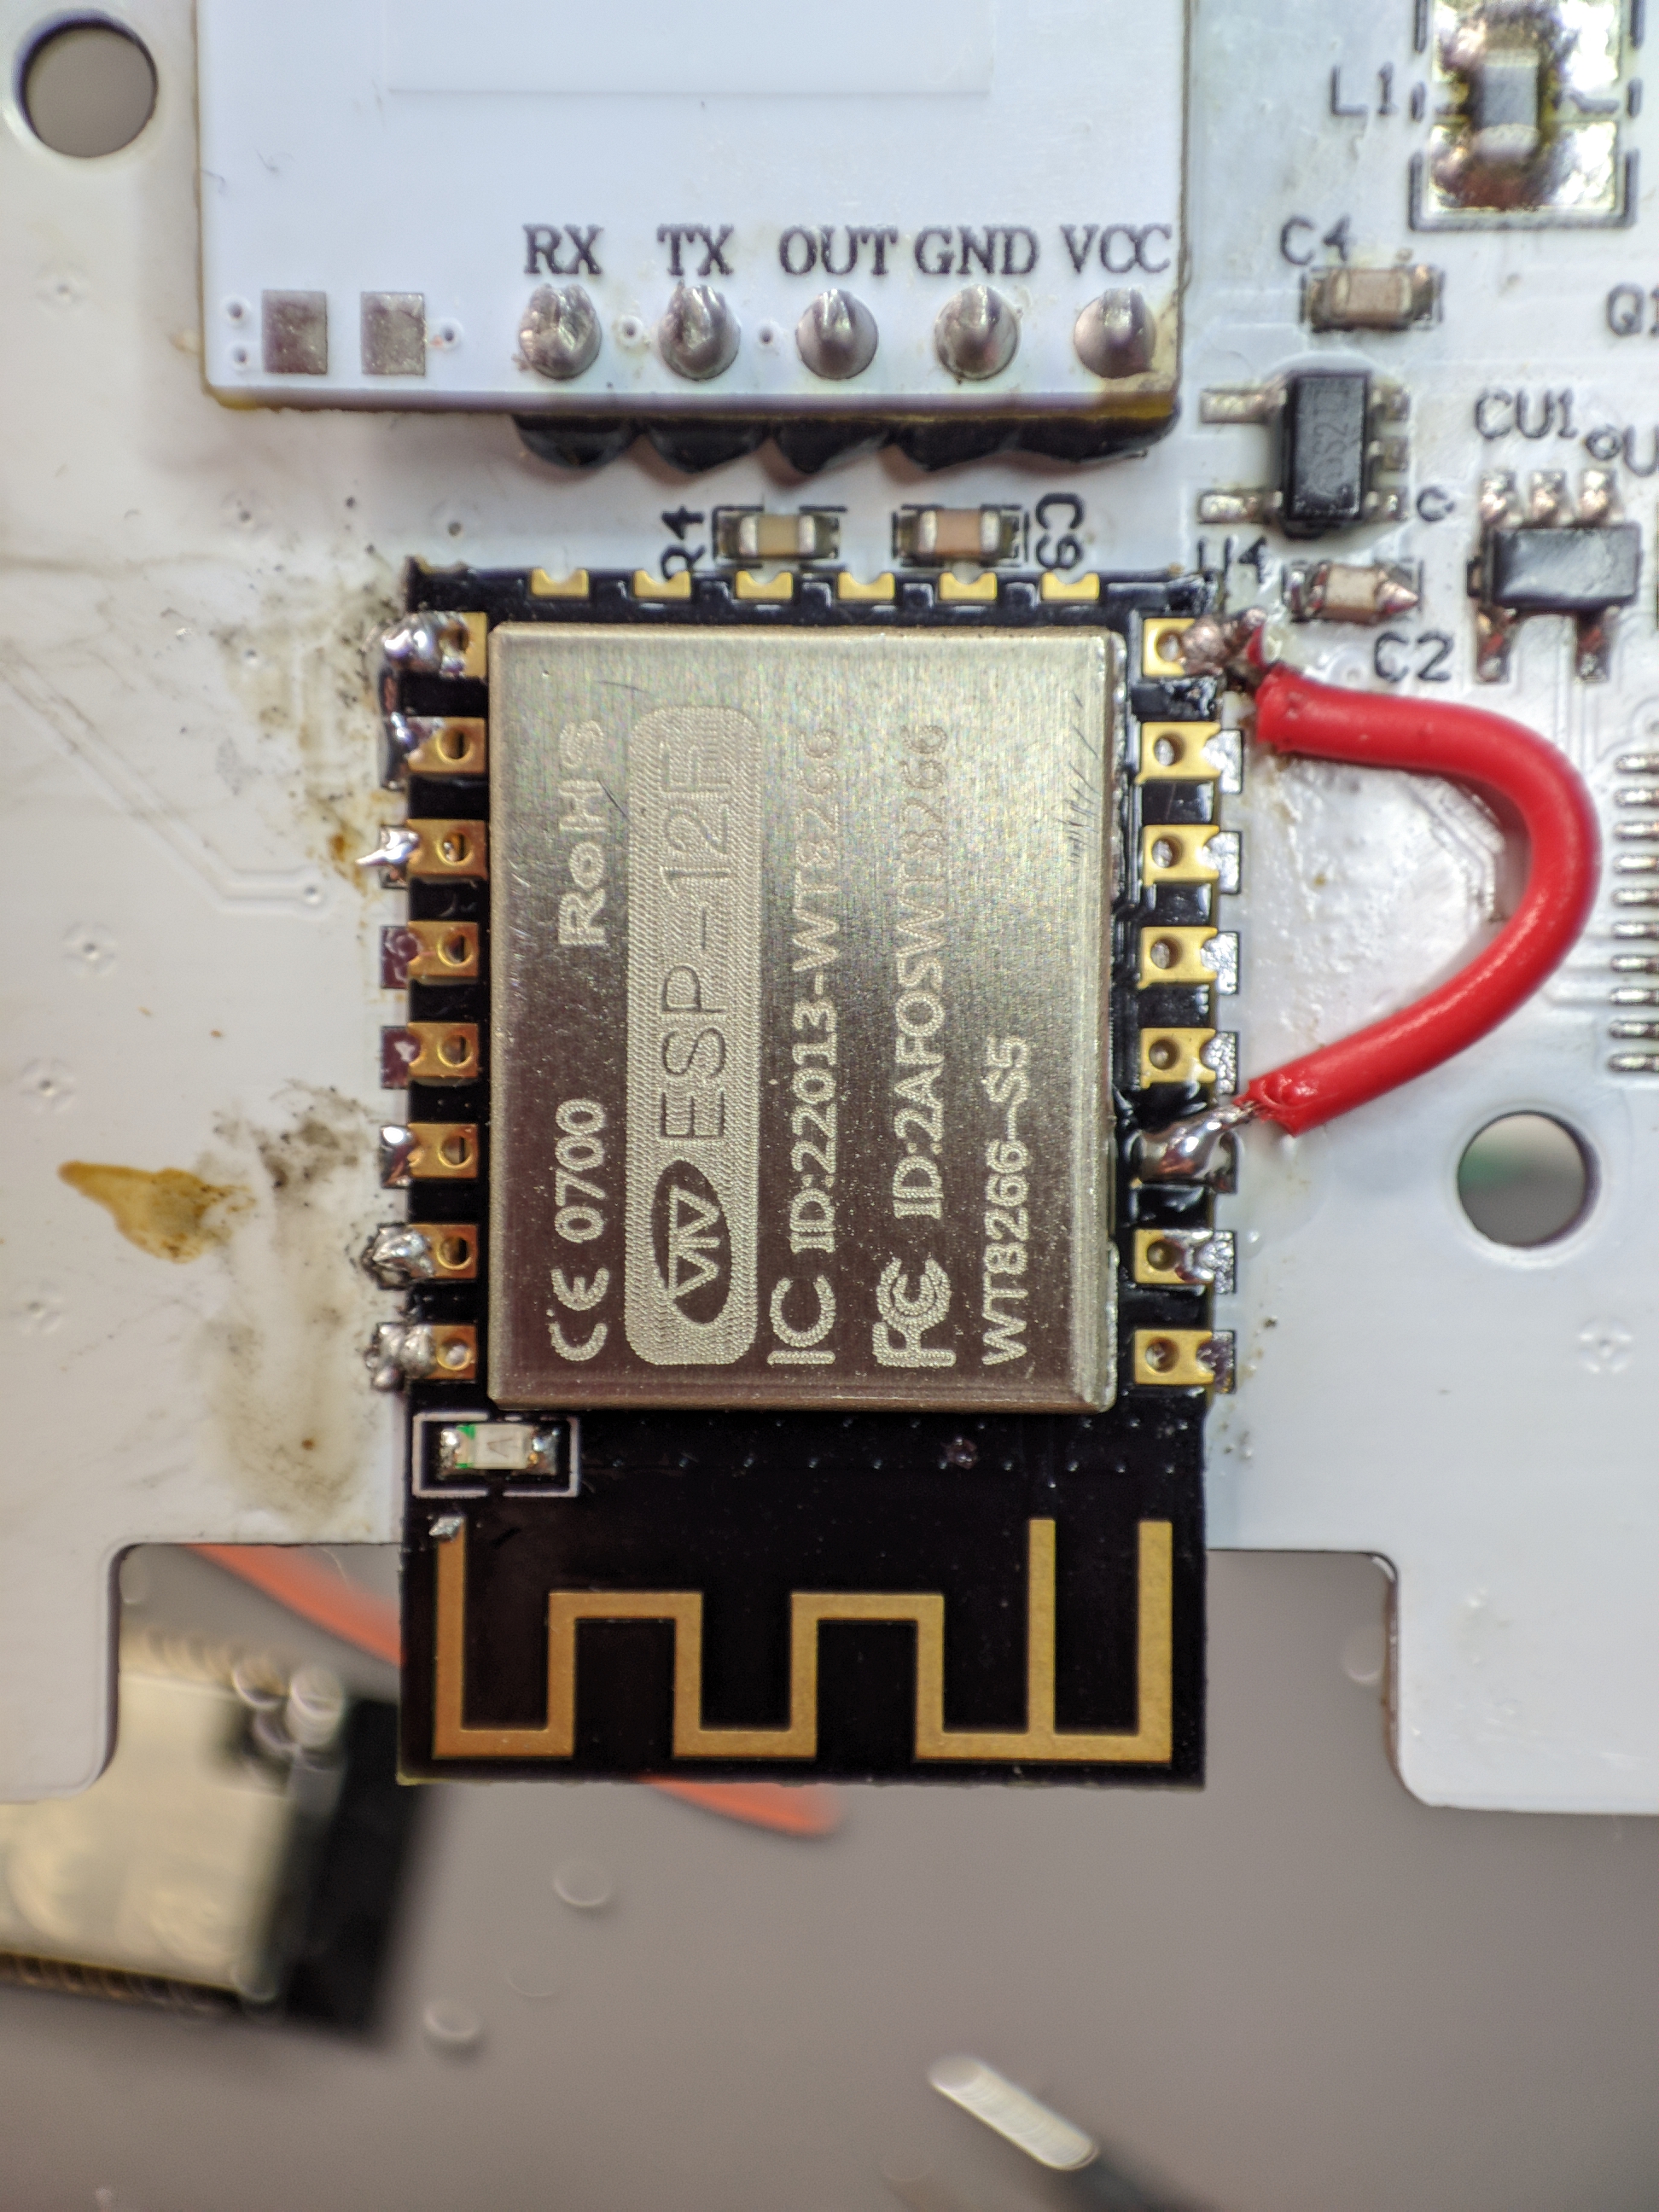
Apply flux liberally, then melt solder all over the pins. Using a heat gun carefully remove the module when the solder is melted through. After cleaning the surface solder in the ESP-12 module with Tasmota flashed on it. This time, I used an ESP-12F module so I had to bridge the GND and GPIO as well as connect 3.3V to the EN pin for it to boot.
Visit the device template page for configuration and information about dpId assignments.
A unique thing you can do with Tasmota is use the reset button as a toggle switch since the MCU reports the presses on dpId 106.
Is It Good Enough?
The size is really nice, sure it could always be smaller but 58x58x11mm is good enough for me. Build quality is really good for a Tuya product and the LED is only used as an indicator when there are connection issues. On top of that you get a bonus light sensor with which you can fully automate lights.
I’ve had it running for two weeks using only the Tuya app and Home Assistant Tuya integration using the recommended settings in the manual and it didn’t disappoint. It always detected me while in the room and the lights didn’t turn off once. After playing with the detection parameters like maxing out sensitivity and adjusting the detection distance it still performed. Sure, sometimes there was a second or two cloud induced delay but all things considered it performed much better than any PIR sensor I have.
After the module replacement and Tasmota providing local control it became perfect. Naturally, if you opted for the Zigbee version it would be locally controlled out of the box.
One thing that didn’t quite work as I expected was that the hole above the light sensor was too small. Because of that the lux readings were staying in double digits which is low. It still worked for automation purposes but I didn’t like the low resolution since its maximum is 2000 lux which was easily reached when not in the case.
That issue was solved by expanding the hole slightly with a 2mm drill bit.
In summation, it’s awesome for the price and even better after some DIY. I don’t have an Aqara FP1 to compare but I got comments the ZY-M100 is faster in detecting presence but take that with a grain of salt.
Personally I ordered two more to use in my home and office at 25$ a piece with 11.11 AliExpress sale discounts. One ceiling mounted Wi-Fi version and another wall mount but this time Zigbee with which I will do the most devious deed and replace the Zigbee module with a Wi-Fi one. I’d gladly get more if I needed them and would skip PIR sensors completely.
Once again, a huge thanks do all donators via Ko-Fi and PayPal and everyone using the affiliate links for funding the purchase for this review.

Explore more like this

Moes ES1 (ZSS-LP-HP02) Zigbee Human Presence Sensor Review
It was hard to resist the new Moes labelled sensor on AliExpress because it looked identical to the Linptech ES1 sensor which works with Xiaomi’s Mijia ecosystem but I avoided...
Comments