Update WebView on NSPanel Pro and Tuya Smart Home Panels

Summary
Update WebView on NSPanel Pro, T6E, S6E and S8E based multi-functional control panels running on Android 8.1 to enable running newest apps such as Fully Kiosk Browser, Wallpanel, Home Assistant Companion and more
Shopping links in this article are affiliate links and I earn a small commission when you buy through them
This guide applies to touch control panels such as:
- discontinued and replaced with an “Alexa” version that has completely different hardware
They’re based on the same PCB hardware and firmware from Smatek. That firmware is based on Android 8.1 with an ancient version of WebView which prevents most of smart home dashboard applications from working such as Fully Kiosk Browser.
With gracious help from tilaksidduram I’ve compiled information on how to update WebView to the newest version and run any app.
Install ADB
Download the Android platform-tools and unzip the contents to a folder. Open a Command Prompt and navigate to that folder. In my case it is located at D:\adb
Open a command prompt and navigate to the folder.
ADB Access to Panel
Wireless
Some panels might have ADB over TCP set up already (like NSPanel Pro) which saves you from disassembling it.
Find out the IP address of your panel and try connecting to it with this command
adb connect [panel_ip]
If it responds with connected to [panel_ip]:5555 you’ve connected to the panel and you’re ready to proceed.
USB
If wireless fails you have to disassemble the panel to gain access to the USB port labelled OTG
Remove the panel from the base. Unscrew the two screws on the back then carefully pry away the back plate starting at this point.
Now unscrew the tiny screws holding the PCB to the screen. Disconnect the touch panel connector to lift up the PCB enough to plug in a data USB cable.
Connect the data USB cable from your computer to the OTG port. If your device isn’t recognised as adb, download ADB drivers and install them.
S8E
S8E panel has access to the USB port at the bottom and doesn’t require disassembly.
Get ADB Access
This command will list all the connected devices with extra information.
adb devices -l
D:\adb>adb devices -l
List of devices attached
F061512302021100016    device product:px30_evb model:px30_evb device:px30_evb transport_id:3
Run command adb tcpip 5555 to set the panel to listen for a TCP/IP connection on port 5555
D:\adb>adb tcpip 5555
restarting in TCP mode port: 5555
Now you can connect to the panel wirelessly. If you don’t know the IP address run adb shell ip -o a to find out.
Try it out while still wired to make sure everything is working.
D:\adb>adb connect 10.1.1.144
connected to 10.1.1.144:5555
Tuya Specific
On Tuya versions of the panel (T6E, S6E and S8E) ADB over TCP does not persist after a reboot. To make it permanent run:
adb shell setprop persist.adb.tcp.port 5555
Install a Launcher
To make working with your panel easier you need to install a standard launcher. I’ve found the smallest launcher possible (only 7kb), which doesn’t take up a lot of precious device memory.
Download the Ultra Small Launcher to the ADB folder and install it with:
adb install ultra-small-launcher.apk
Simulate a Home key press.
adb shell input keyevent 3
You will be offered a selection of launchers, set Launcher as default.
Install Xposed
Download Xposed Installer and install it:
adb install de.robv.android.xposed.installer_3.1.5-43_minAPI15(nodpi)_apkmirror.com.apk
Download Xposed Framework.
Copy .tar file to ADB folder then upload it to the panel filesystem
adb push xposed-v90-sdk27-arm64-beta3.tar /sdcard/Download/
Open shell in ADB
adb shell
Switch to root
su
Make filesystem writeable
mount -o rw,remount /system
Navigate to the directory where you uploaded Xposed framework
cd /sdcard/Download/
Extract the xposed-v90-sdk27-arm64-beta3.tar file
tar -xvf xposed-v90-sdk27-arm64-beta3.tar
Change into the new directory
cd /sdcard/Download/xposed-v90-sdk27-arm64-beta3/
Make the installer script executable
chmod a+x /sdcard/Download/xposed-v90-sdk27-arm64-beta3/META-INF/com/google/android/flash-script.sh
Run Xposed framework installer script
sh /sdcard/Download/xposed-v90-sdk27-arm64-beta3/META-INF/com/google/android/flash-script.sh
Xposed Framework is now installed, but not activated. Reboot your device. It will take longer than usual to boot this time.
Once the panel has rebooted use adb shell input keyevent 3 to open the launcher again, then open the Xposed app, gloss over the warning and make sure it is activated.
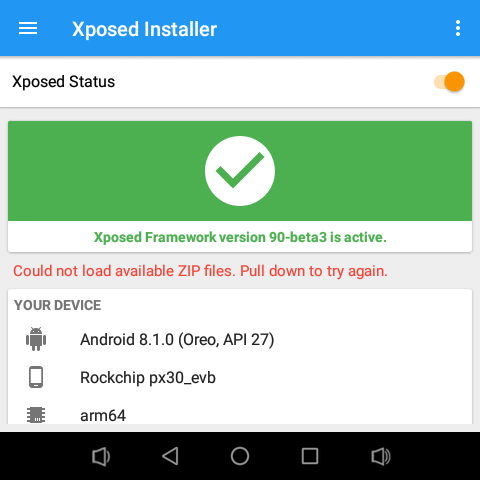
If it’s orange and says it’s not activated, another reboot might solve it.
Install AnyWebView
Download AnyWebView and install with
adb install AnyWebView.apk
Open Xposed again, open Modules from the left menu and activate AnyWebView.
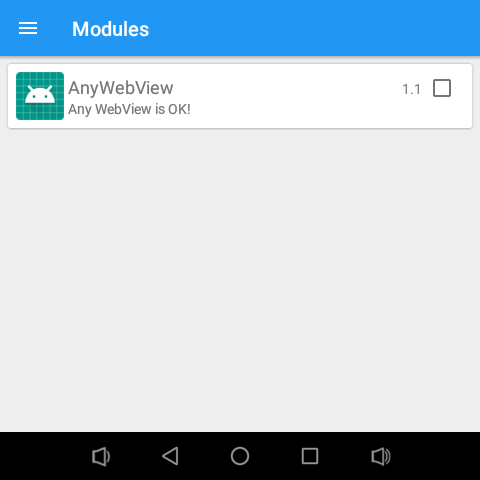
Reboot your device.
Update WebView
Now you need to install an updated WebView component. You can install Android System WebView, Bromite WebView or other compatible webview.
Download an arm64 version in .apk form NOT Bundle or .xapk.
Install WebView (change filename with your .apk)
adb install "Android System WebView_v105.0.5195.136_apkpure.com.apk"
Wait a while because it’s a large install.
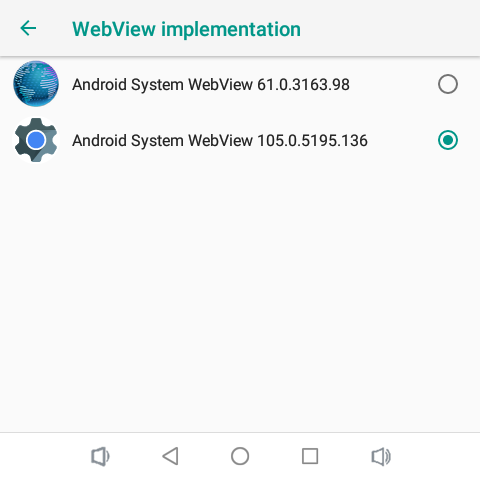
Go to Settings -> System -> About tablet -> Build Number and tap the “Build Number” option 7 times to enable developer options.
In Developer options, navigate to WebView Implementation and choose your WebView instead of the outdated “Android System WebView 61.x”
Finished
Now you can use Fully Kiosk, Home Assistant Companion, Wallpanel and other apps that depend on a newer version of WebView.

Explore more like this
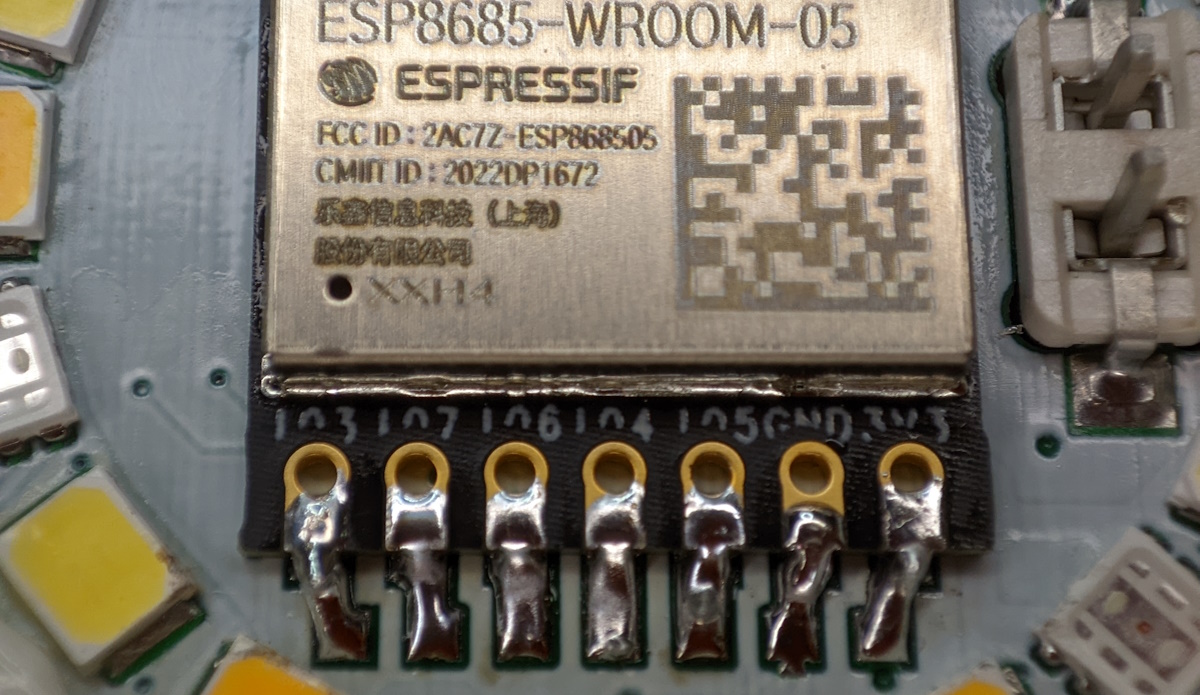
Replace Tuya CB2L, WB2L, BW2L Modules with ESP
Replace Tuya TYWE2L, CB2L, WB2L, WR2L, WBR2L, BW2L and similar Wi-Fi modules with an Espressif ESP32 or ESP8266 light module.
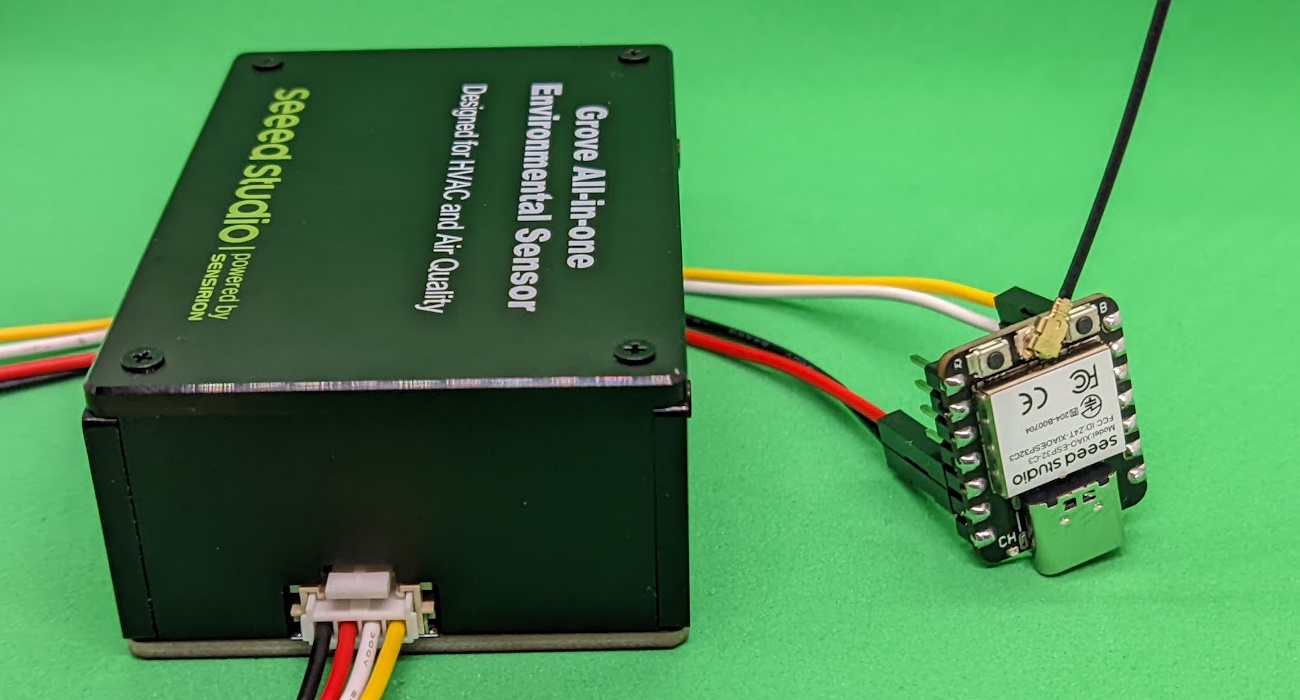
Seeed Studio Grove All-in-one Environmental Sensor with Tasmota
The Grove all-in-one environmental sensors from Seeed Studio (SEN54 and SEN55) detect various pollution indicators and can be used to monitor air quality in enclosed spaces. They’re built to easily...
Comments