Seeed Studio Grove All-in-one Environmental Sensor with Tasmota

The Grove all-in-one environmental sensors from Seeed Studio (SEN54 and SEN55) detect various pollution indicators and can be used to monitor air quality in enclosed spaces. They’re built to easily implement into your DIY sensor project and I’ll show you how to use it with Tasmota.
Full disclosure: This is a review sample sent to me free of charge by Seeed Studio. Review is not influenced by that fact and is solely my opinion. Shopping links in this article are affiliate links and I earn a small commission when you buy through them which helps support my work
Seeed Studio Grove All-in-one Environmental Sensor (SEN5X) is available from Seeed Studio online store.
Overview
The SEN55 sensor measures temperature, humidity, PM1.0, PM2.5, PM4, PM10, VOC (volatile organic compounds) and nitrogen oxides (NOx). SEN54, which is is 5$ cheaper , doesn’t detect nitrogen oxides.


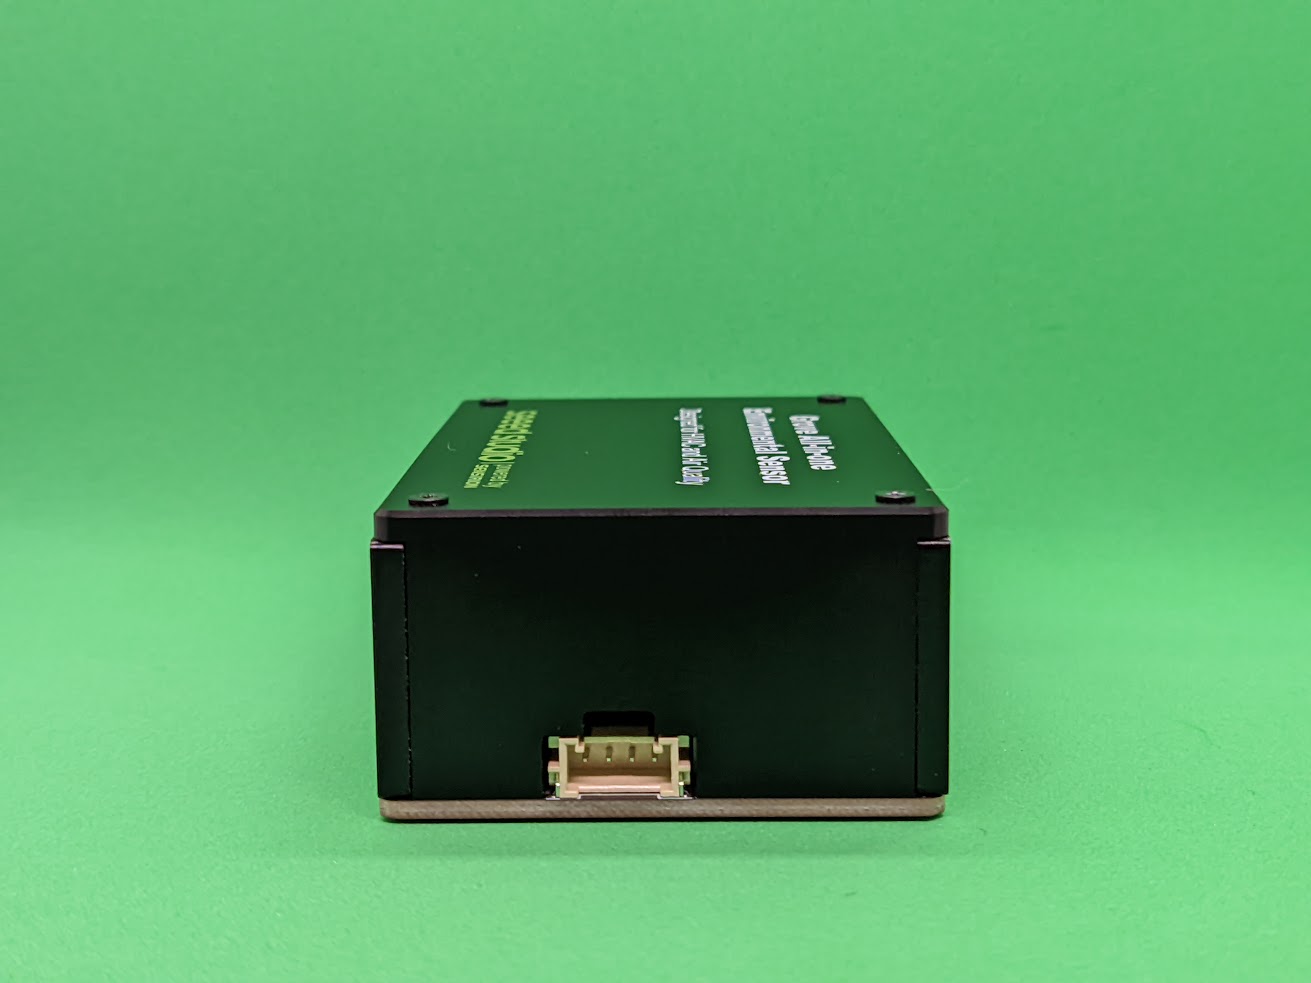

Seeed Studio’s Grove sensor is based on Sensirion’s SEN55 (Datasheet) which is placed into an acrylic enclosure with a Grove port. Grove is an easy to use interface to existing development platforms from Seeed Studio such as XIAO, Raspberry Pi, Arduino, Wio Terminal and others. Seeed Studio has some of those applications for SEN54 or SEN55 well documented in their wiki.
The Grove to Grove cable is provided with the sensor. If you wish to conect it to a typical development board using the standard 2.54 pin headers you will need a Grove Conversion cable.

Let’s take a peek inside by unscrewing the 4 screws holding the acrylic case together.


The modification done by Seeed Studio is the Grove port and a voltage regulator to allow a 3.3V power supply option. If you wish you can use the sensor itself in your project and connect to it via the original cable. The pinout for it is available in the datasheet.

VOC and NOx Index
SEN55 has a different approach towards volatile organic compound sensing. Instead of using the common TVOC representation of the data which is hard to quantify and ofter isn’t exact, Sensirion implemented an index. Both indexes mimic the human nose’s perception of odors with a relative intensity compared to recent history. It adapts its gain according to the events of the past 24 hours learning period, leading to different conditions being quantified on the same limited scale: an index ranging from 1 to 500.
On the VOC Index scale, because every indoor air environment contains a certain VOC background from constantly off-gassing sources the starting value is always mapped to 100. VOC Index above 100 means that there are more VOCs compared to the average (from cooking, cleaning, breathing, etc.) while a VOC Index below 100 means that there are fewer VOCs (fresh air from an opened window, air purifier, etc.).
NOx Index is being sensitive towards oxidizing gases. A NOx Index above 1 means that there are more NOx compounds compared to the average (cooking on a gas stove), while an NOx Index close to 1 means that there are (nearly) no NOx gases present, which is the case most of the time (or induced by fresh air from an open window, using an air purifier, etc.).
Tasmota Configuration
To use the Grove SEN5x sensors with Tasmota you need an ESP based development board. Tasmota32 and tasmota-sensors build include the driver for Grove SEN5x sensors by default.
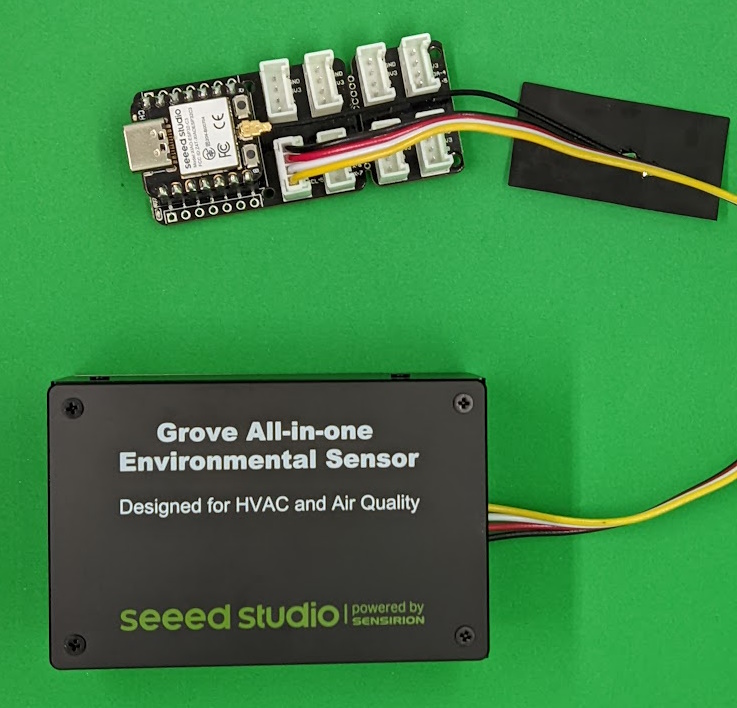
I’ve used the small XIAO ESP32C3 development board and its Grove Base board which enables me to connect other Grove peripherals.
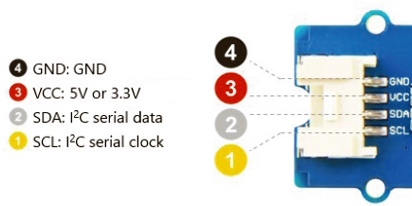
Connect Grove SEN5x to the Grove port of your board. If you’re using Grove to Dupont cable connect the wires as pictured:
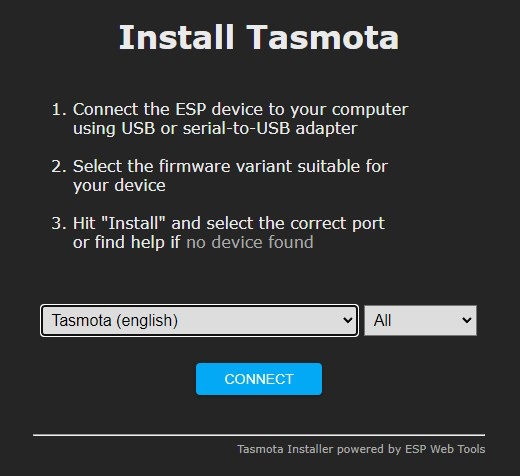
Install Tasmota using the Tasmota Web Installer or using other installation options.
Once installed, configure Tasmota to connect to your Wi-Fi network and open the webUI in the browser using its new IP address.
In the webUI navigate to Configuration -> Configure Module and configure the I2C SDA and I2C SCL pins according to how you wired them. In my case (XIAO ESP32C3 and Grove Base) the pins are fixed to GPIO6 for SDA and GPIO7 for SCL.
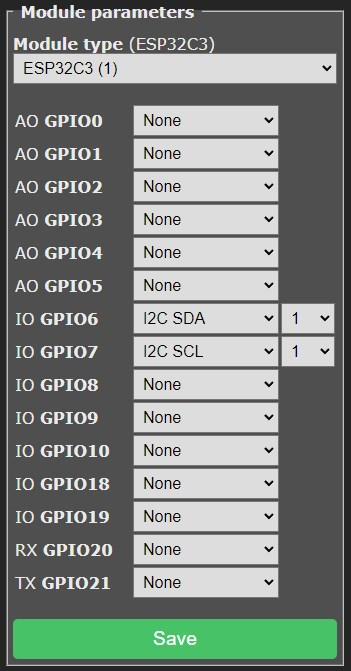
Clicking Save will restart Tasmota and the main page will now display all the sensor data.
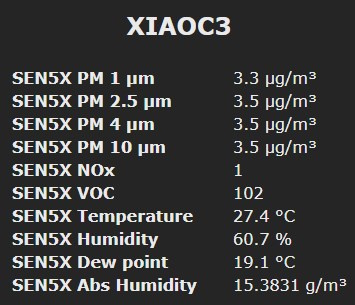
Tasmota’s implementation of the sensor additionally provides absolute humidity (aHumidity) and dew point sensors.
All the data is also transmitted via MQTT. Tasmota can be integrated in various smart home solutions and from version 13 of Tasmota you can even use Matter over Wi-Fi (Current Matter specification supports only temperature and humidity sensors).
Conclusion
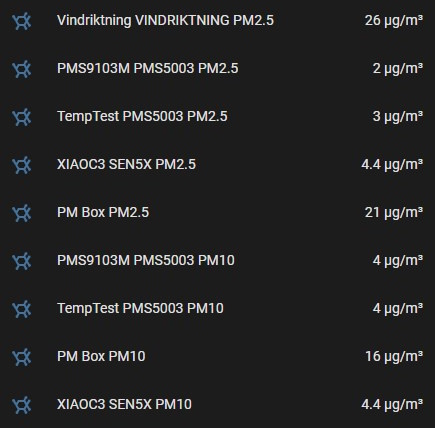
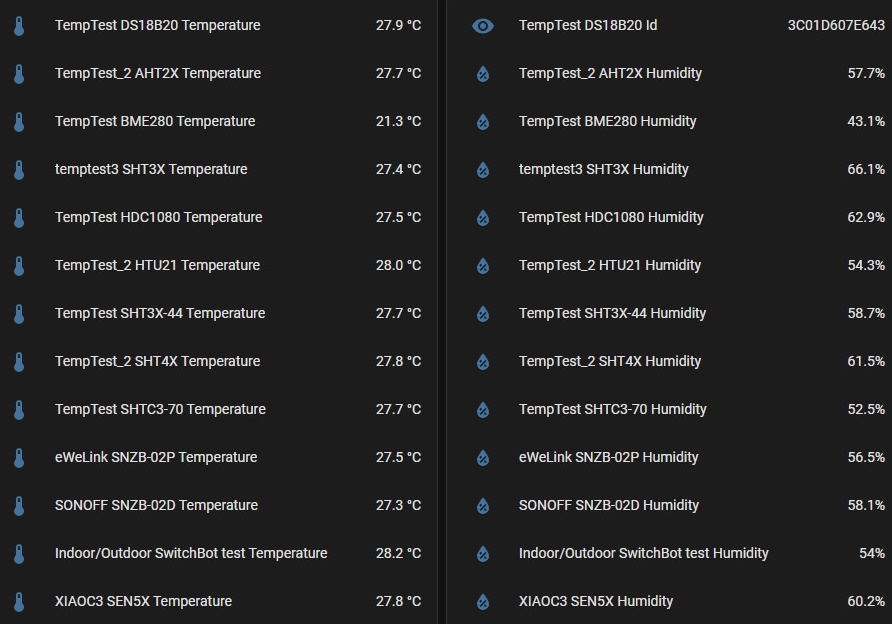
All the readings during my testing were accurate and in a trend line with my sensor testing setup. The sensor with the XIAO ESP32C3 board uses around 0.8W.
The VOC and NOx index is great for creating automations since it gives your values applicable in real life scenarios.
The price of 55$ (49$ for SEN54) might seem high but good and accurate environment sensors like this cannot be bought cheaply and I find this a good value for what you receive.
It would be perfect if the package also implemented CO2 detection to be a true environment sensor. For now you need to add a CO2 sensor like SCD41, SCD30 or MH-Z19 yourself.
Seeed Studio Grove All-in-one Environmental Sensor (SEN5X) is available from Seeed Studio online store.

Explore more like this

Convert Xiaomi MMC MHO-C401 E-Ink Bluetooth Sensor to Zigbee
Guide on installing Zigbee firmware on the Bluetooth temperature and humidity sensor with e-ink display. The best Zigbee temperature and humidity sensor with an e-ink display is a Bluetooth one....

Kaiweets HT118A Digital Multimeter Review
If you’re into tinkering with electronics one of the tools you can’t go without is a multimeter.
Comments