Hacking the Sonoff NSPanel

Summary
Chronicling the journeys of decoding the NSPanel communication protocol and establishing control of the Nextion screen with custom firmware.
Sonoff NSPanel is available through Itead store.
After finishing the review and the hardware teardown I had a general idea of how the NSPanel works and it was time to flash custom firmware on it. But wait, not so fast! Since we’re dealing with a very new, still unreleased, device you need to take some steps before even thinking about custom firmware.
Back up the Original Firmware
Back up the original firmware, then back it up again for good measure. The module being ESP32 dictates the use of esptool.py and this article explains the flash identification and backup procedure in detail.
Discover how ESP32 communicates with Nextion
I’m frequenting the Unofficial Nextion Discord because it’s also the openHASP development hub. Since they actually have experience with Nextion screens I asked and got information on the standard protocol Nextion uses with their standalone screens and read up more on it on the Nextion website.
Gotta do some research first to know what to look for!
Analyze Serial Communication
For this I used a cheap 24Mhz logic analyzer (AliExpress) and PulseView.
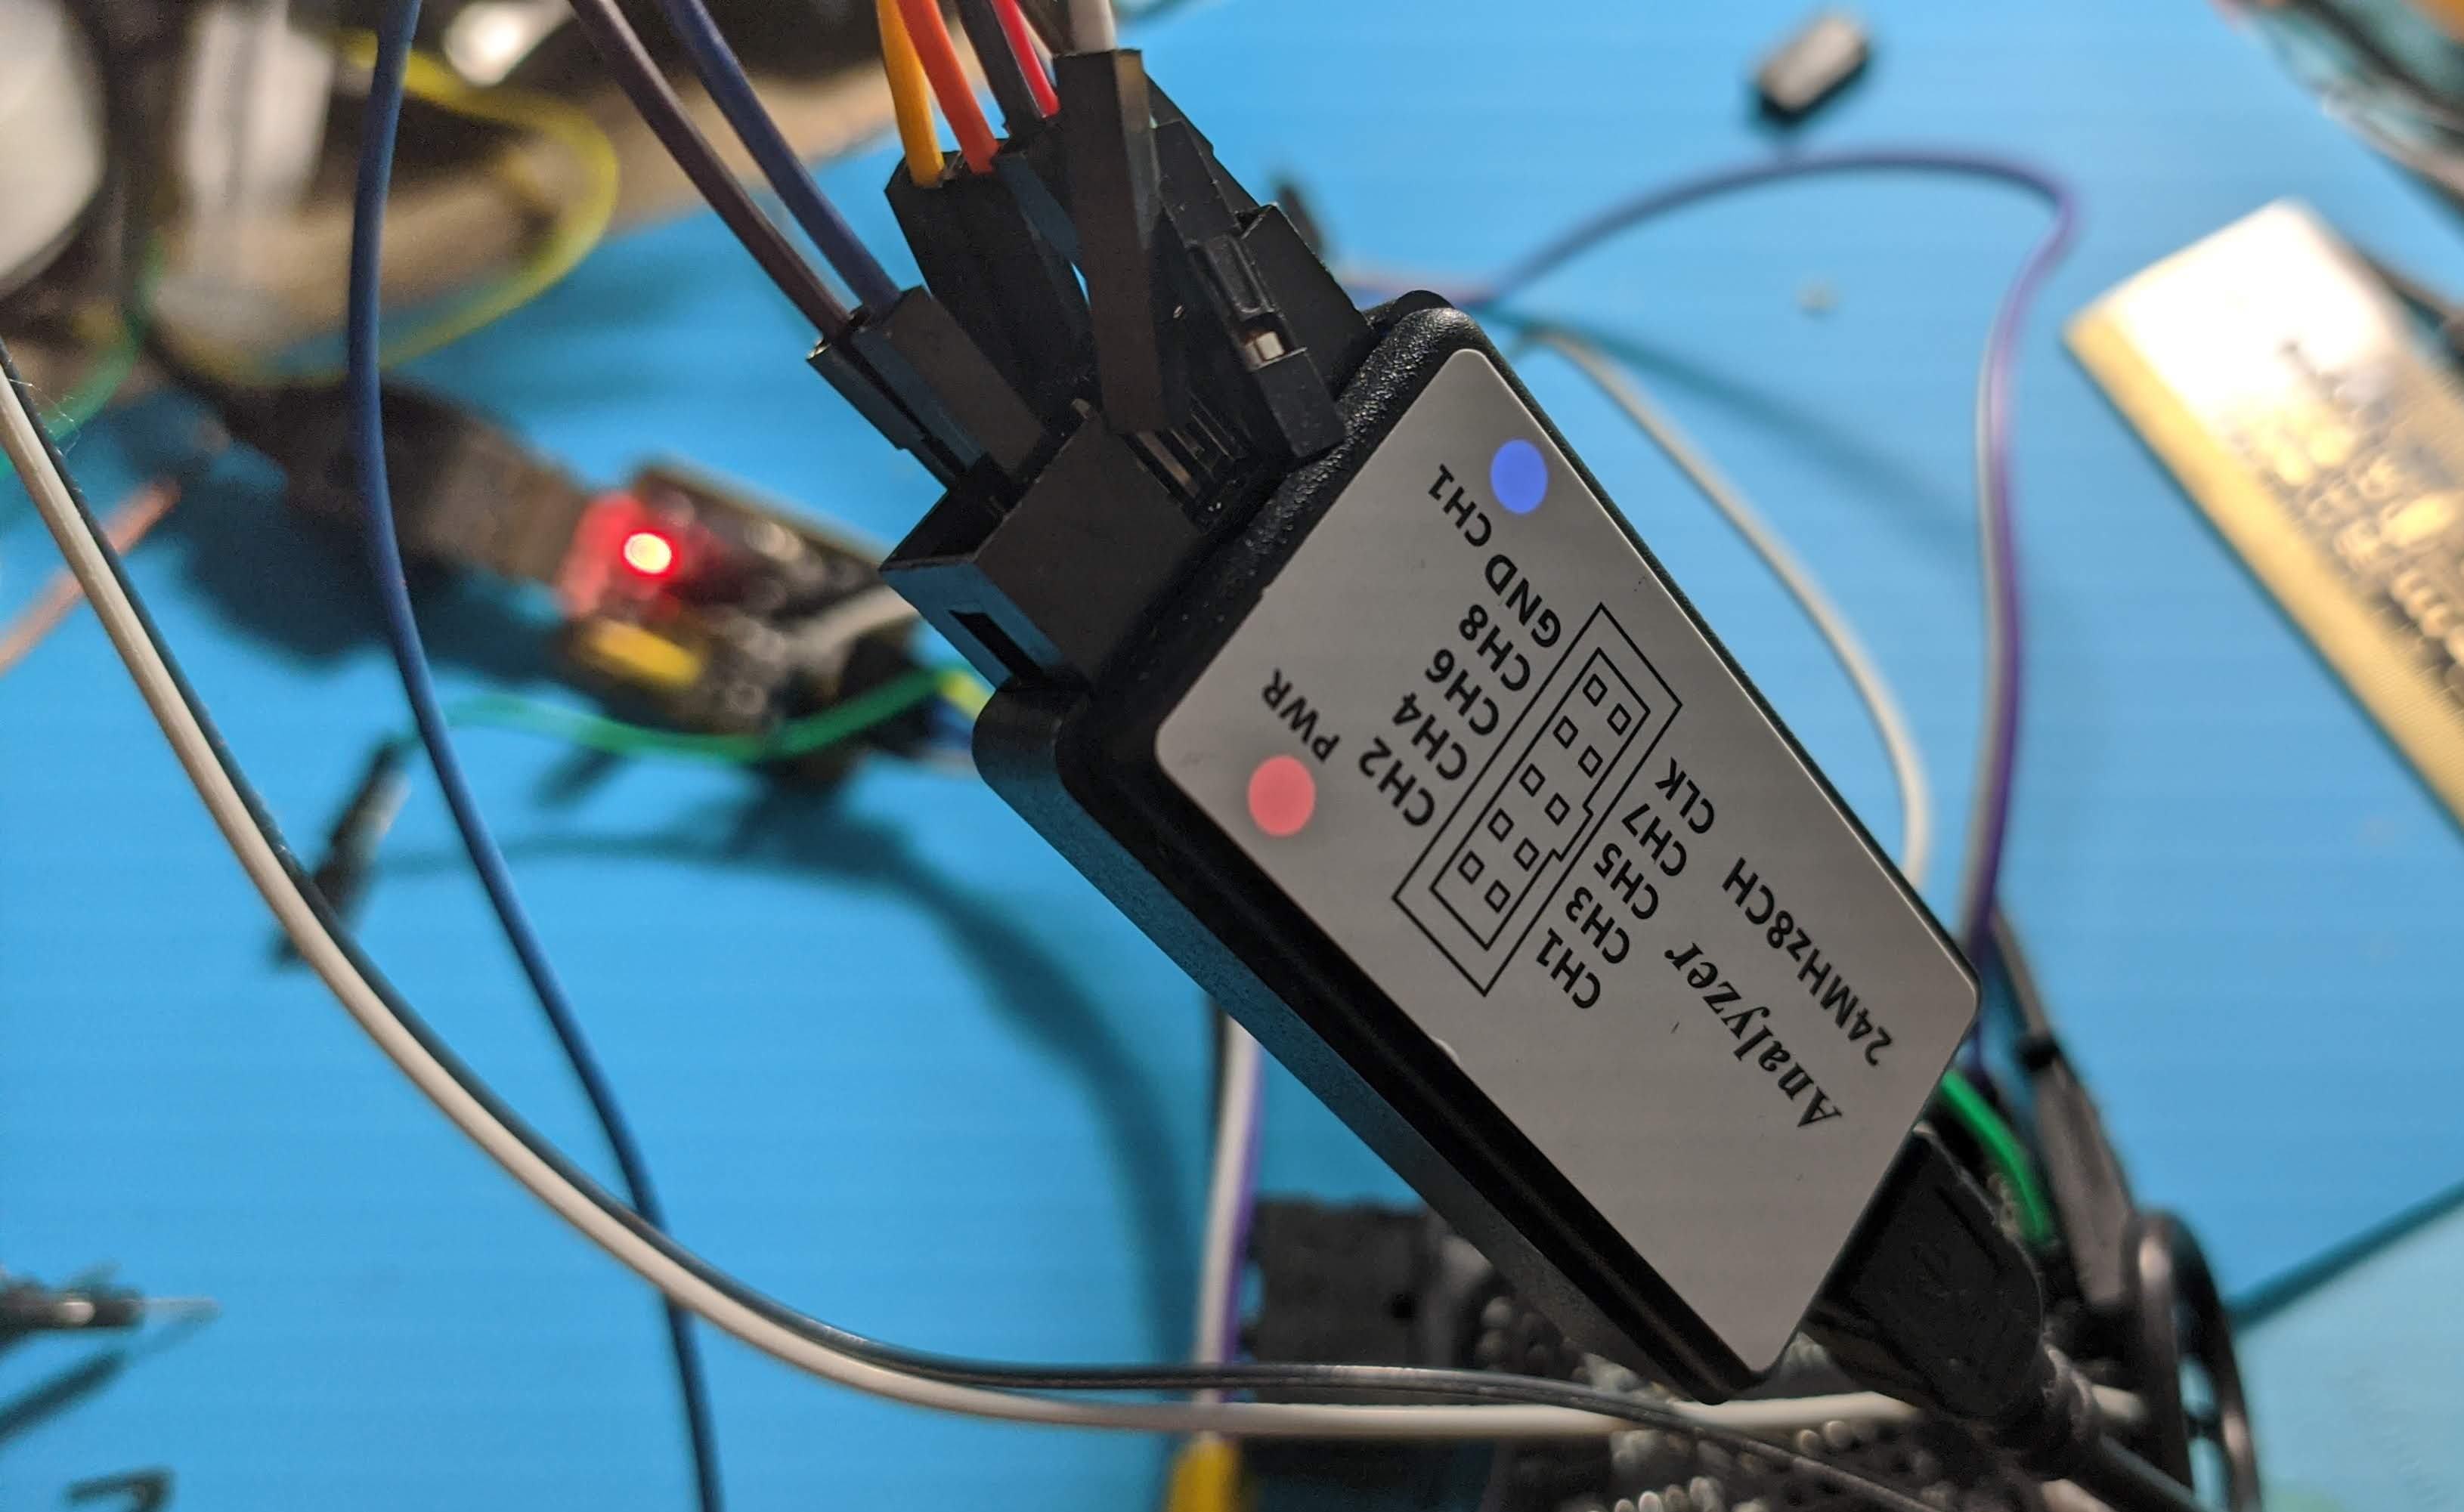
Connected the D0 and D1 pins on the analyzer to the TF_RX and TF_TX pads and fired up PulseView. I’ve set the sampling to 24Mhz since it’s the highest my analyzer can do and max sample size. Decoder is set to UART because serial communication is used. I use two decoders, one set to show hex value and the other to show ascii-
I clicked “Run” in PulseView and supplied 5V power through the headers and waited for the sampling to finish. Data is flowing but almost all of it doesn’t look at all like the Nextion protocol which ends every message with 0xFFFFF or ÿÿÿ and instead I’m seeing JSON payloads with some extra bytes before and after. Since Itead kindly released the pinouts and Nextion upload protocol on the Kickstarted I asked them for the protocol documentation. The response was a bit weird:
After communicating with our engineers, the communication protocol between ESP32 and Nextion controller in the NSPanel you mentioned in the previous email is too complicated, so I am sorry to tell we can’t provide it.
Too complicated!?!? Challenge accepted!!!
Decoding the structure of the message
I’ve run multiple data gathering sessions, for each screen and all app controls and features. All the data was then collated into a spreadsheet with copious notes to have a good birds eye view on the entire protocol. After staring at it intently a pattern emerged..

Every message to and from the screen starts with 0x55AA which is very reminiscent of Tuya’s protocol. Next byte is always an 80-something hex number.
Following that are another two bytes. First byte changes with every message and the last one is 0x00 all the time. After that sequence follows a JSON payload. Each message finishes with two seemingly random bytes.
Look into original firmware
To leave no stone unturned I took the backed up original firmware binary and ran it through strings to extract as much data as possible. And data there was… Amongst standard ESP IDF error messages and my Wi-Fi password there were strings confirming my findings with the logic analyzer and a quite a lot of new information:
Found a command {"queryInfo":"factory"} to enter factory and screen test mode. Not that useful but it’s a fun discovery.
{"HMI_outdoorTemp":{"current":34,"range":"26,36"},"HMI_weather":7} is the command to set the weather forecast and icon which didn’t turn up on the analyzer.
Found strings relating to Wi-Fi state such as connecting, disconnect, pairing and nonetwork
Scrolling further the structure for the JSON commands was there in plain text:
{"id":"%s","switches":[{"outlet":%d,"switch":"off"}]}
device
group
{"HMI_resources":[{"index":%d,"ctype":"%s","id":"%s","uiid":%d}]}
scene
{"HMI_resources":[{"index":%d,"ctype":"%s","id":"%s"}]}
{"HMI_weather":%d,"HMI_outdoorTemp":{"current":%d,"range":"%s"}}
ATCMode
{"params":{"ATCMode":%d,"ATCExpect0":%0.2f}}
{"temperature":%d,"humidity":%d,"tempUnit":%d}
tempUnit
{"tempUnit":0}
{"tempUnit":1}
{"ATCExpect0":%d}
{"ATCExpect1":%d}
{"ctype":"%s","id":"%s","params":"%s"}
{"ctype":"%s","id":"%s"}
{"ctype":"device","id":"%s","params":"switch|switches"}
{[{"index":%d,"type":"delete"}]}
It is almost as good as documentation from the source.
There are also some commands related to updating with apikeys, certificates and urls to ewelink servers and firmware upgrades which cannot be accessed just with a browser.
Armed with this arsenal of data it’s time to crack this nut wide open.
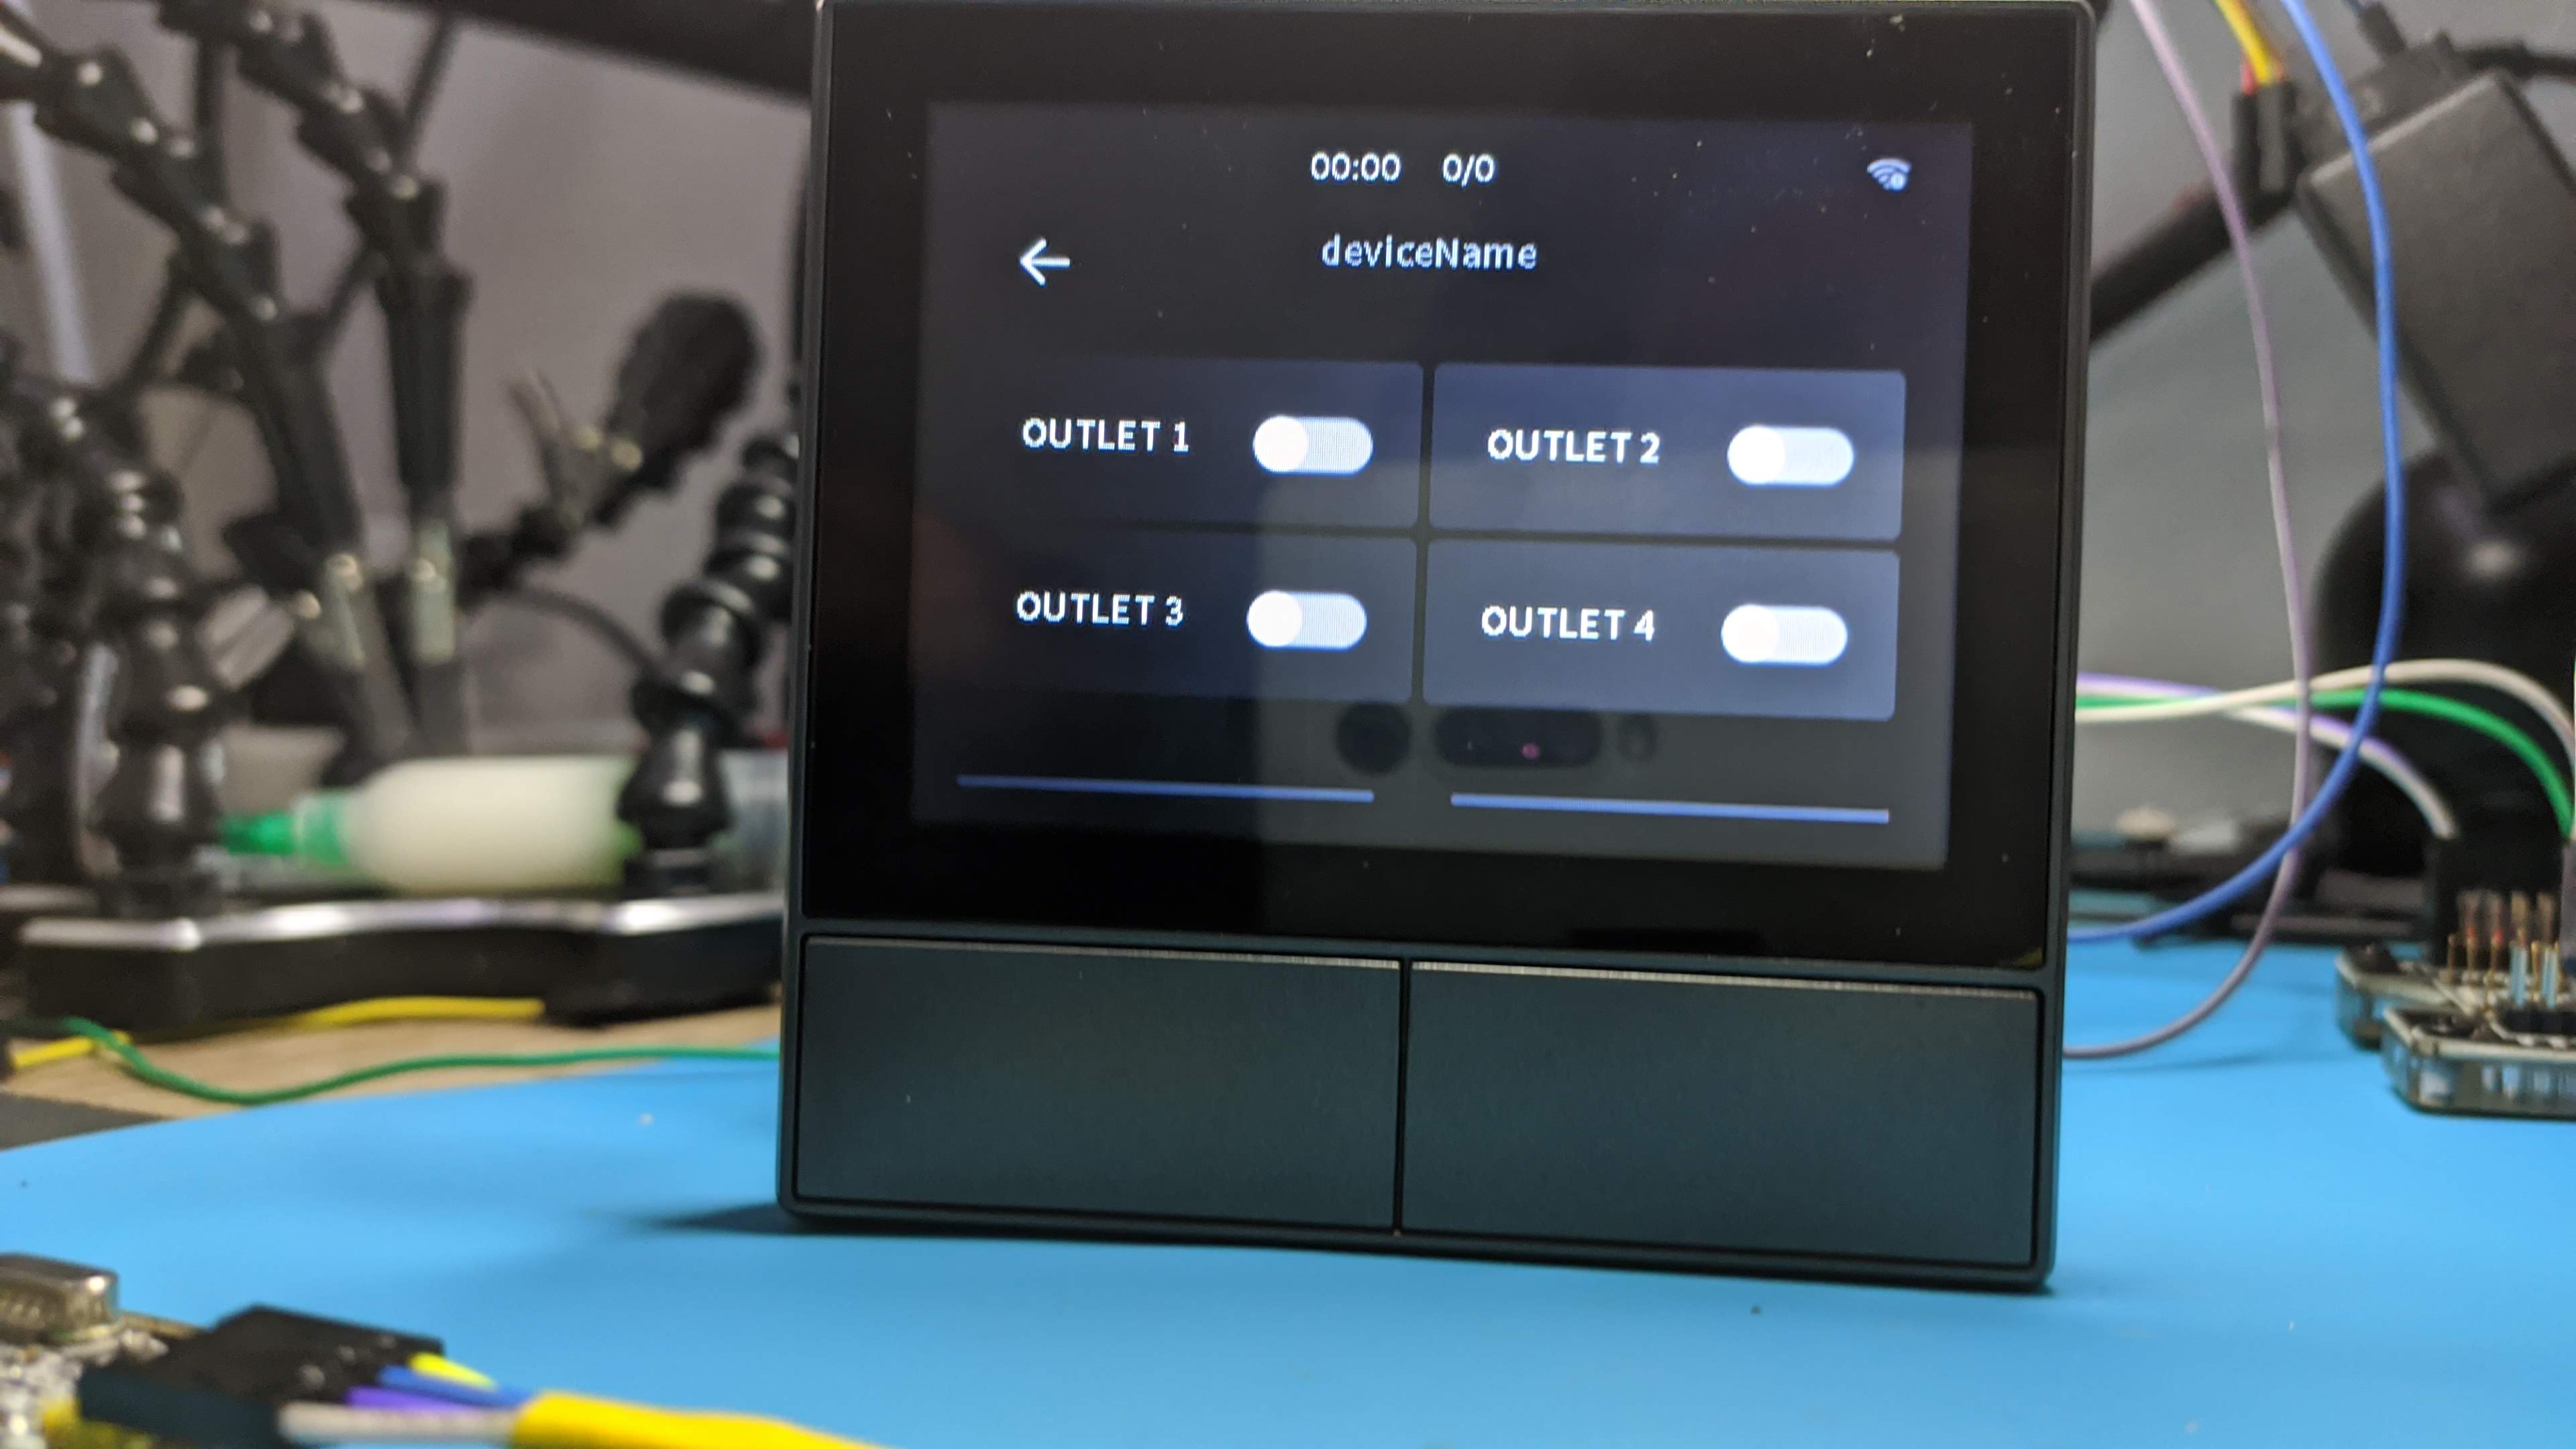
NSPanel Protocol Structure
Example message from NSPanel to Nextion looks like:
55AA8017007B227175657279496E666F223A2276657273696F6E227D846C
When converted to ascii the JSON payload is obvious. Don’t know what JSON is? Read “JSON: What It Is, How It Works, & How to Use It”
U[AA][80][17][00]{"queryInfo":"version"}[84]l
So we’ll look at everything except the JSON payload in hex.
Since It wasn’t apparent to me what the unknown bytes mean I posted a few strings to the Unofficial Nextion Discord. People jumped in and gave suggestions and insight on what they could be. Shouts to MaxZ for figuring out the last two bytes are CRC16 MODBUS. I checked the assumptions we’ve deduced about the protocol structure. #teamwork
I present the NSPanel protocol:
55 AA [type] [payload length] [00] [JSON payload] [crc] [crc]

CRC-16 (MODBUS) Big Endian
Type
According to the message samples, the type byte classifies as following:
- 80 = general device info
- 81 = weather forecast
- 82 = date and time
- 83 = temperature probe
- 84 = thermostat related
- 85 = Wi-Fi and networking
- 86 = widget and object drawing and parameters
- 87 = screen dimming
If “type” doesn’t correspond to JSON payload, Nextion will return an error.
Payload Length
This is equal to the number of characters of the JSON payload converted to hex
JSON Payload
Every payload needs to be JSON formatted with specific key names.
Payloads range from a simple {"tempUnit":0} to {"relation":[{"ctype":"device","id":"1000f71b01","name":"Bulb S..","online":true,"params":{"switch":"on","ltype":"white","white":{"br":100,"ct":255}}}]}.
Most of the payloads do not have to include every key-value pair or follow their order but it’s safer to copy the original firmware structure.
CRC
CRC is calculated from all the previous bytes using CRC-16 MODBUS. Thanks again to MaxZ for spotting that! I used Scadacore Online Checksum Calculator and ran a few payloads through it to confirm that.
I’ve set up a document repository on my GitHub with a detailed protocol breakdown and auxiliary script and information that can be updated in the future.
Inital Tasmota Test
For a simple test with Tasmota, I hooked up a NodeMCU GPIO to the TF_TX pad and, naturally, GND. I configured that GPIO as Serial Rx in order to see whether Tasmota can even correctly read the messages from the Nextion screen. At first it looked like a dud since the messages were short and just gibberish, but from previous experience I knew to try hex formatting by sending SerialSend5 00 and that was successful. I got a “55AA870B007B226572726F72223A307D550100” which is {"error":0}.
Everything is go for flashing Tasmota. If it does not pan out I can hopefully restore the original firmware backup.
Flashing Tasmota
Flashing Tasmota was straightforward. Use the headers with all the pins broken out and flash tasmota32.bin using the guide.
Since the front panel is powered with 5V, disconnect 3.3V from the serial-to-USB adapter and connect 5v power back to the headers.
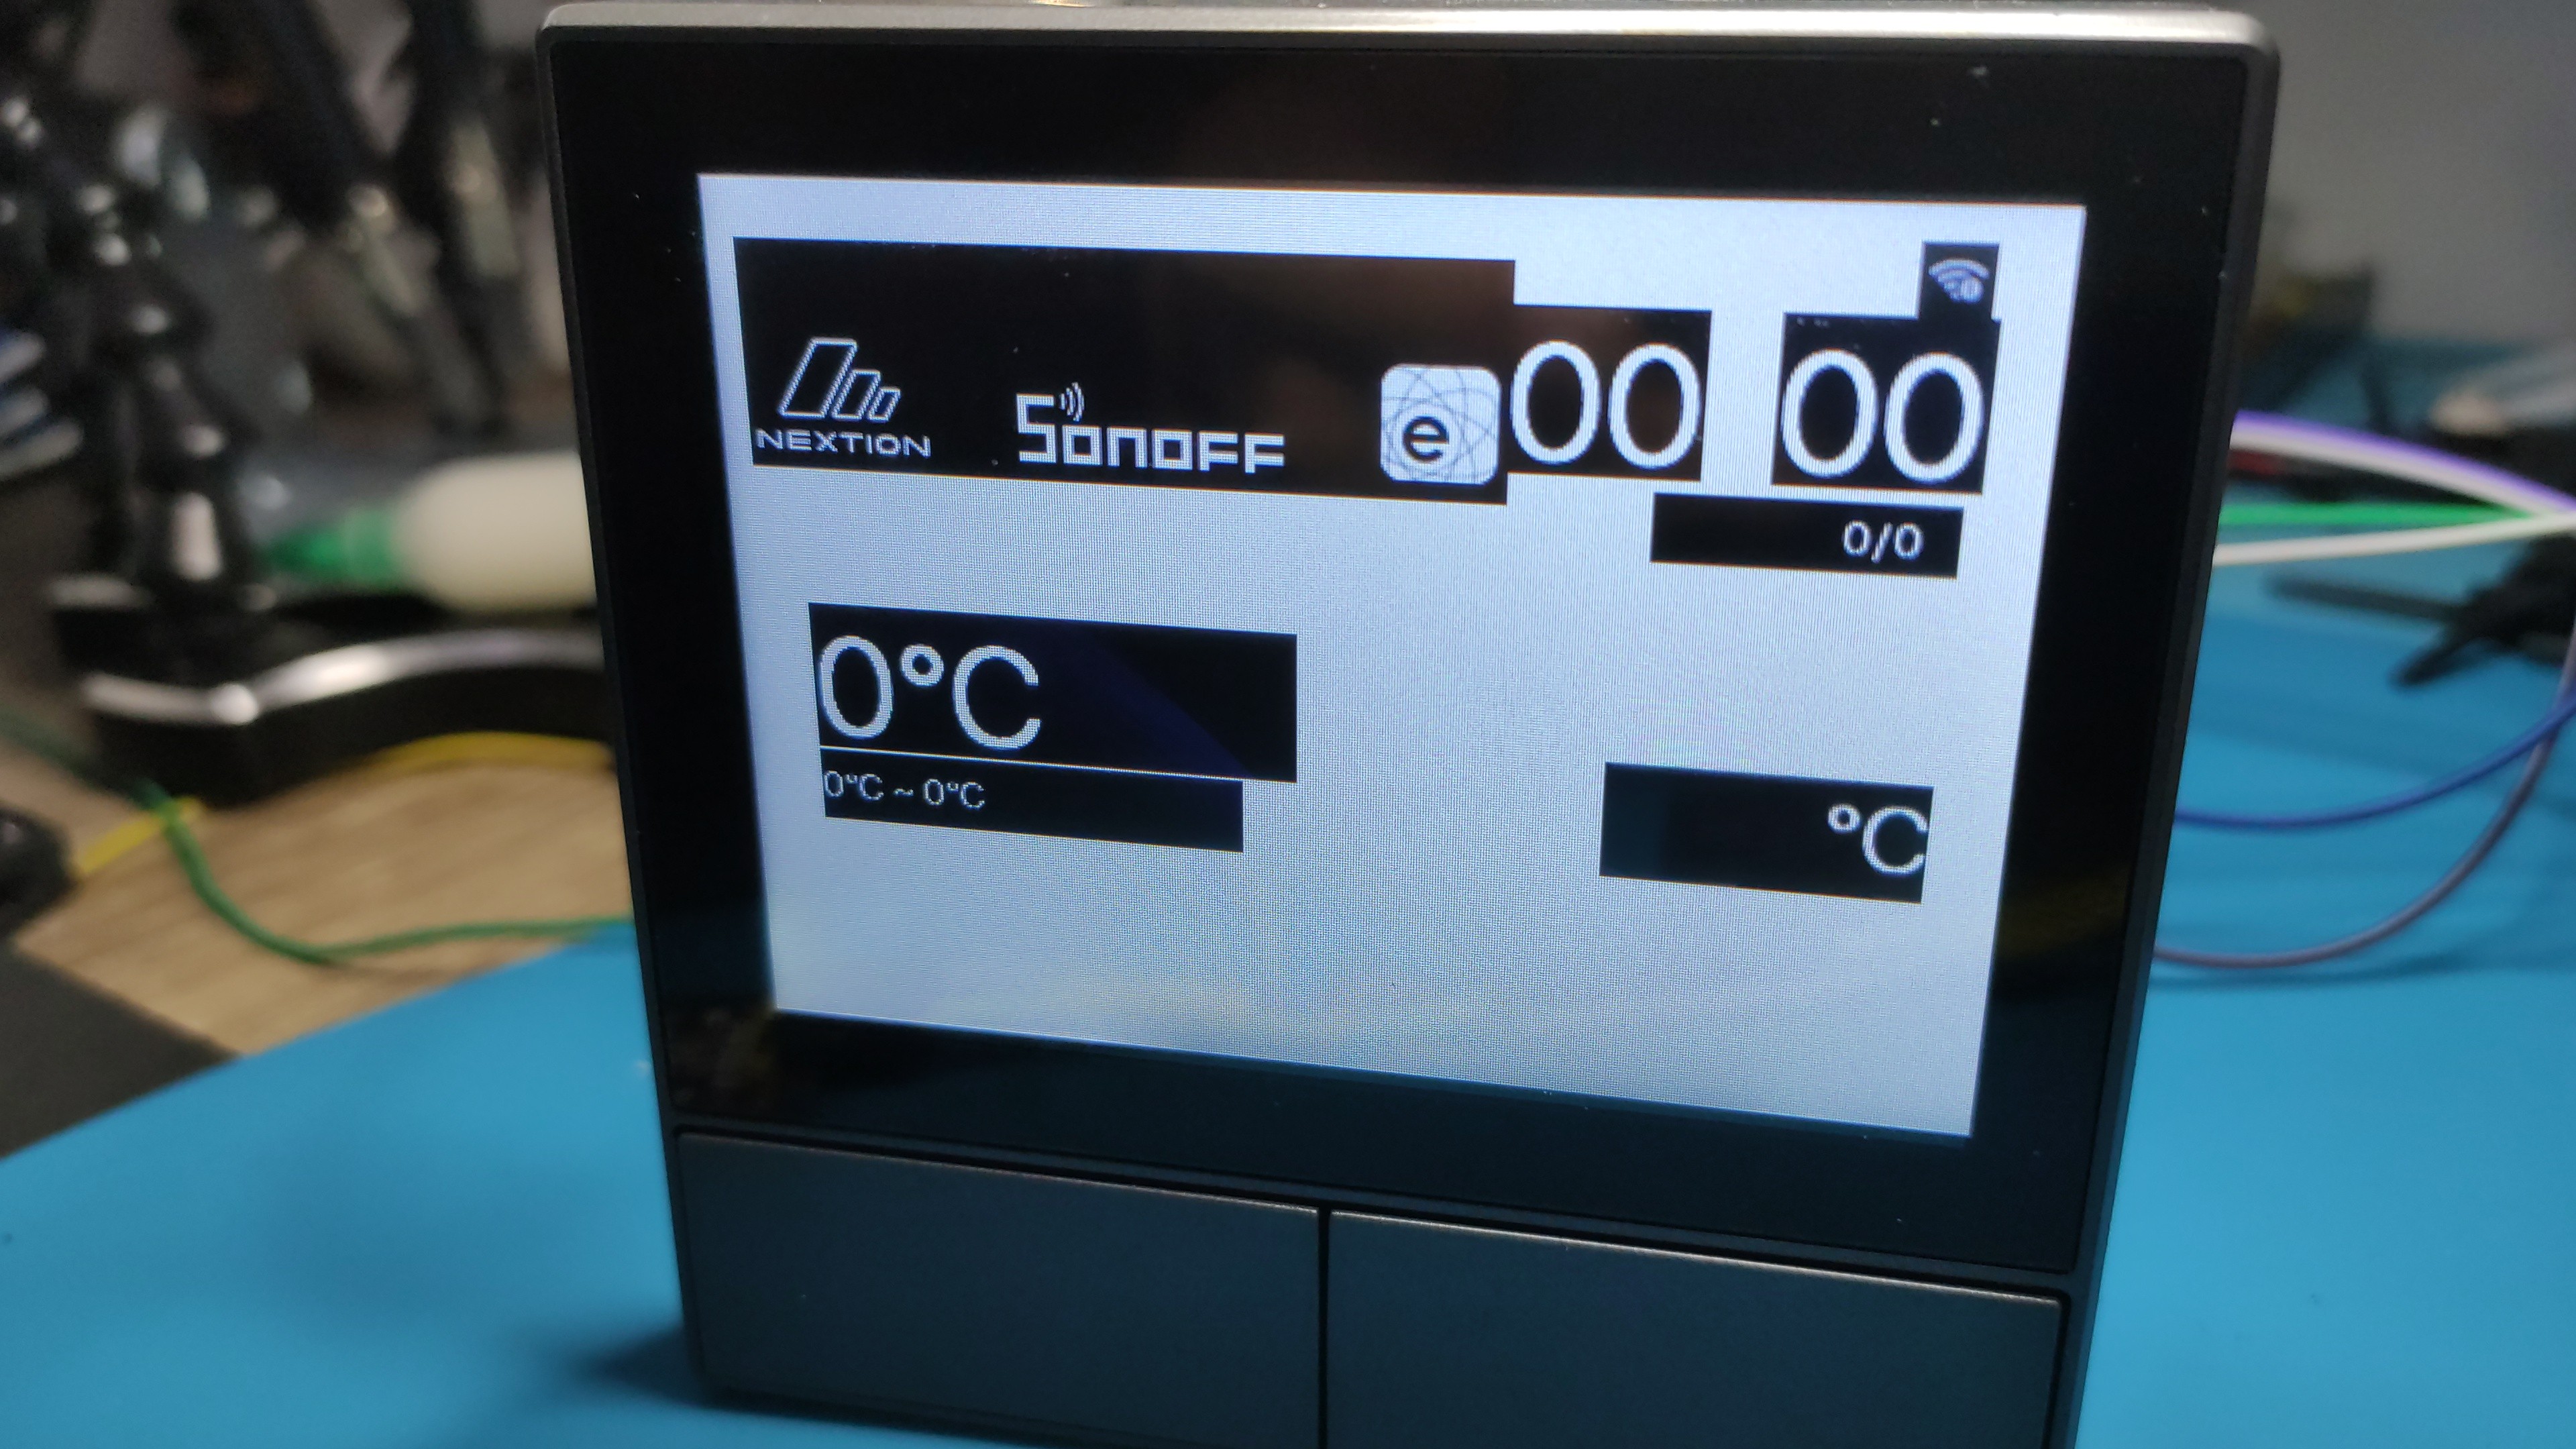
Device successfully boots into Tasmota but the screen is blank. Well need to solve that first. Sonoff did release the pinout for NSPanel and on the list was screen reset which might be responsible for that. I configured it as Relay1 and after a reset I was greeted with the boot animation. Flipping the relay to ON turns the screen off and vice versa.

Next I set GPIO16 and GPIO17 as SerBr TX and SerBr Rx, set SBaudRate to 115200 and issue:
SSerialSend5 55AA8017007B227175657279496E666F223A2276657273696F6E227D846C
to query screen for information and I get the hex response back. I randomly try other commands and I notice the screen does respond to some of them and changes the values.
Testing everything
Now I have to figure out what can I remove from commands for them to still be valid. For that I’d need to generate my own hex commands. While its possible doing it manually with the help of ascii to hex online converters and the CRC calculator I knew it would be easier if there was a script of some sort. The problem in all that is that I don’t know how to code so better learn that first. After a couple of days and many questions and advices from skillful coders I had a Python script that will convert the JSON input into a complete NSPanel command in hex.
What follows is a tedious process of trying a lot of combinations in order to find out which values work and which don’t. This way I found out all the possible weather icons and some bugs or features. For example, setting the rssiLevel to a number higher than 4 will use some other picture element instead of the Wi-Fi icon and draw it in its location. You can stack quite a few of them and make a real mess.
All of the finding were painstakingly recorded in the spreadsheet. I had a lot of control over the screen elements but was facing a bit of a problem.
After a command to draw a widget I completely lost the ability to swipe between the screens. When I send the command while on the widget screen I can draw them and use them as with the original firmware. I had to return to the logic analyzer capture logs to spot a pattern. It didn’t take long to realize the original firmware was sending eights commands at once, once for each widget. If a widget wasn’t active in app it sent a delete widget command.
Trying to send 8 commands at once worked and now I’m back to trying out all the combination to discover all possible widget types. Some 50ish numbers later I was left with 8 possible widgets of three types: device, group and scene.
Nextion mode
Fairly satisfied with everything found so far it was time to try standard Nextion Instruction Set. Referencing HMI Upload Protocol I converted the init message DRAKJHSUYDGBNCJHGJKSHBDNÿÿÿconnectÿÿÿÿÿconnectÿÿÿ to hex and fired it off.
The screen returned comok 2,30614-0,NX4832F035_011C,48,61744,16643401829EF850,16777216 and Nextion Discord denizens told me that’s a good sign. Its a string identifying the screen type and that it’s ready to receive HMI Project files.
I tried a few Nextion commands from the Instruction Set with interesting finds.
Very powerful but while using Nextion mode, the NSPanel mode commands do not work. So its one or the other or some way to switch between the two fast.
The screen supports the entire Nextion set and its possible to draw all the images and change all the values, you just need to guess correctly which one is which. Luckily, MaxZ from, again, Unofficial Nextion Discord adapted one of his Python scripts to extract a lot of information about all the pages and objects.
First I had to disable the ESP32 by grounding GPIO0, then keep the FSP RST pin high by connecting it to 3.3V. Connected my CH340G serial to USB adapter to TX and RX and ran the script. Entire output is available in the GitHub.
Sonoff NSPanel is available through Itead store.
All in all, a plethora of options and possible avenues with this device. Now to code all of that into a Tasmota driver…
Running Tasmota
Visit the Tasmota configuration page for instructions on flashing and running Tasmota on the NSPanel

Explore more like this
Replace Tuya CB2L, WB2L, BW2L Modules with ESP
Replace Tuya TYWE2L, CB2L, WB2L, WR2L, WBR2L, BW2L and similar Wi-Fi modules with an Espressif ESP32 or ESP8266 light module.

Comments