Sideload Apps on Tuya T6E, S6E and S8E Android Smart Home Panels
Summary
Guide on how to sideload apps to Tuya based T6E, S6E and S8E Android 8.1 smart home touch panels or CCS panels.
Shopping links in this article are affiliate links and I earn a small commission when you buy through them
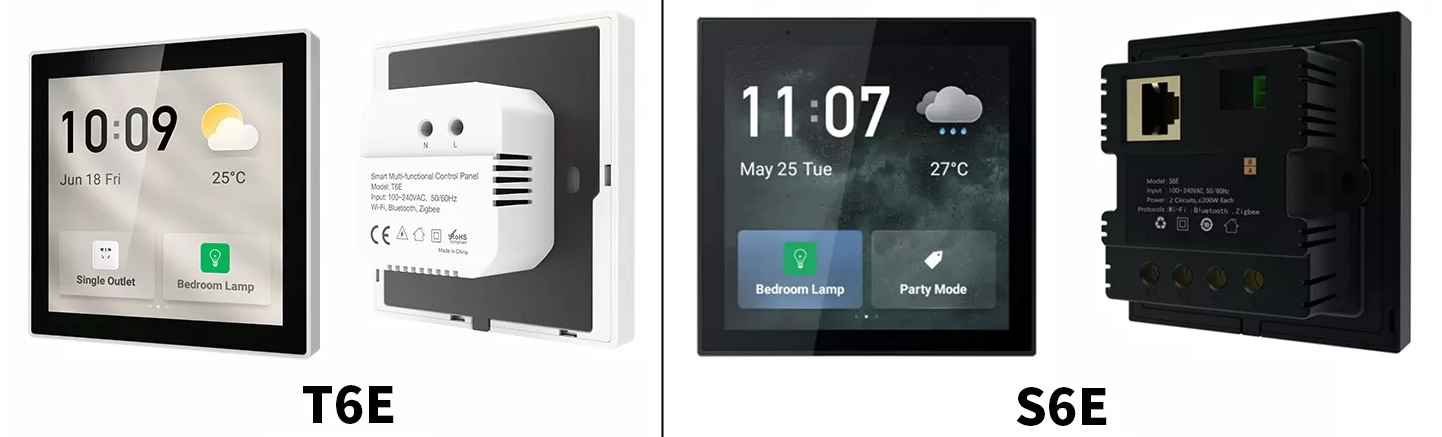
This guide applies to touch control panels such as:
- discontinued and replaced with an “Alexa” version that has completely different hardware
Disassembly
Remove the panel from the base. Unscrew the two screws on the back then carefully pry away the back plate starting at this point.
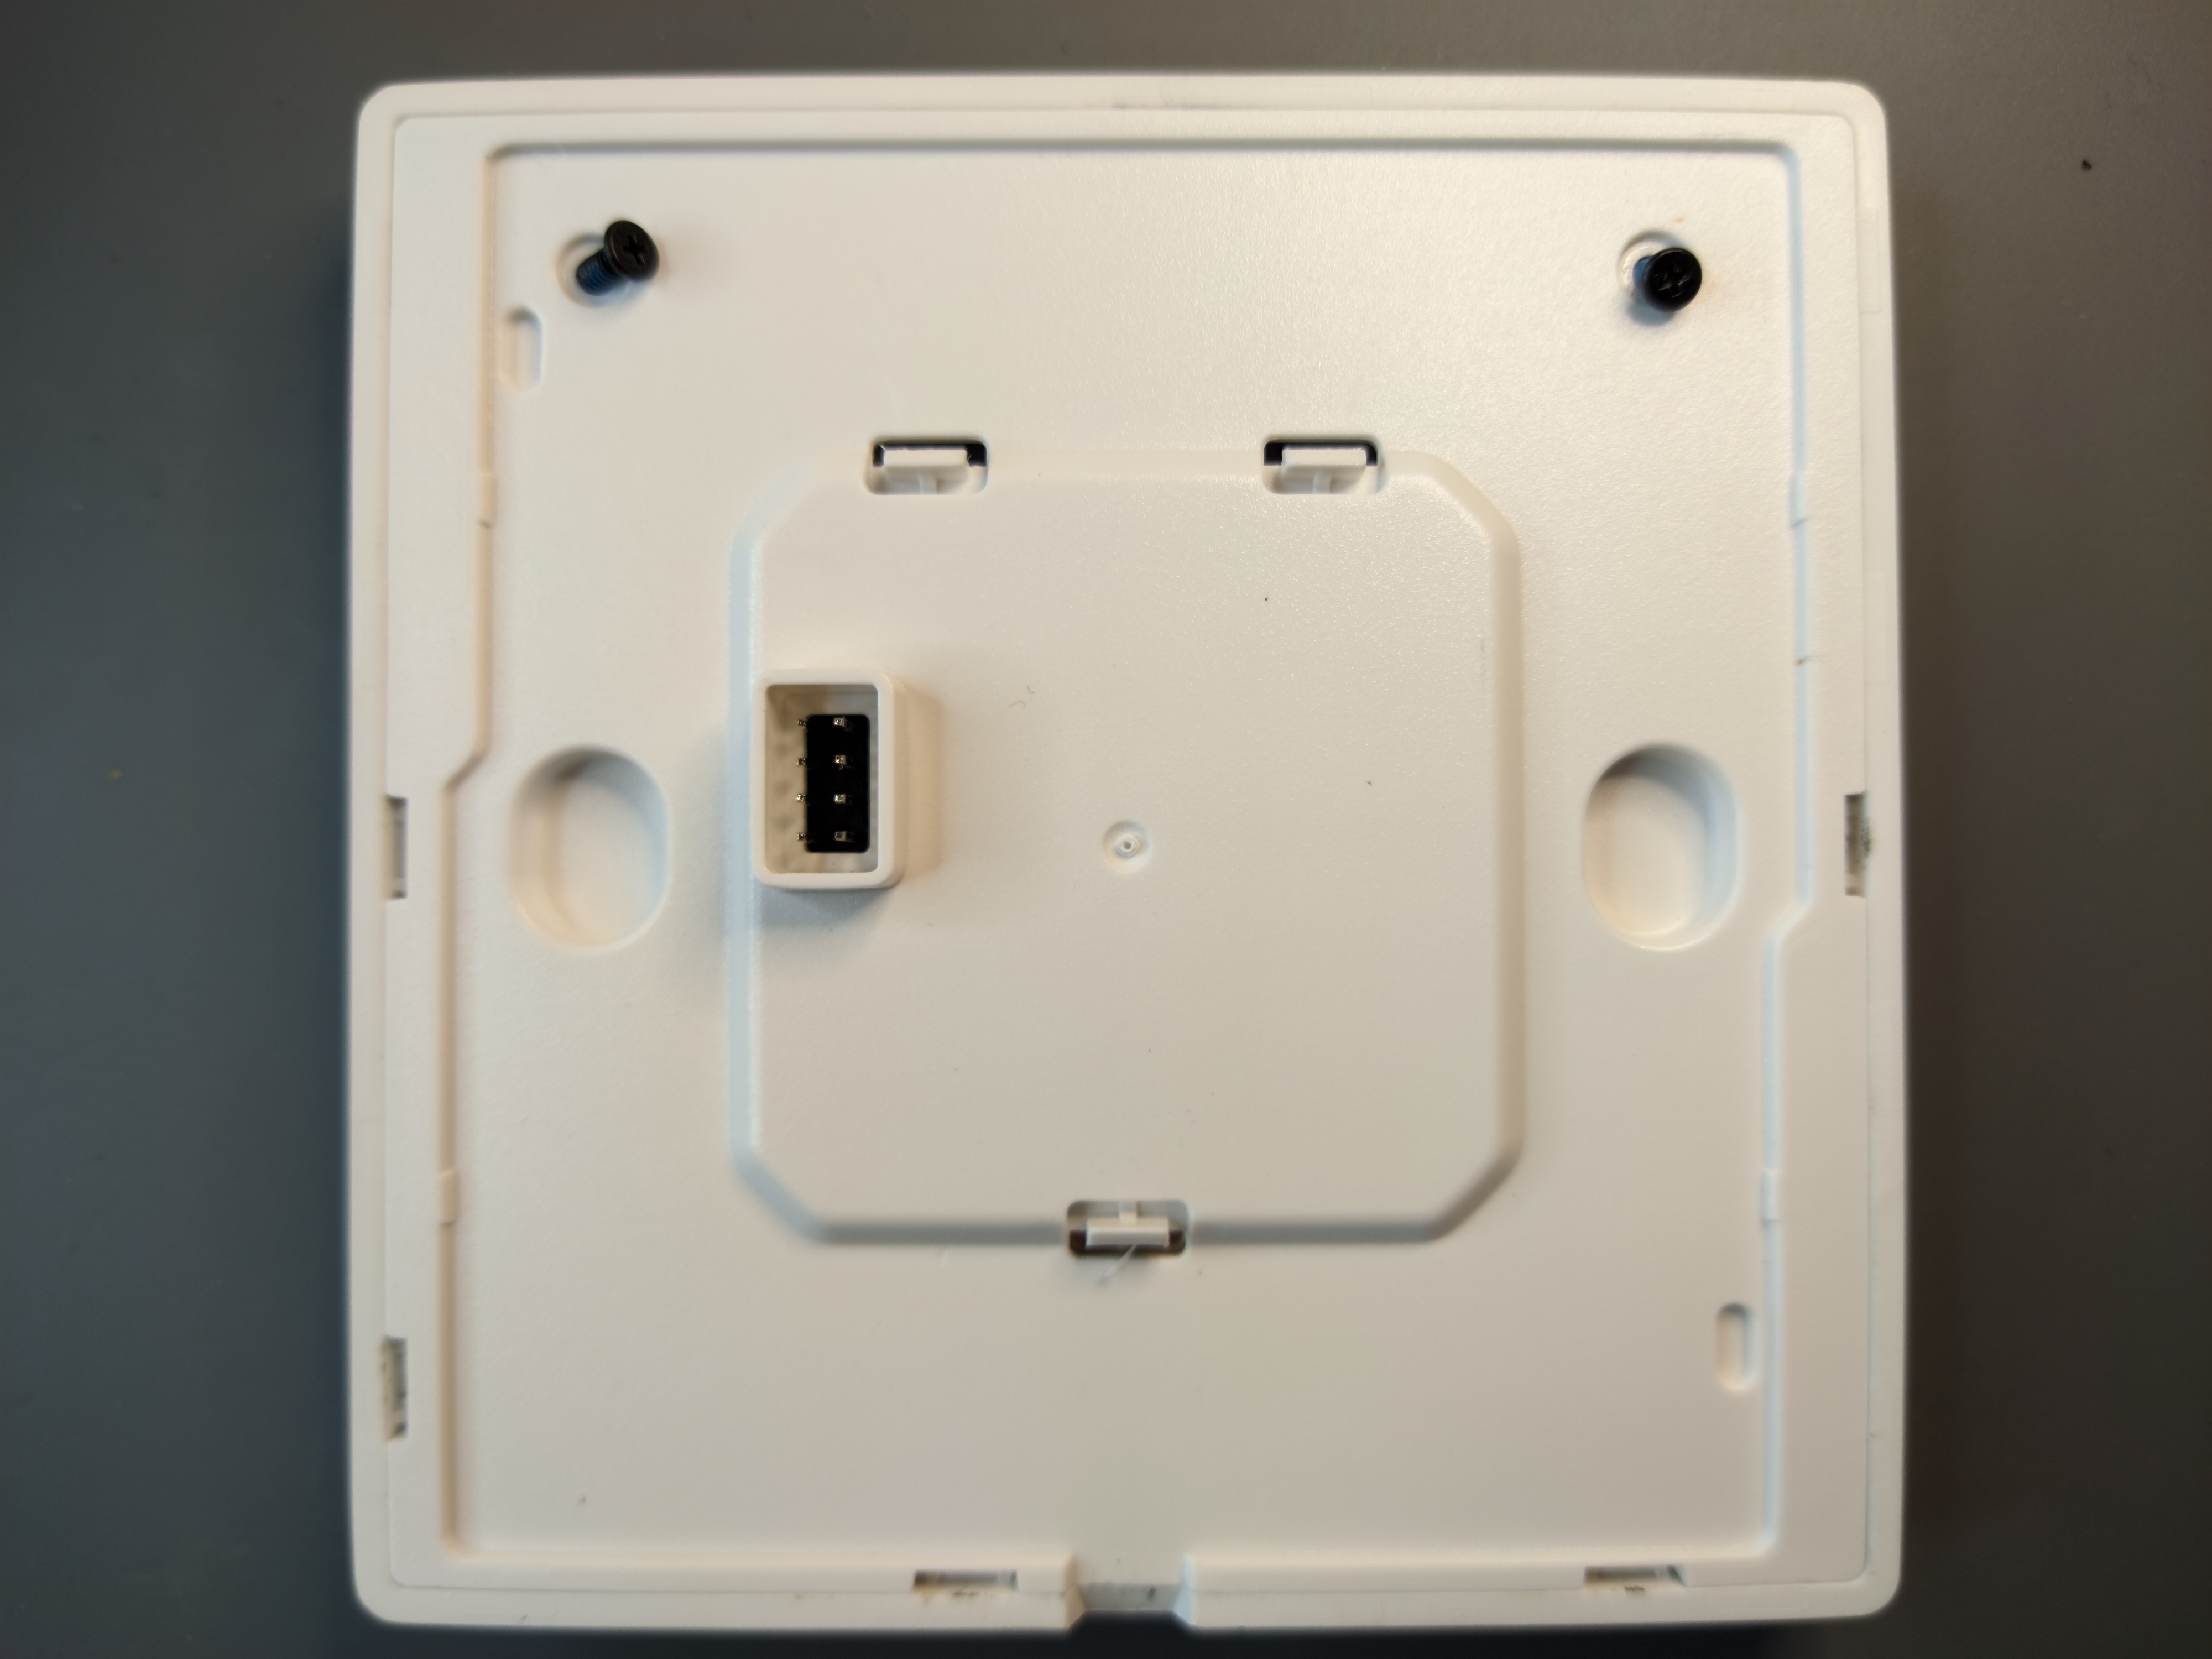
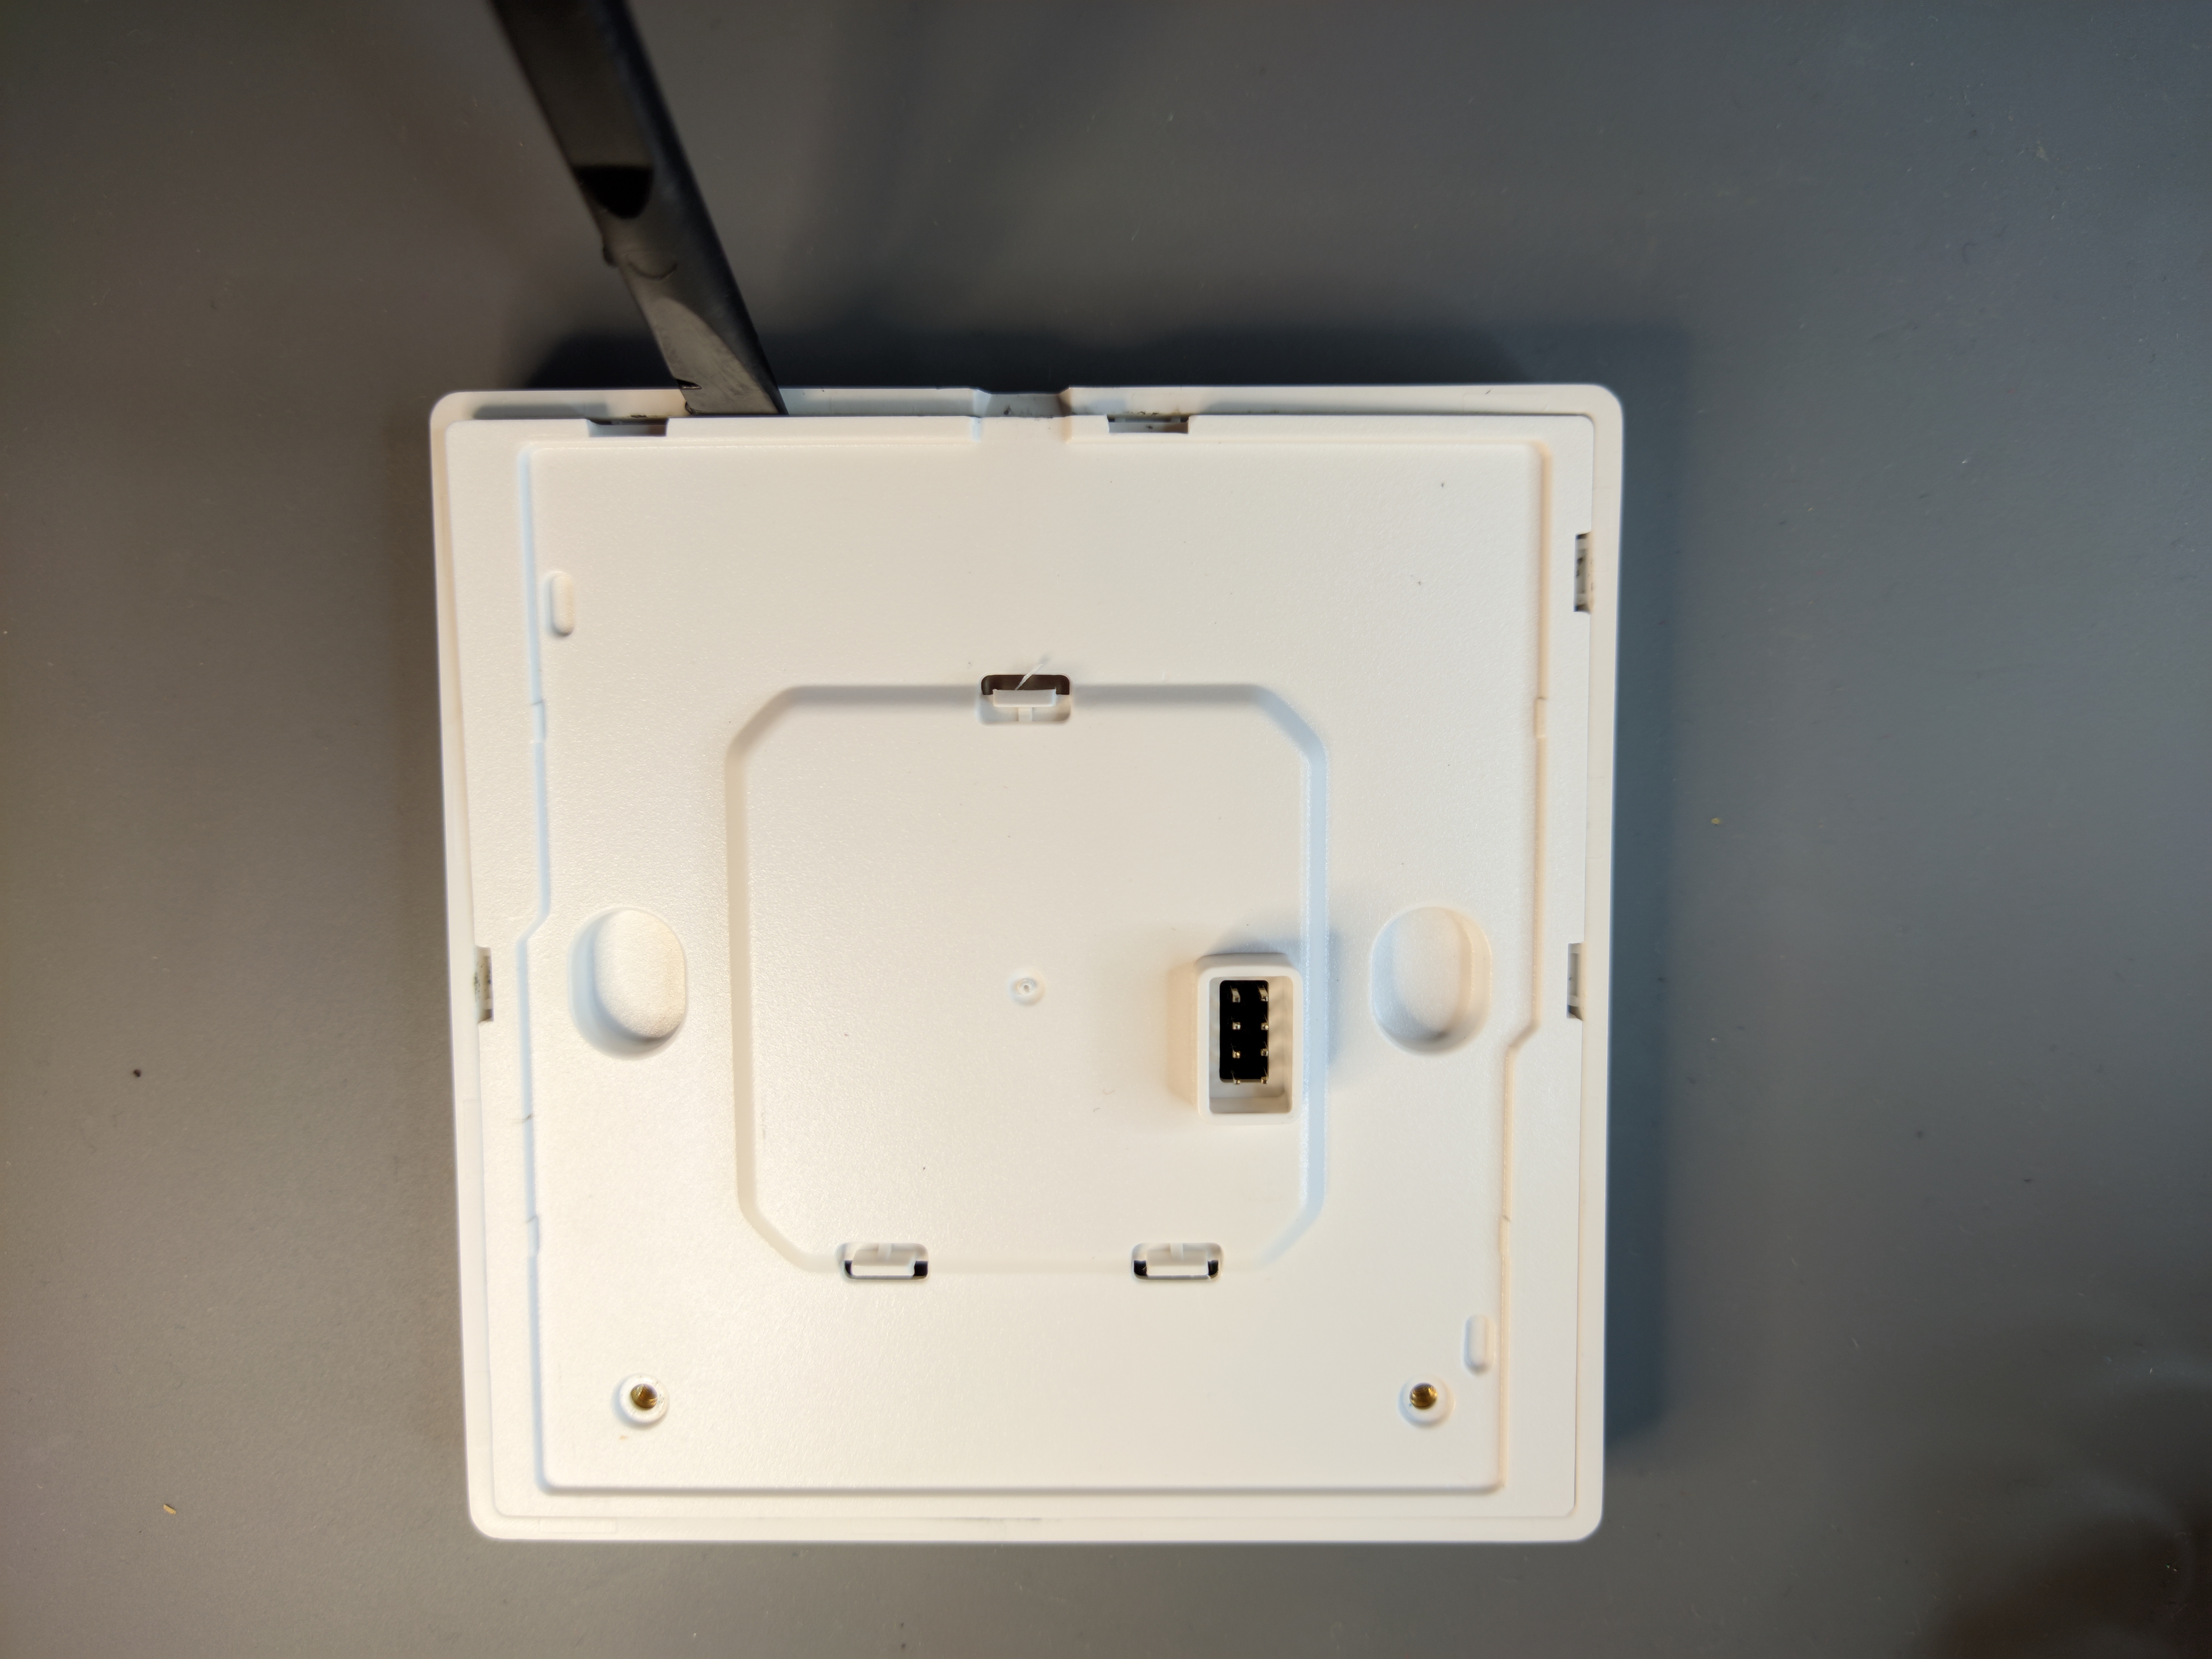
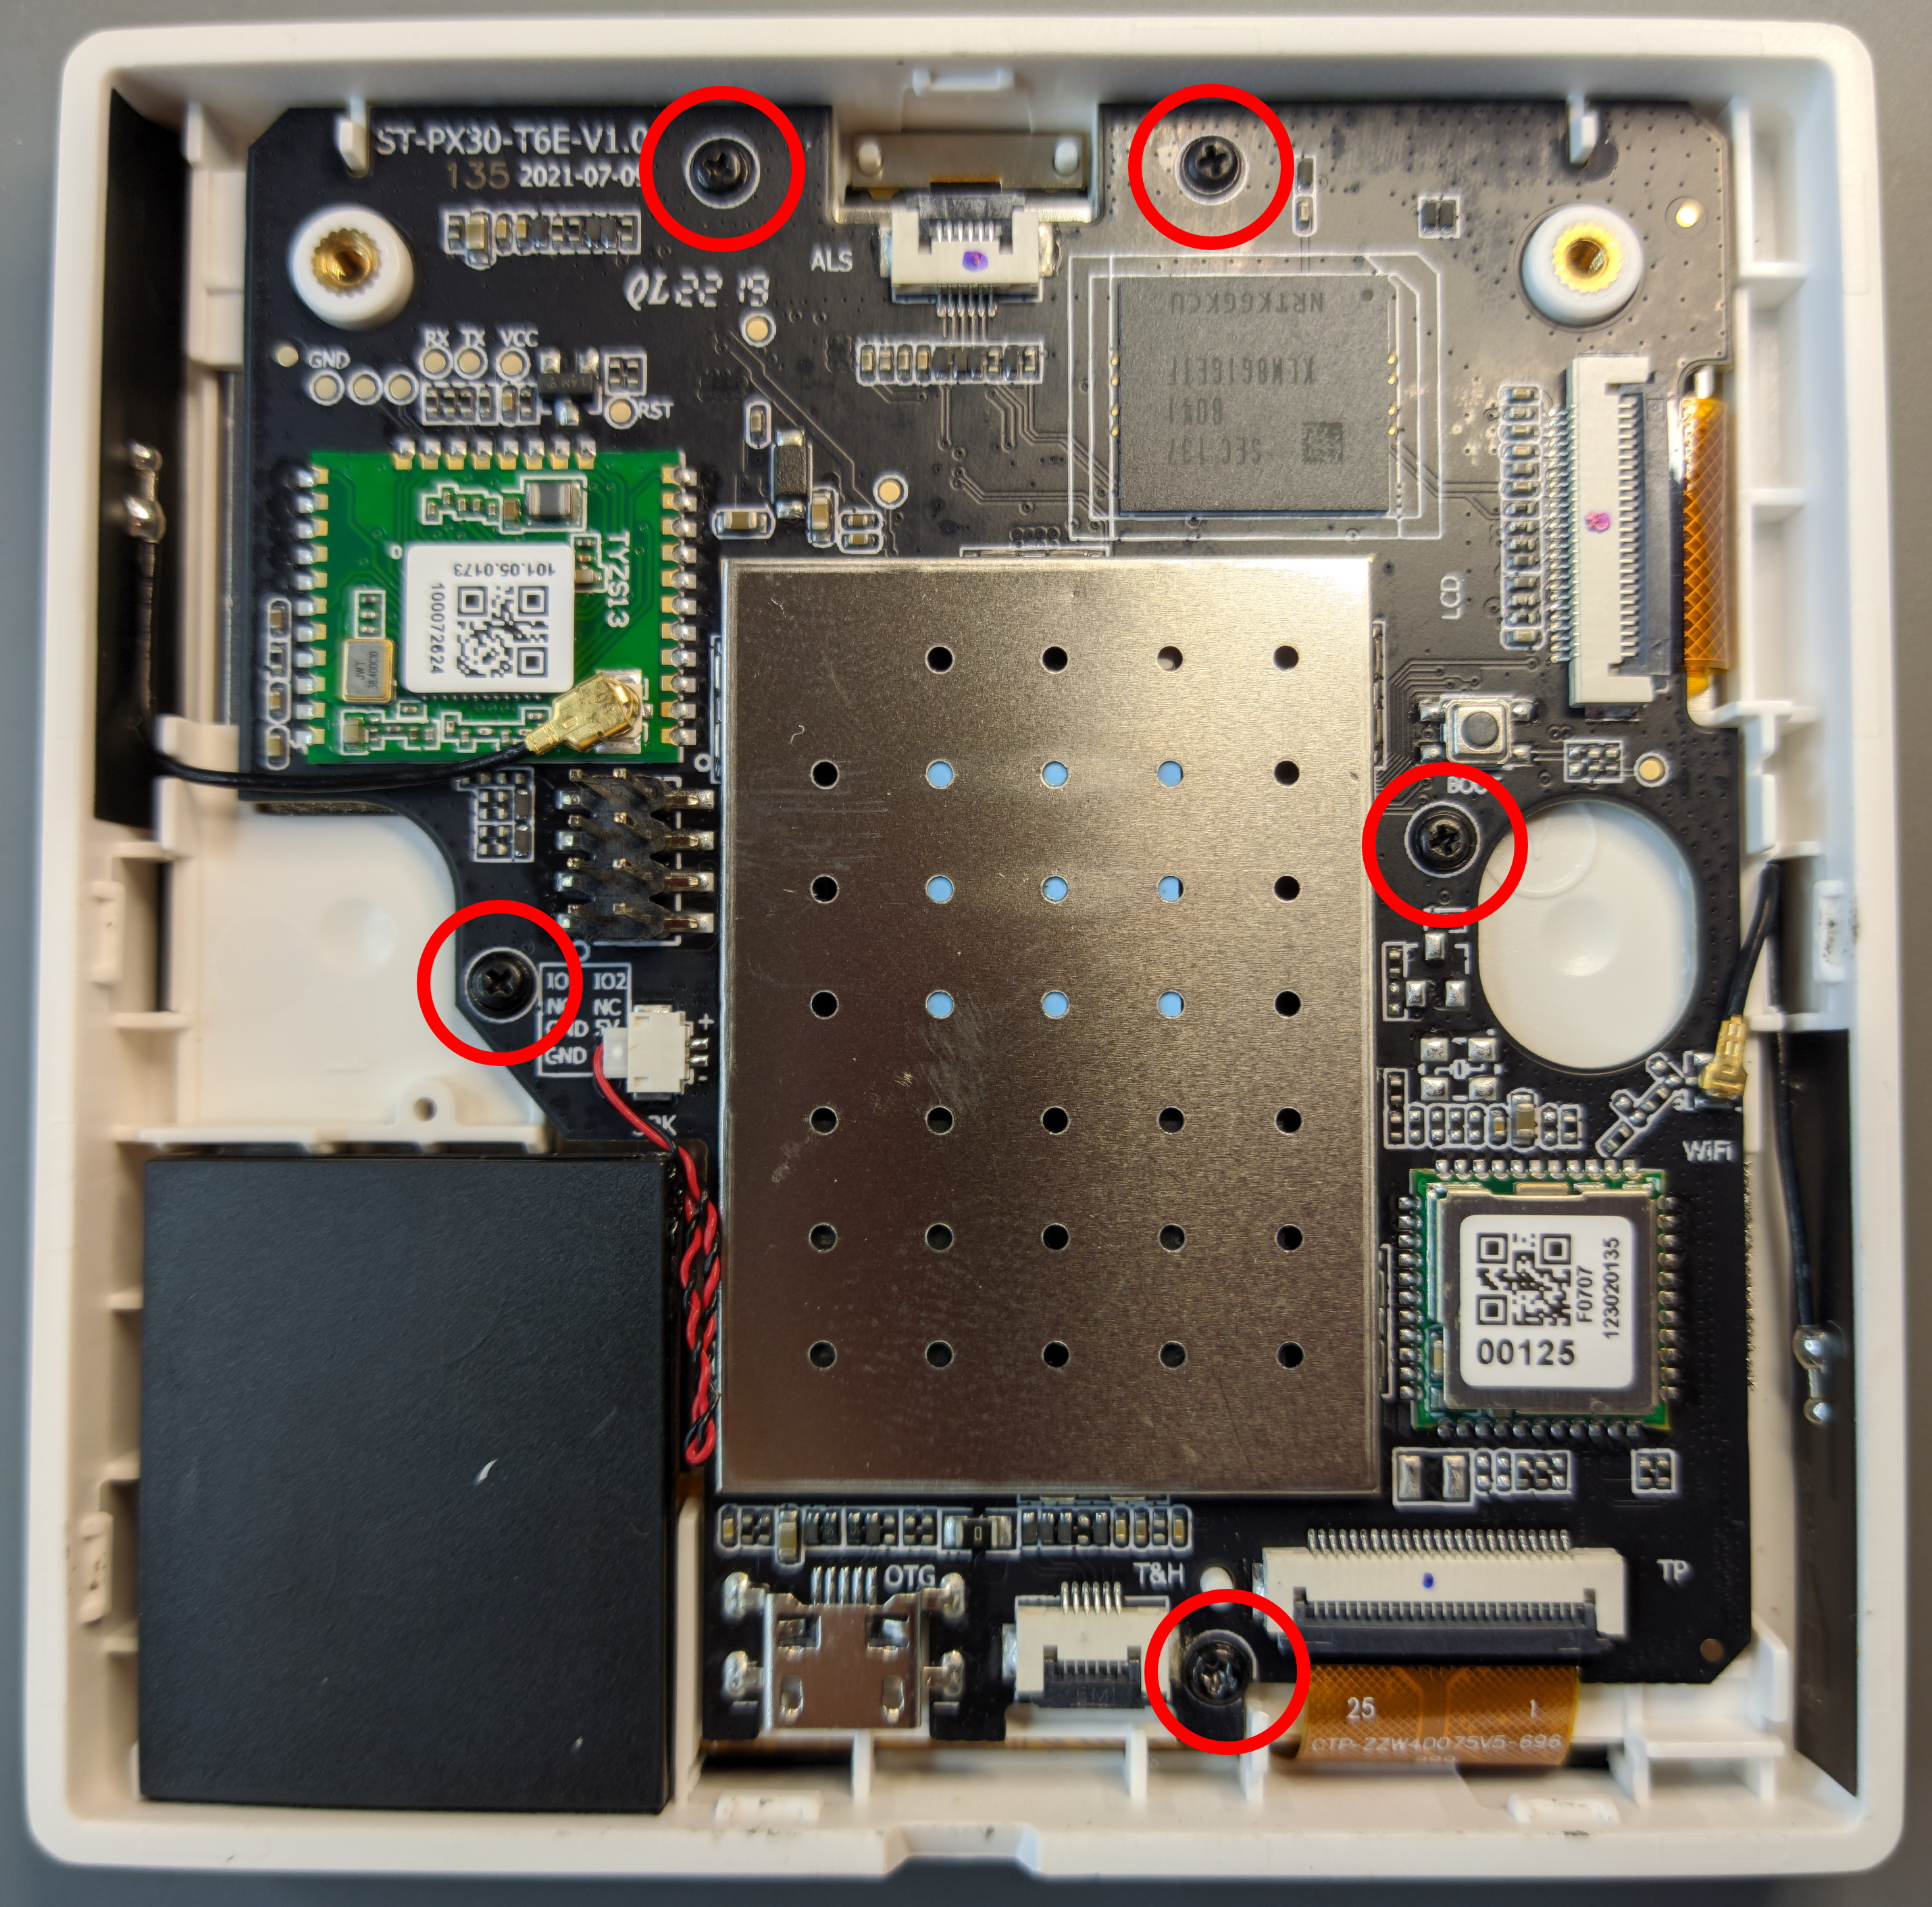
Now unscrew the tiny screws circled. Remove the tape from the touch panel connector and disconnect the connector to lift up the PCB.
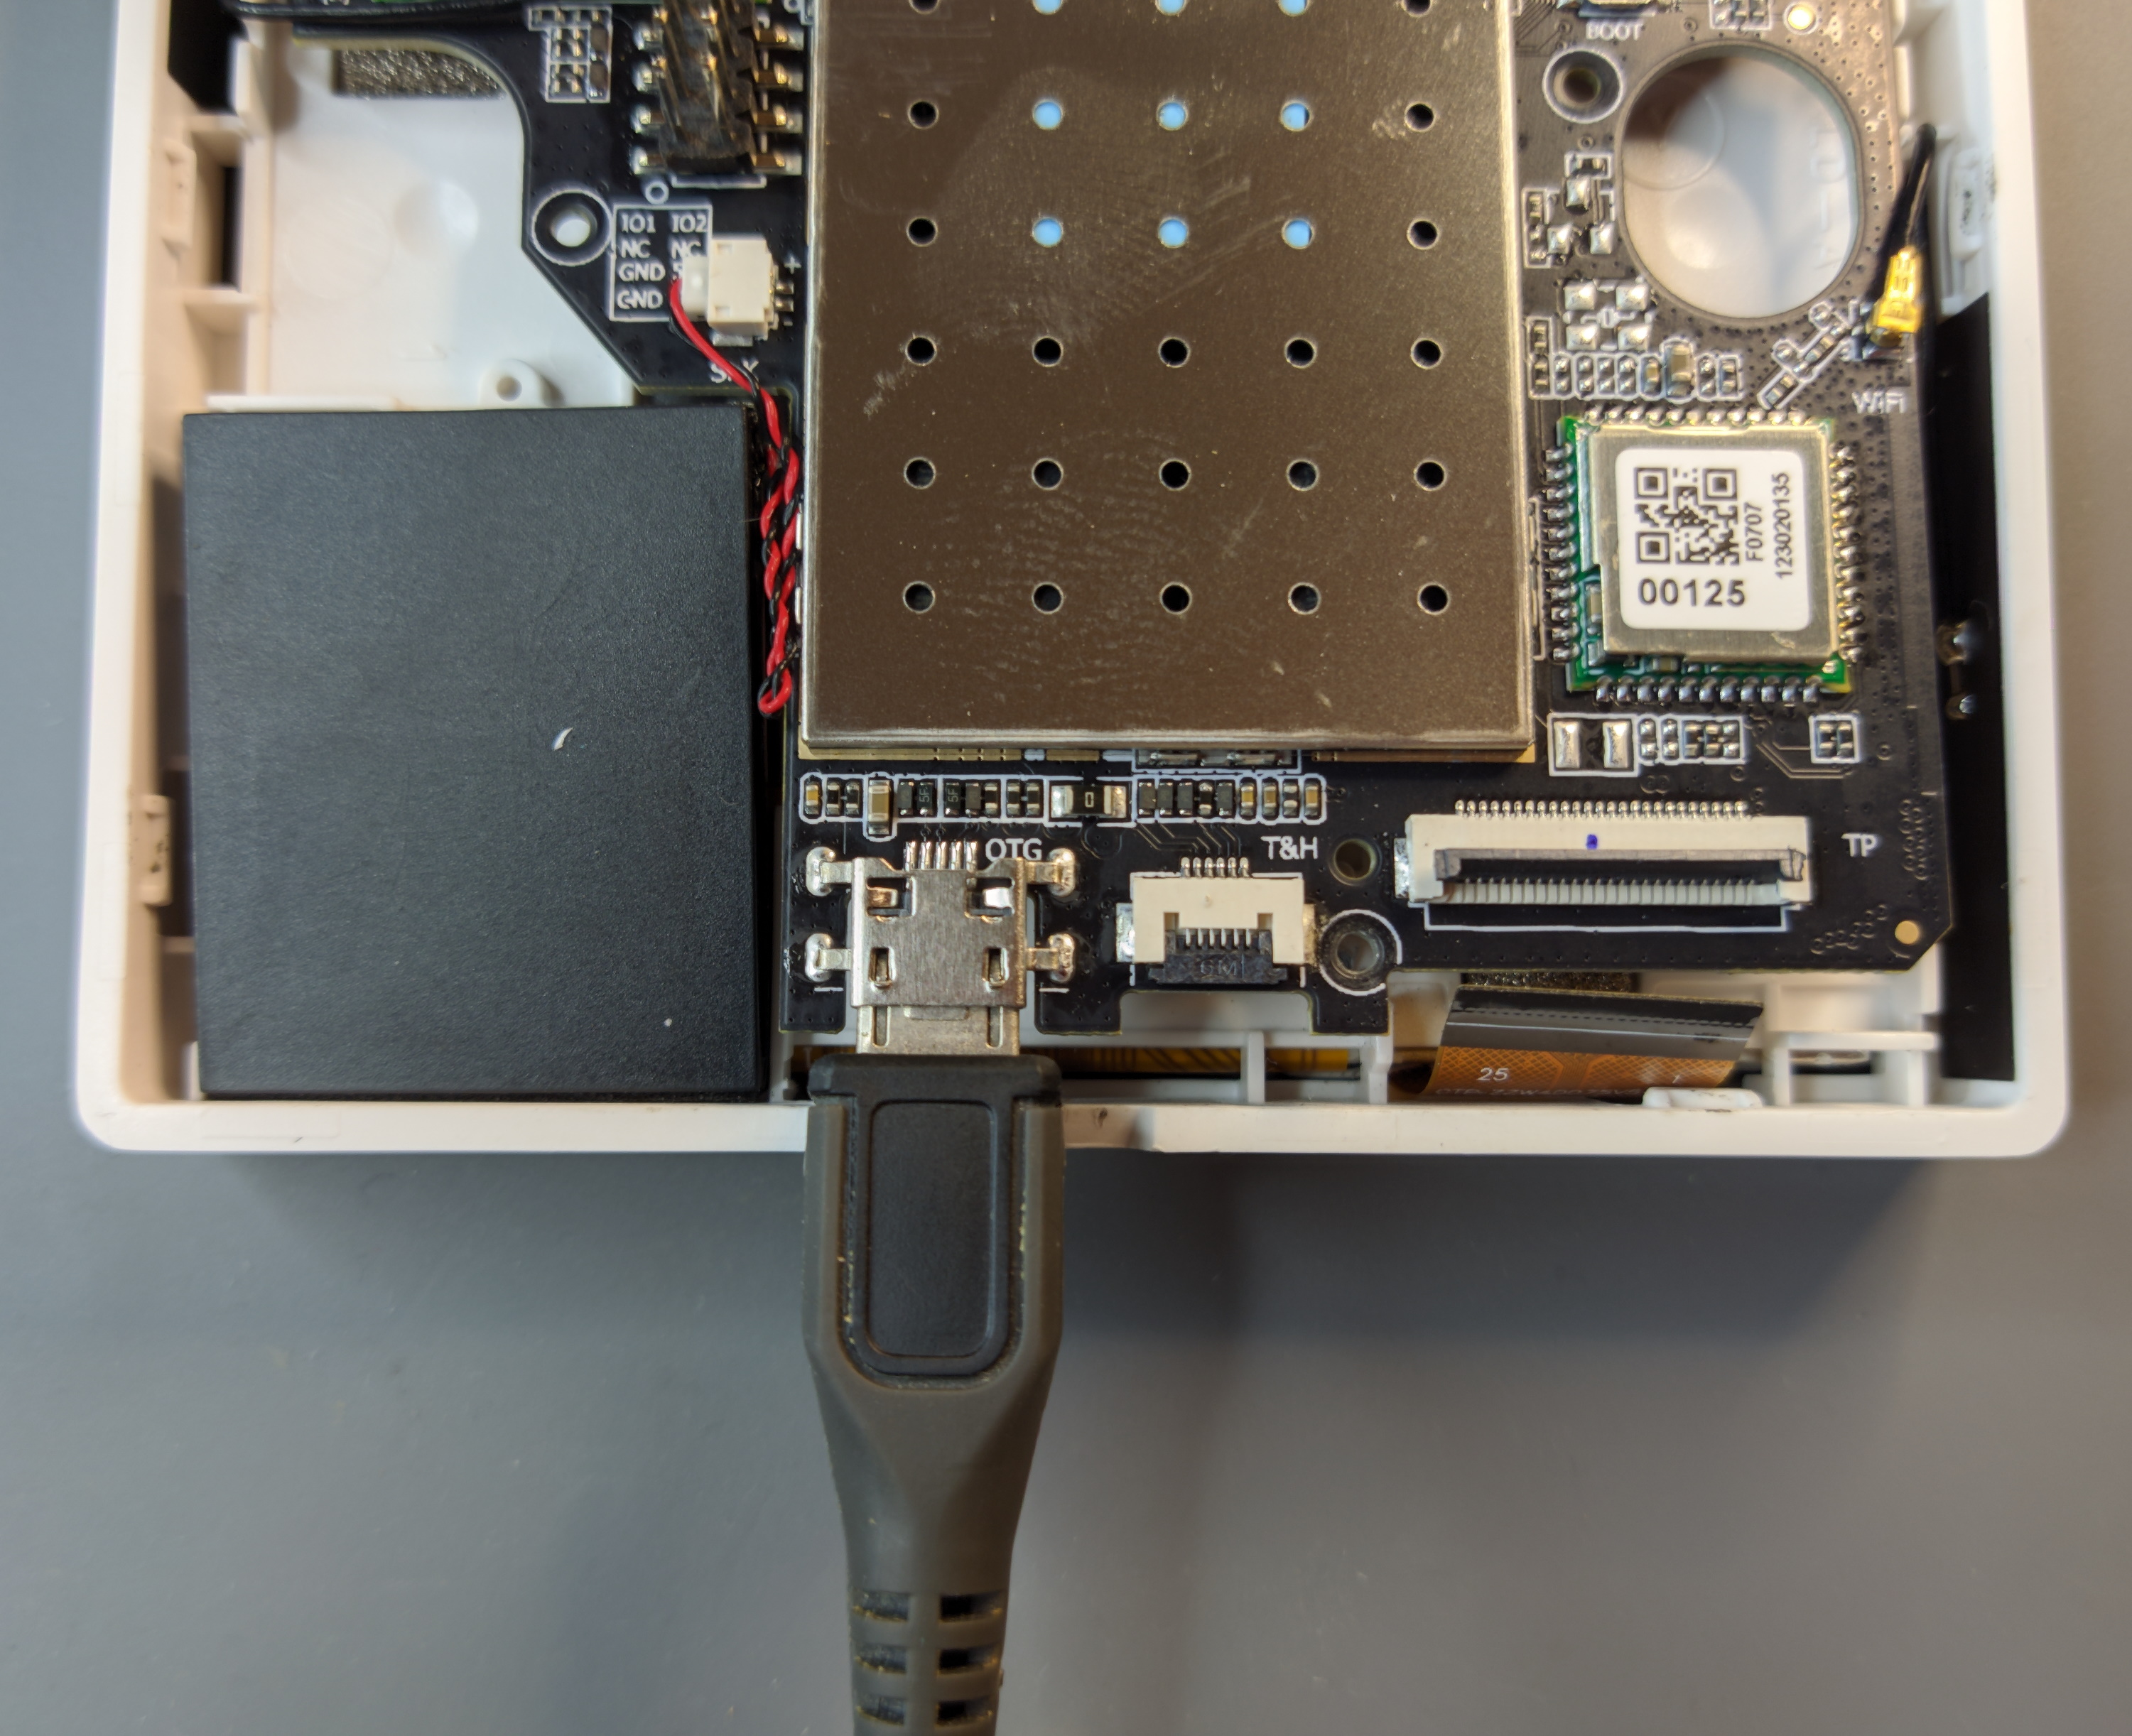
Connect the data USB cable from your computer to the OTG port.
S8E
S8E panel has access to the USB port at the bottom and doesn’t require disassembly for this.

Install ADB and Drivers
Download ADB drivers and install.
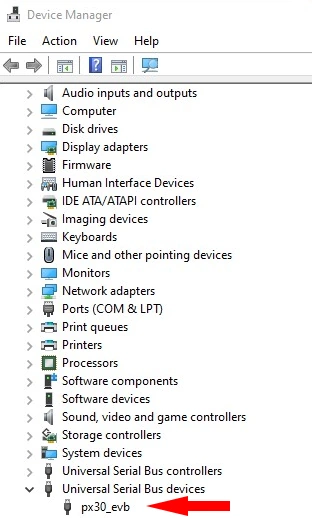
When the panel is connected to your computer via USB you should have a new device in Device Manager.
Download the Android platform-tools and unzip the contents to a folder. Open a Command Prompt
and navigate to that folder. In my case it is located at D:\adb
Get ADB Access
This command will list all the connected devices with extra information.
adb devices -l
Output:
D:\adb>adb devices -l
List of devices attached
F070712302013500125    device product:px30_evb model:px30_evb device:px30_evb transport_id:8
Run the following command to make ADB over TCP permanent:
adb shell setprop persist.adb.tcp.port 5555
To set the panel to listen for a TCP/IP connection on port 5555 run:
adb tcpip 5555
Output:
D:\adb>adb tcpip 5555
restarting in TCP mode port: 5555
Now you can connect to the panel wirelessly. If you don’t know the IP address run adb shell ip -o a to find out.
Try it out while still wired to make sure everything is working.
D:\adb>adb connect 10.1.1.105
connected to 10.1.1.105:5555
Reassemble the panel and plug it into the base again. Make sure you’ve mounted the light and proximity sensor labelled “ALS” correctly. Once it boots, run:
adb connect [ip_address]
Using ADB
With ADB access you have a powerful tool at your disposal to take control of the panel. You can use to install and uninstall apps, list running processes, free memory and even gain root access.
Here’s a list of ADB commands you can use on your panel.
A useful one is a simulated press of the Home button with
adb shell input keyevent 3
You can get root access with su while in ADB shell.
Push a file to the panel:
D:\adb>adb push wallpaper.jpg /sdcard/Download/wallpaper.jpg
wallpaper.jpg: 1 file pushed, 0 skipped. 18.5 MB/s (52101 bytes in 0.003s)
Useful ADB commands:
adb input keyevent 26- simulate power button press, used to wake device or put it to sleepadb input keyevent 4- simulate back key pressadb input keyevent 3- simulate home key pressadb input keyboard text "your_text"- send text as if typing on screen keyboard, useful for long passwordsadb shell cmd statusbar expand-notifications- show notifications menuadb shell dumpsys meminfo- show memory usage and all the running apps
Install a Launcher
To make working with your panel easier you need to install a standard launcher. I’ve found the smallest launcher possible (only 7kb), which doesn’t take up a lot of precious device memory.
Download the Ultra Small Launcher to the ADB folder and install it with:
adb install ultra-small-launcher.apk
Simulate a Home key press.
adb shell input keyevent 3
You will be offered a selection of launchers, set “Launcher” as default.
Disable Tuya Panel App
The Tuya panel app is very pervasive. A swipe from the top will pull down the settings menu from the Tuya app and then you’re stuck in it again unless you use adb shell input keyevent 3. It will also load over any default launcher you set after a reboot. Best way to handle that is to disable the app completely.
Gain shell access with adb shell then switch to root with su. Disable with these two commands:
pm disable com.tuya.iotgateway.launcher
pm disable com.smartpad.fourinchneeu.smart
Output:
px30_evb:/ $ su
px30_evb:/ # pm disable com.tuya.iotgateway.launcher
Package com.tuya.iotgateway.launcher new state: disabled
px30_evb:/ # pm disable com.smartpad.fourinchneeu.smart
Package com.smartpad.fourinchneeu.smart new state: disabled
Screen Navigation
Tuya panels have removed the navigation bar from the system and I couldn’t figure out a way to restore it. As a replacement I found the J Touch app to assist with navigation.
Download J Touch and install with ADB:
adb install "J Touch_1.7.0-GP_Apkpure.apk"
Open J Touch on the panel, grant the necessary permissions and configure gestures for navigation per your preference. I set single tap for back and swipe up for home screen.
Update WebView
To run more modern apps based on WebView like Home Assistant Companion, Fully Kiosk Browser or Wallpanel you need to update WebView component.
Share with me what you’ve managed to do with it on Twitter or in comments!

Explore more like this
Replace Tuya CB2L, WB2L, BW2L Modules with ESP
Replace Tuya TYWE2L, CB2L, WB2L, WR2L, WBR2L, BW2L and similar Wi-Fi modules with an Espressif ESP32 or ESP8266 light module.
Seeed Studio Grove All-in-one Environmental Sensor with Tasmota
The Grove all-in-one environmental sensors from Seeed Studio (SEN54 and SEN55) detect various pollution indicators and can be used to monitor air quality in enclosed spaces. They’re built to easily...
Comments