IKEA Vindriktning air quality sensor running Tasmota
IKEA Vindriktning is an affordable air quality sensor with a well designed enclosure and you can connect it to your smart home using Tasmota and some soldering.
Links in this article marked with a * are affiliate links. By purchasing through them I get a commission that helps in future projects!
Thanks to the Hypfer/esp8266-vindriktning-particle-sensor project I found out that IKEA’s new Vindriktning sensor can be connected to an ESP module. Considering it costs only 10€ I decided to get one to play around with and in the meantime Tasmota added a driver for it, perfect!
Disassembly
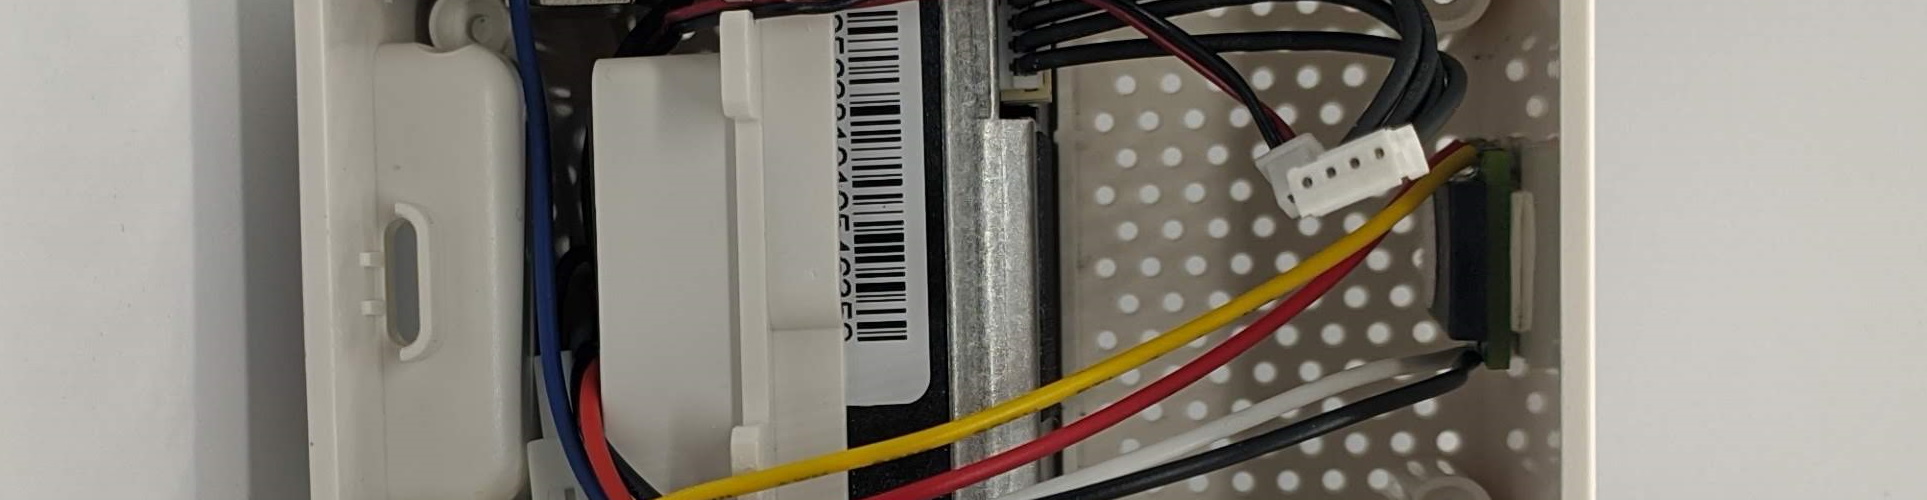
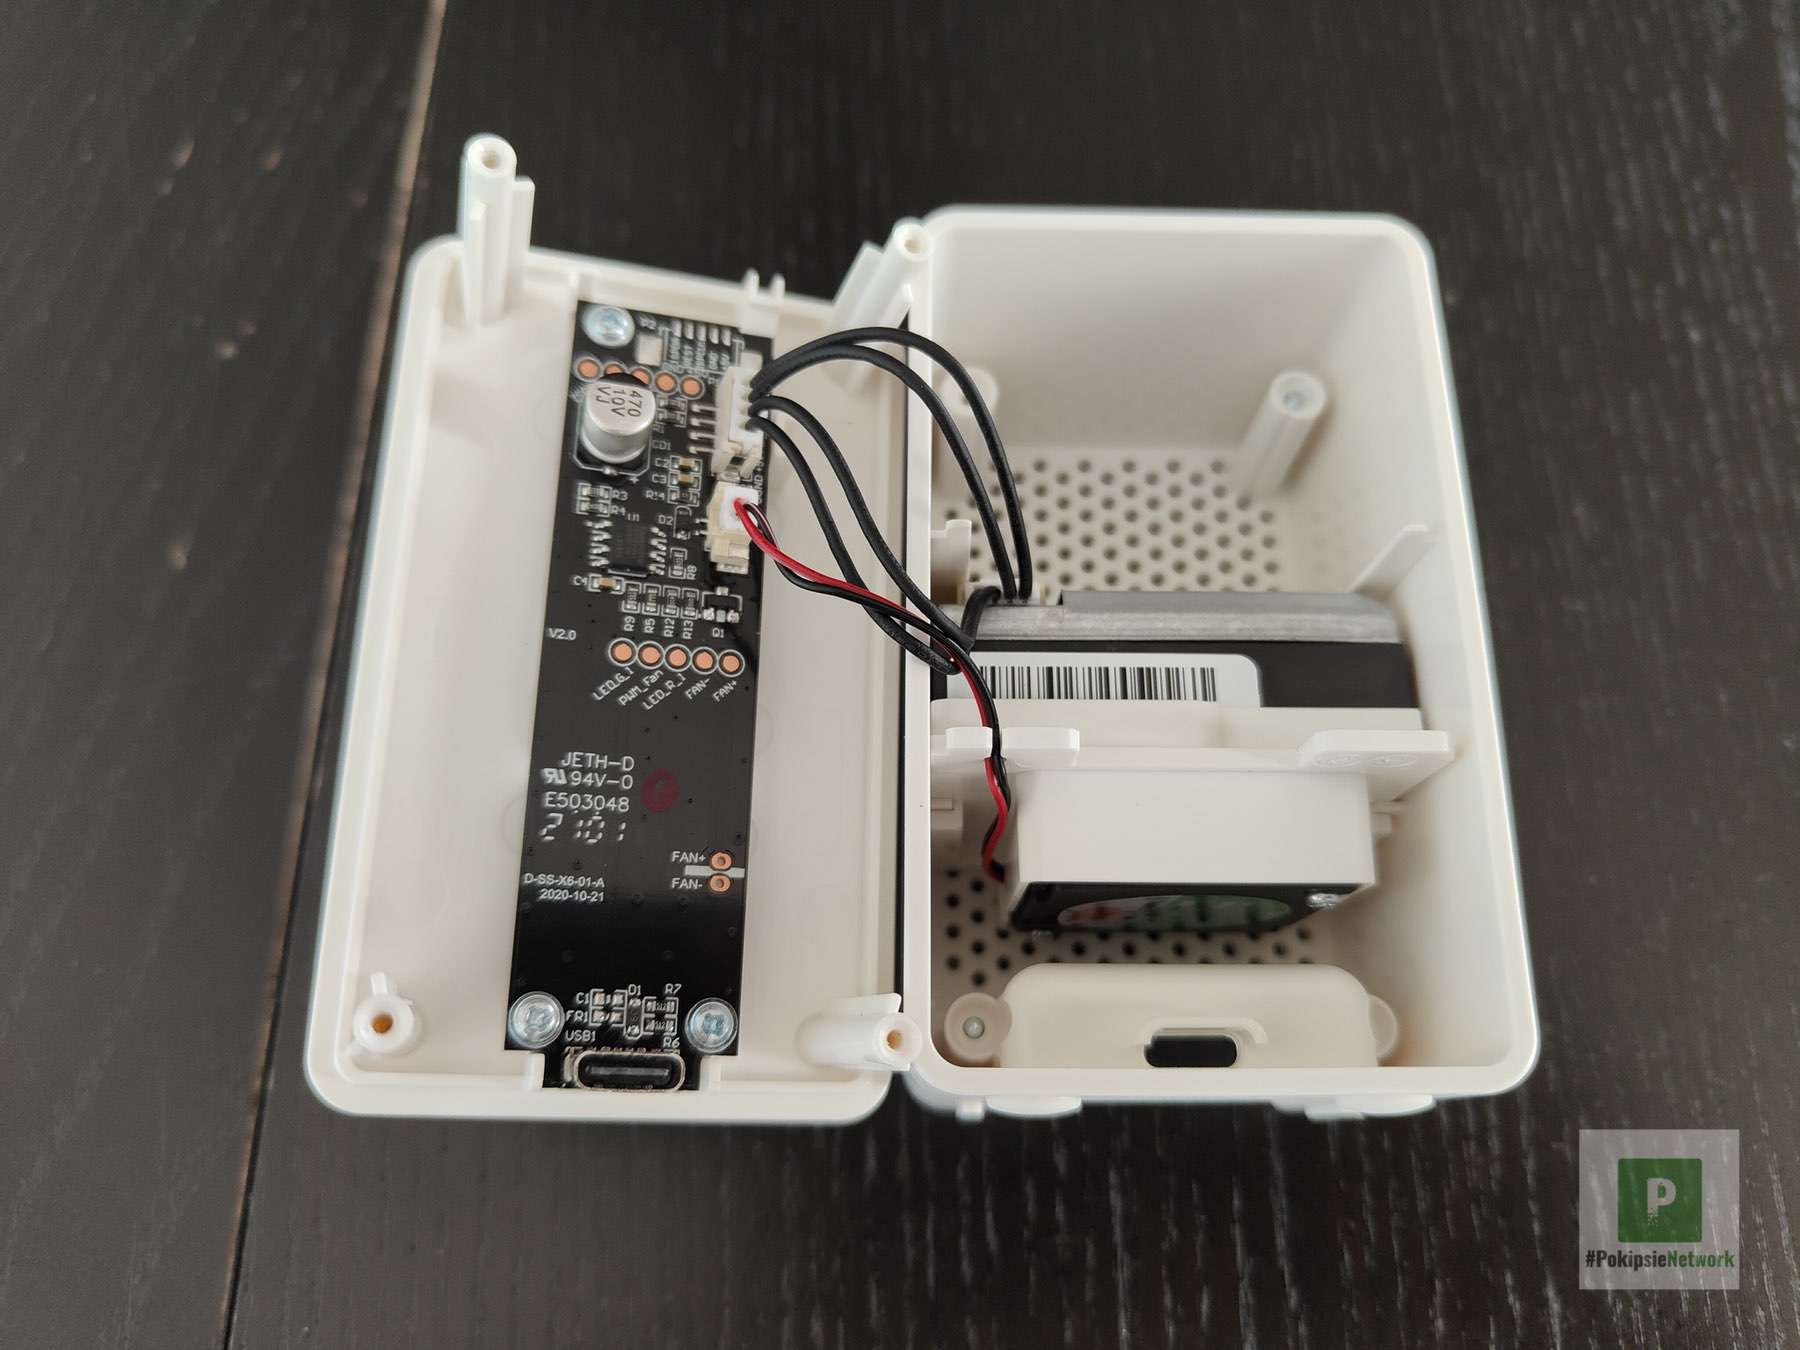
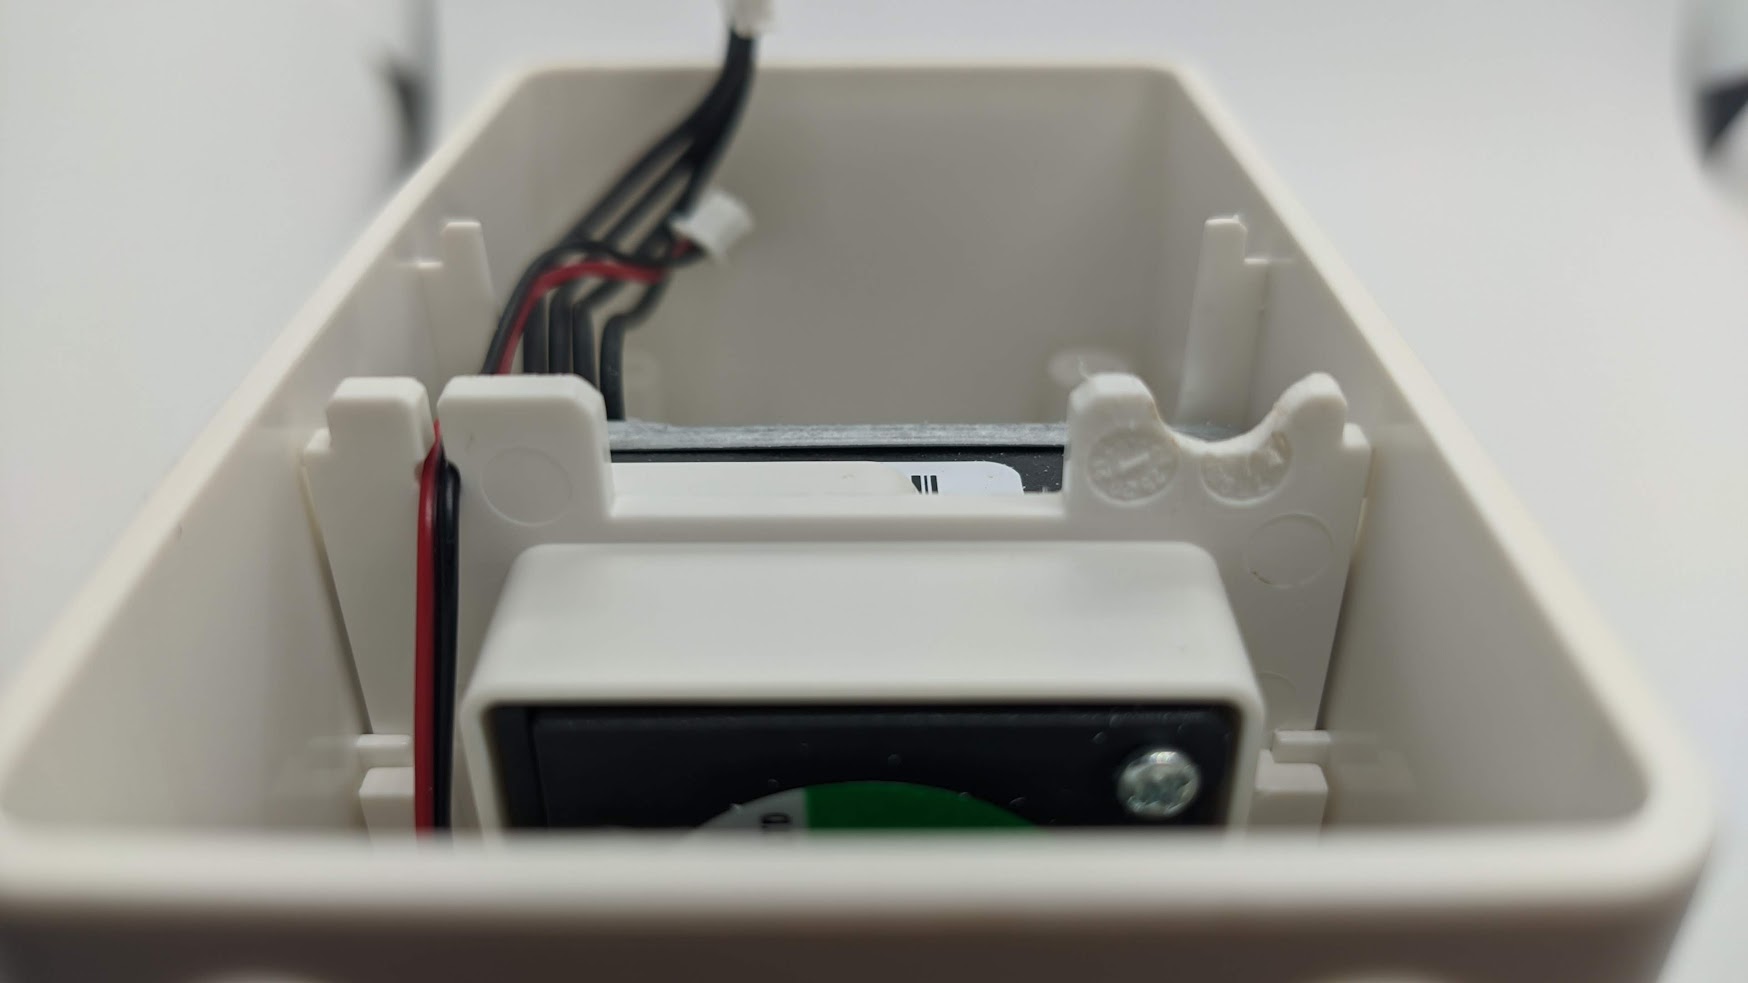
Vindriktning has a nice, unobtrusive design and its powered by USB Type C. Its very easy to open by unscrewing only 4 screws which gets you access to the PCB and the spacious internals. While the top part is very spacious I would recommend fitting the ESP8266 board in the bottom, below the fan. This will keep the airflow to the PM2.5 sensor unobstructed.
To make it smarter you will need:
- a soldering iron - a basic soldering iron is sufficient for small projects like this. I use a Mustool MT883 from Banggood* for a couple of years now.
- good solder and flux - don’t get the super cheap stuff and definitely don’t use unleaded solder. I typically get Mechanic solder* and RMA223 flux*.
- wires - I reuse scrap wire
- an ESP board or module - a Wemos D1 mini without the header pins soldered fits nicely below and can be powered by 5V directly. I opted for an ESP-M3 module with an AMS1117 breakout board* voltage regulator to convert 5V to 3.3V needed by the ESP. Goes without saying, any other ESP module would work, you can even use an ESP32 if you find a small enough board to fit inside. Make sure to flash Tasmota to the module before soldering everything.
Soldering
Unplug the two connectors from the PCB and remove it from the enclosure so you can work with it easily.
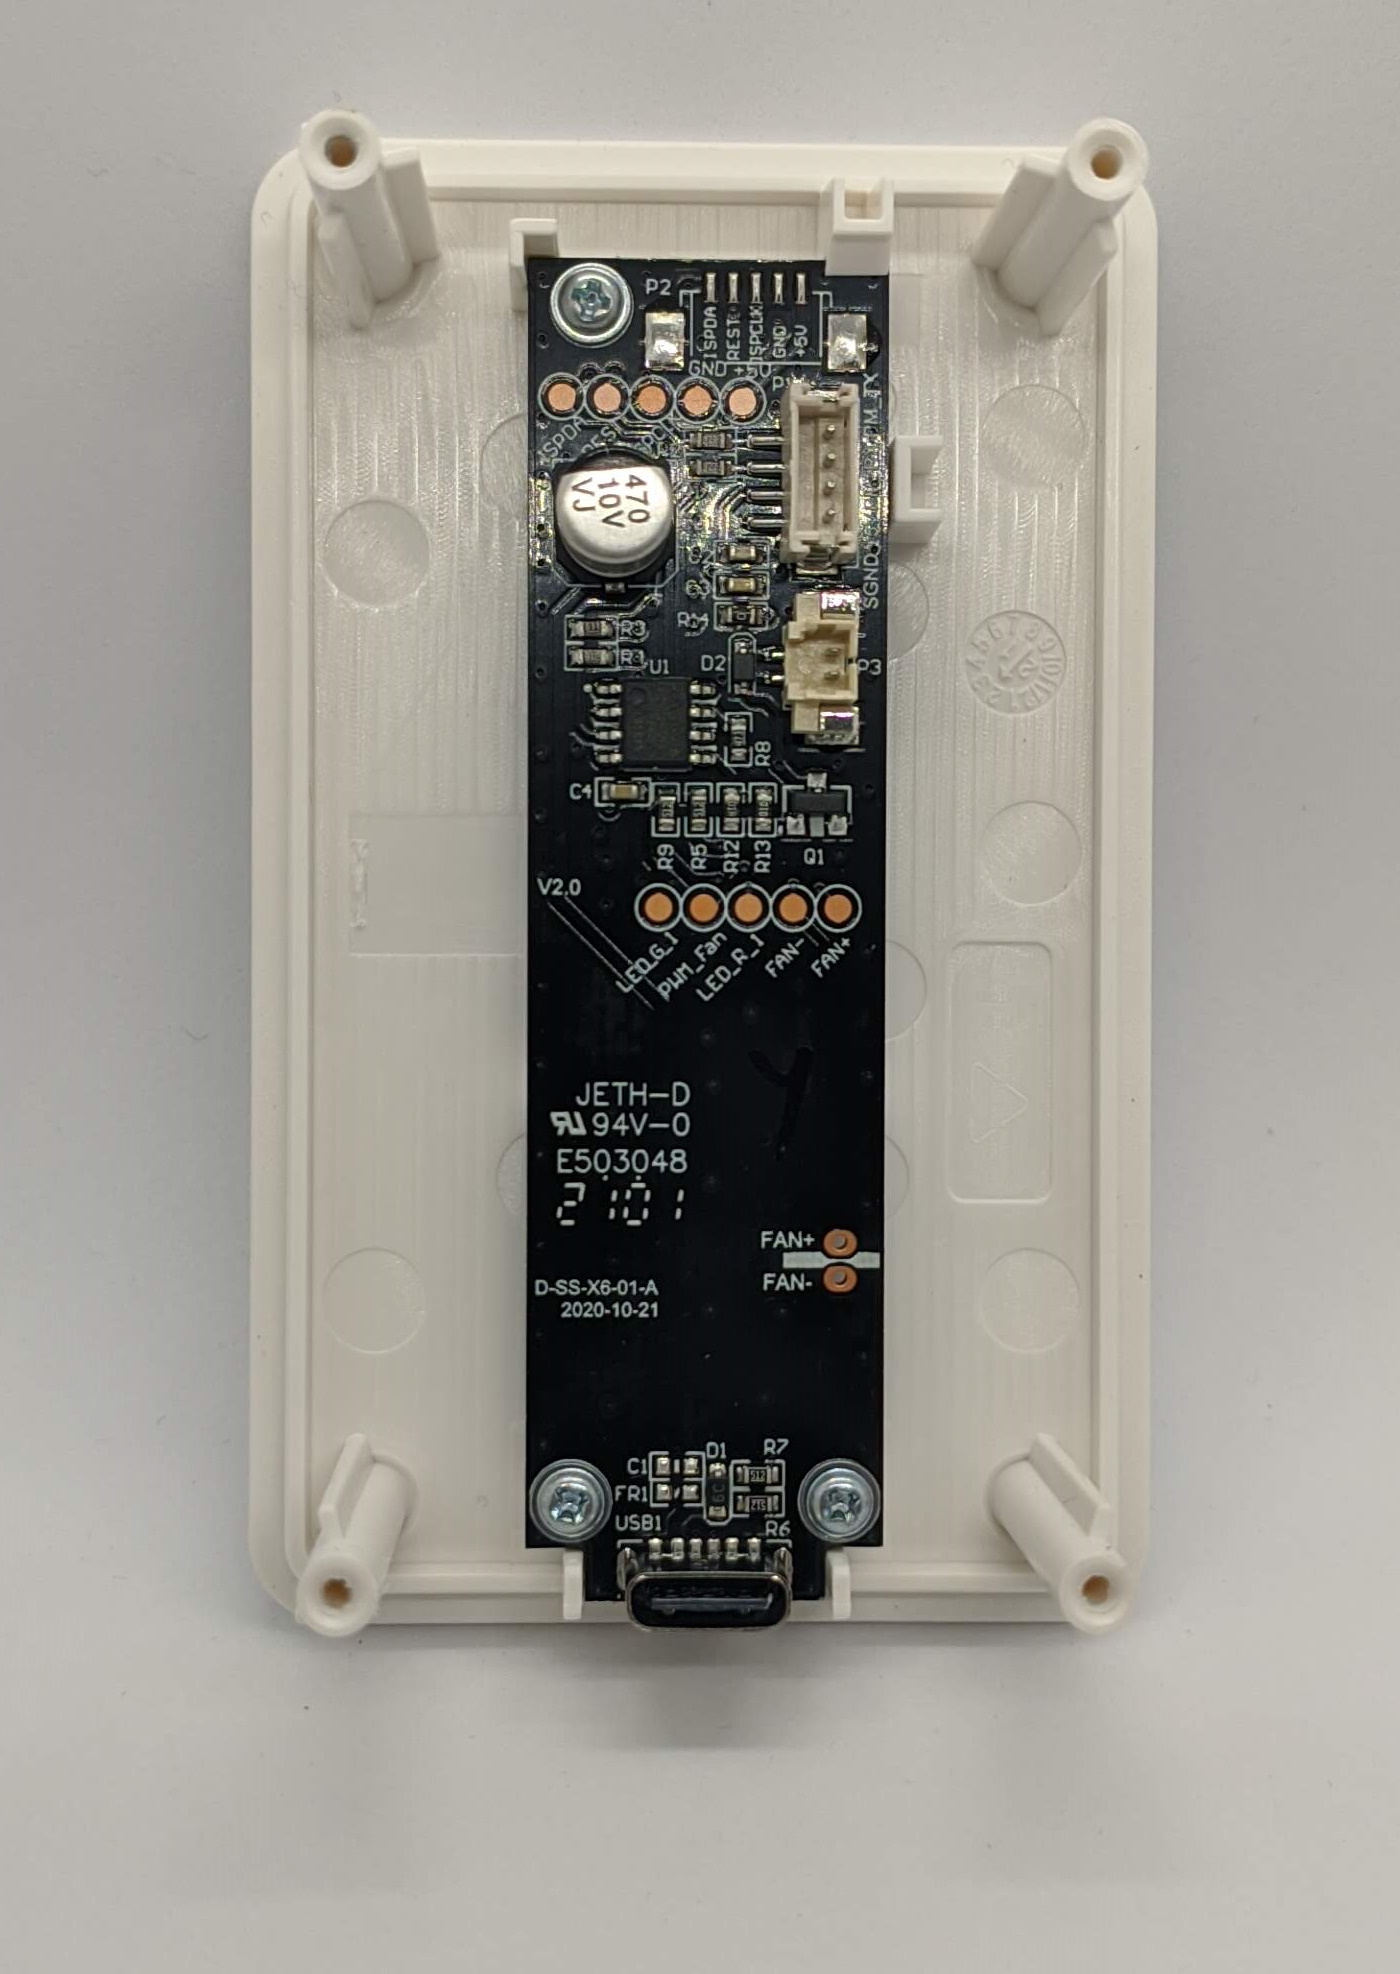
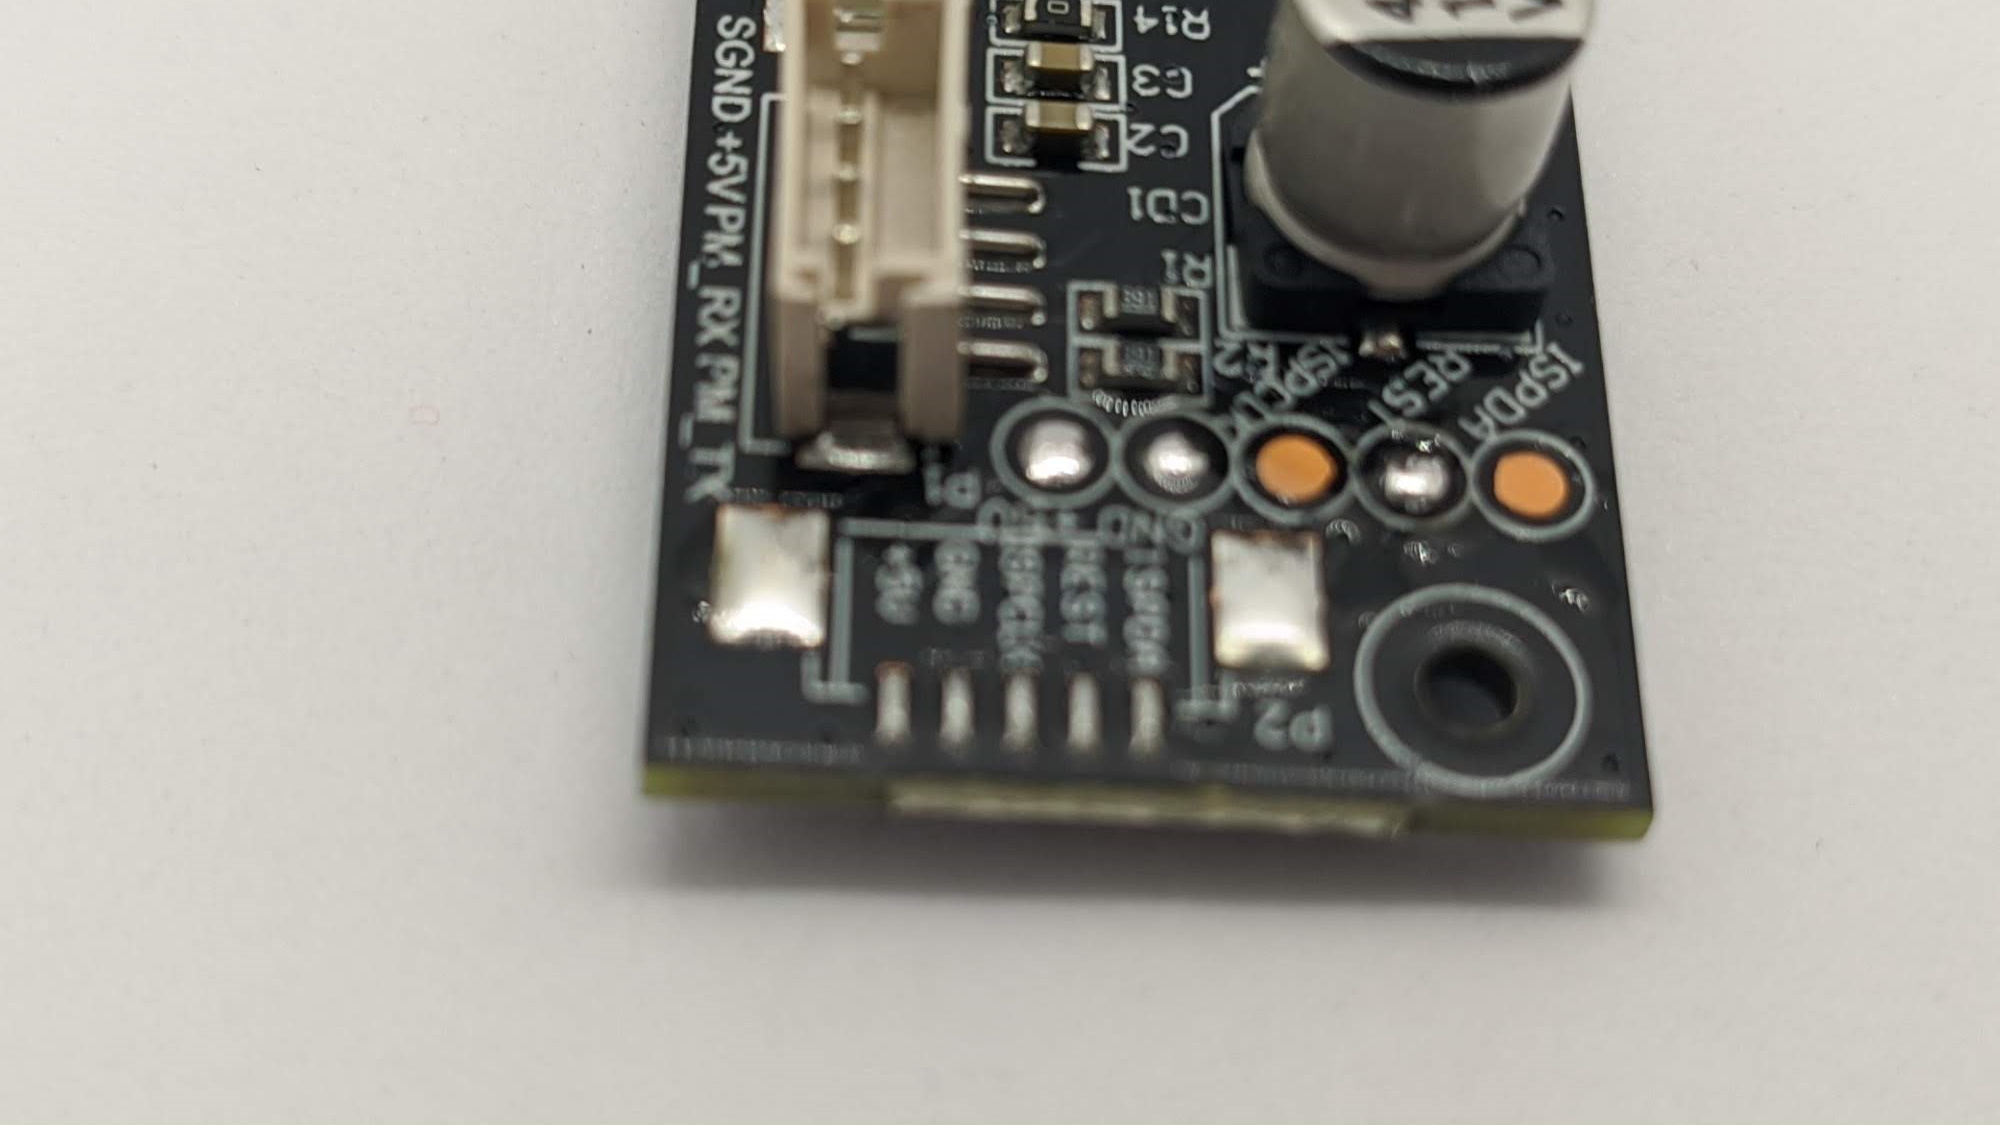
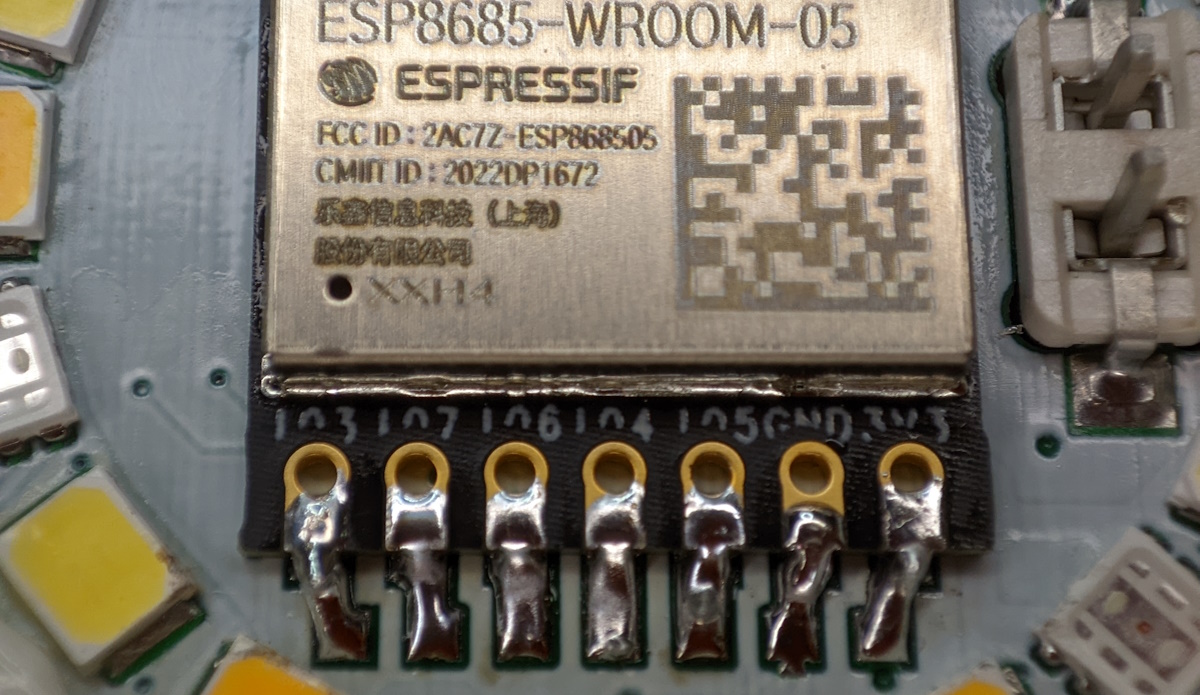
The PCB has all the pads labelled and easily accessible. You will use the top row, ones labelled: 5V, GND and REST.
Pre-tin the pads and wires for easier soldering. Always use plenty of flux, don’t skimp on it. Don’t keep the soldering iron too long on the pads to avoid burning them off with excessive heat.
Because everything is pre-tinned, soldering the three wires requires just brief contact with the soldering iron set to around 350°C until the solder melts on the pad and the wire and fuses together. Make sure the wires will have enough length to reach the ESP module. Make sure the wires are held strong enough and that there are no shorts between them.
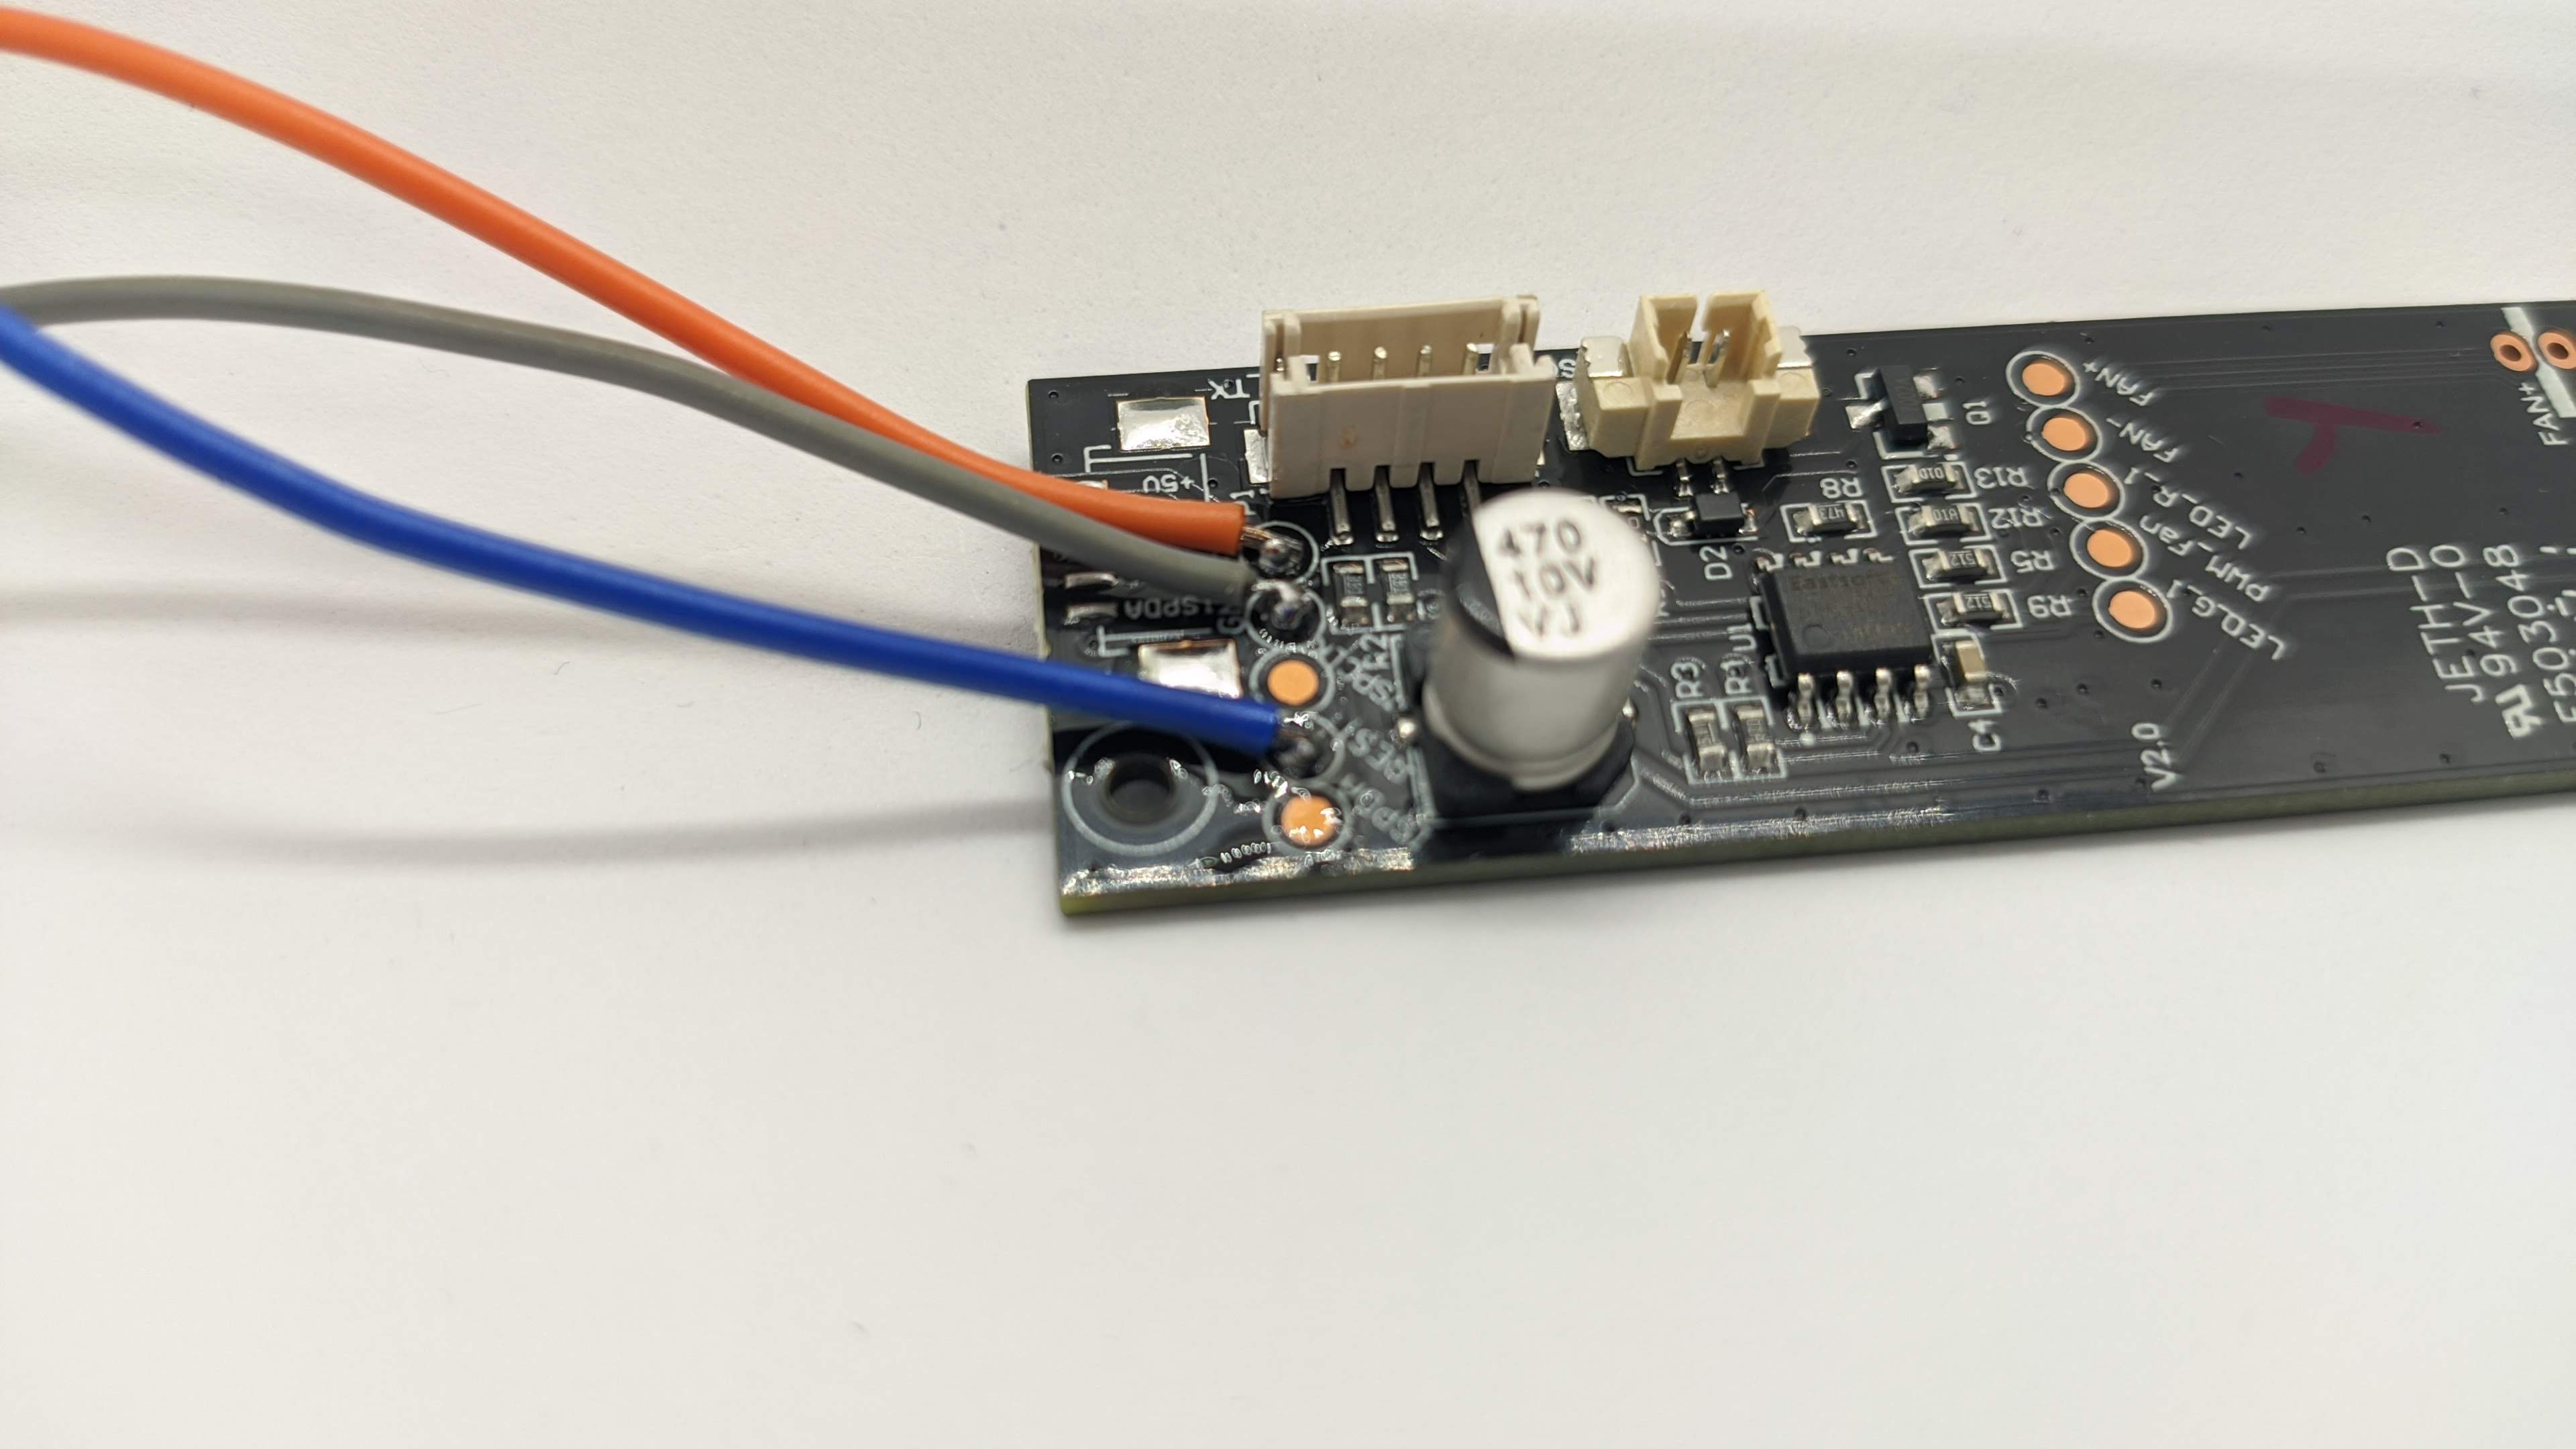
Connect the wires as follows:
- REST to any safe free pin, I used GPIO5 aka D1. This is the pin used to receive data from the air quality sensor.
- 5V to the Vin of the voltage regulator or 5V pin on the D1 mini
- GND to GND
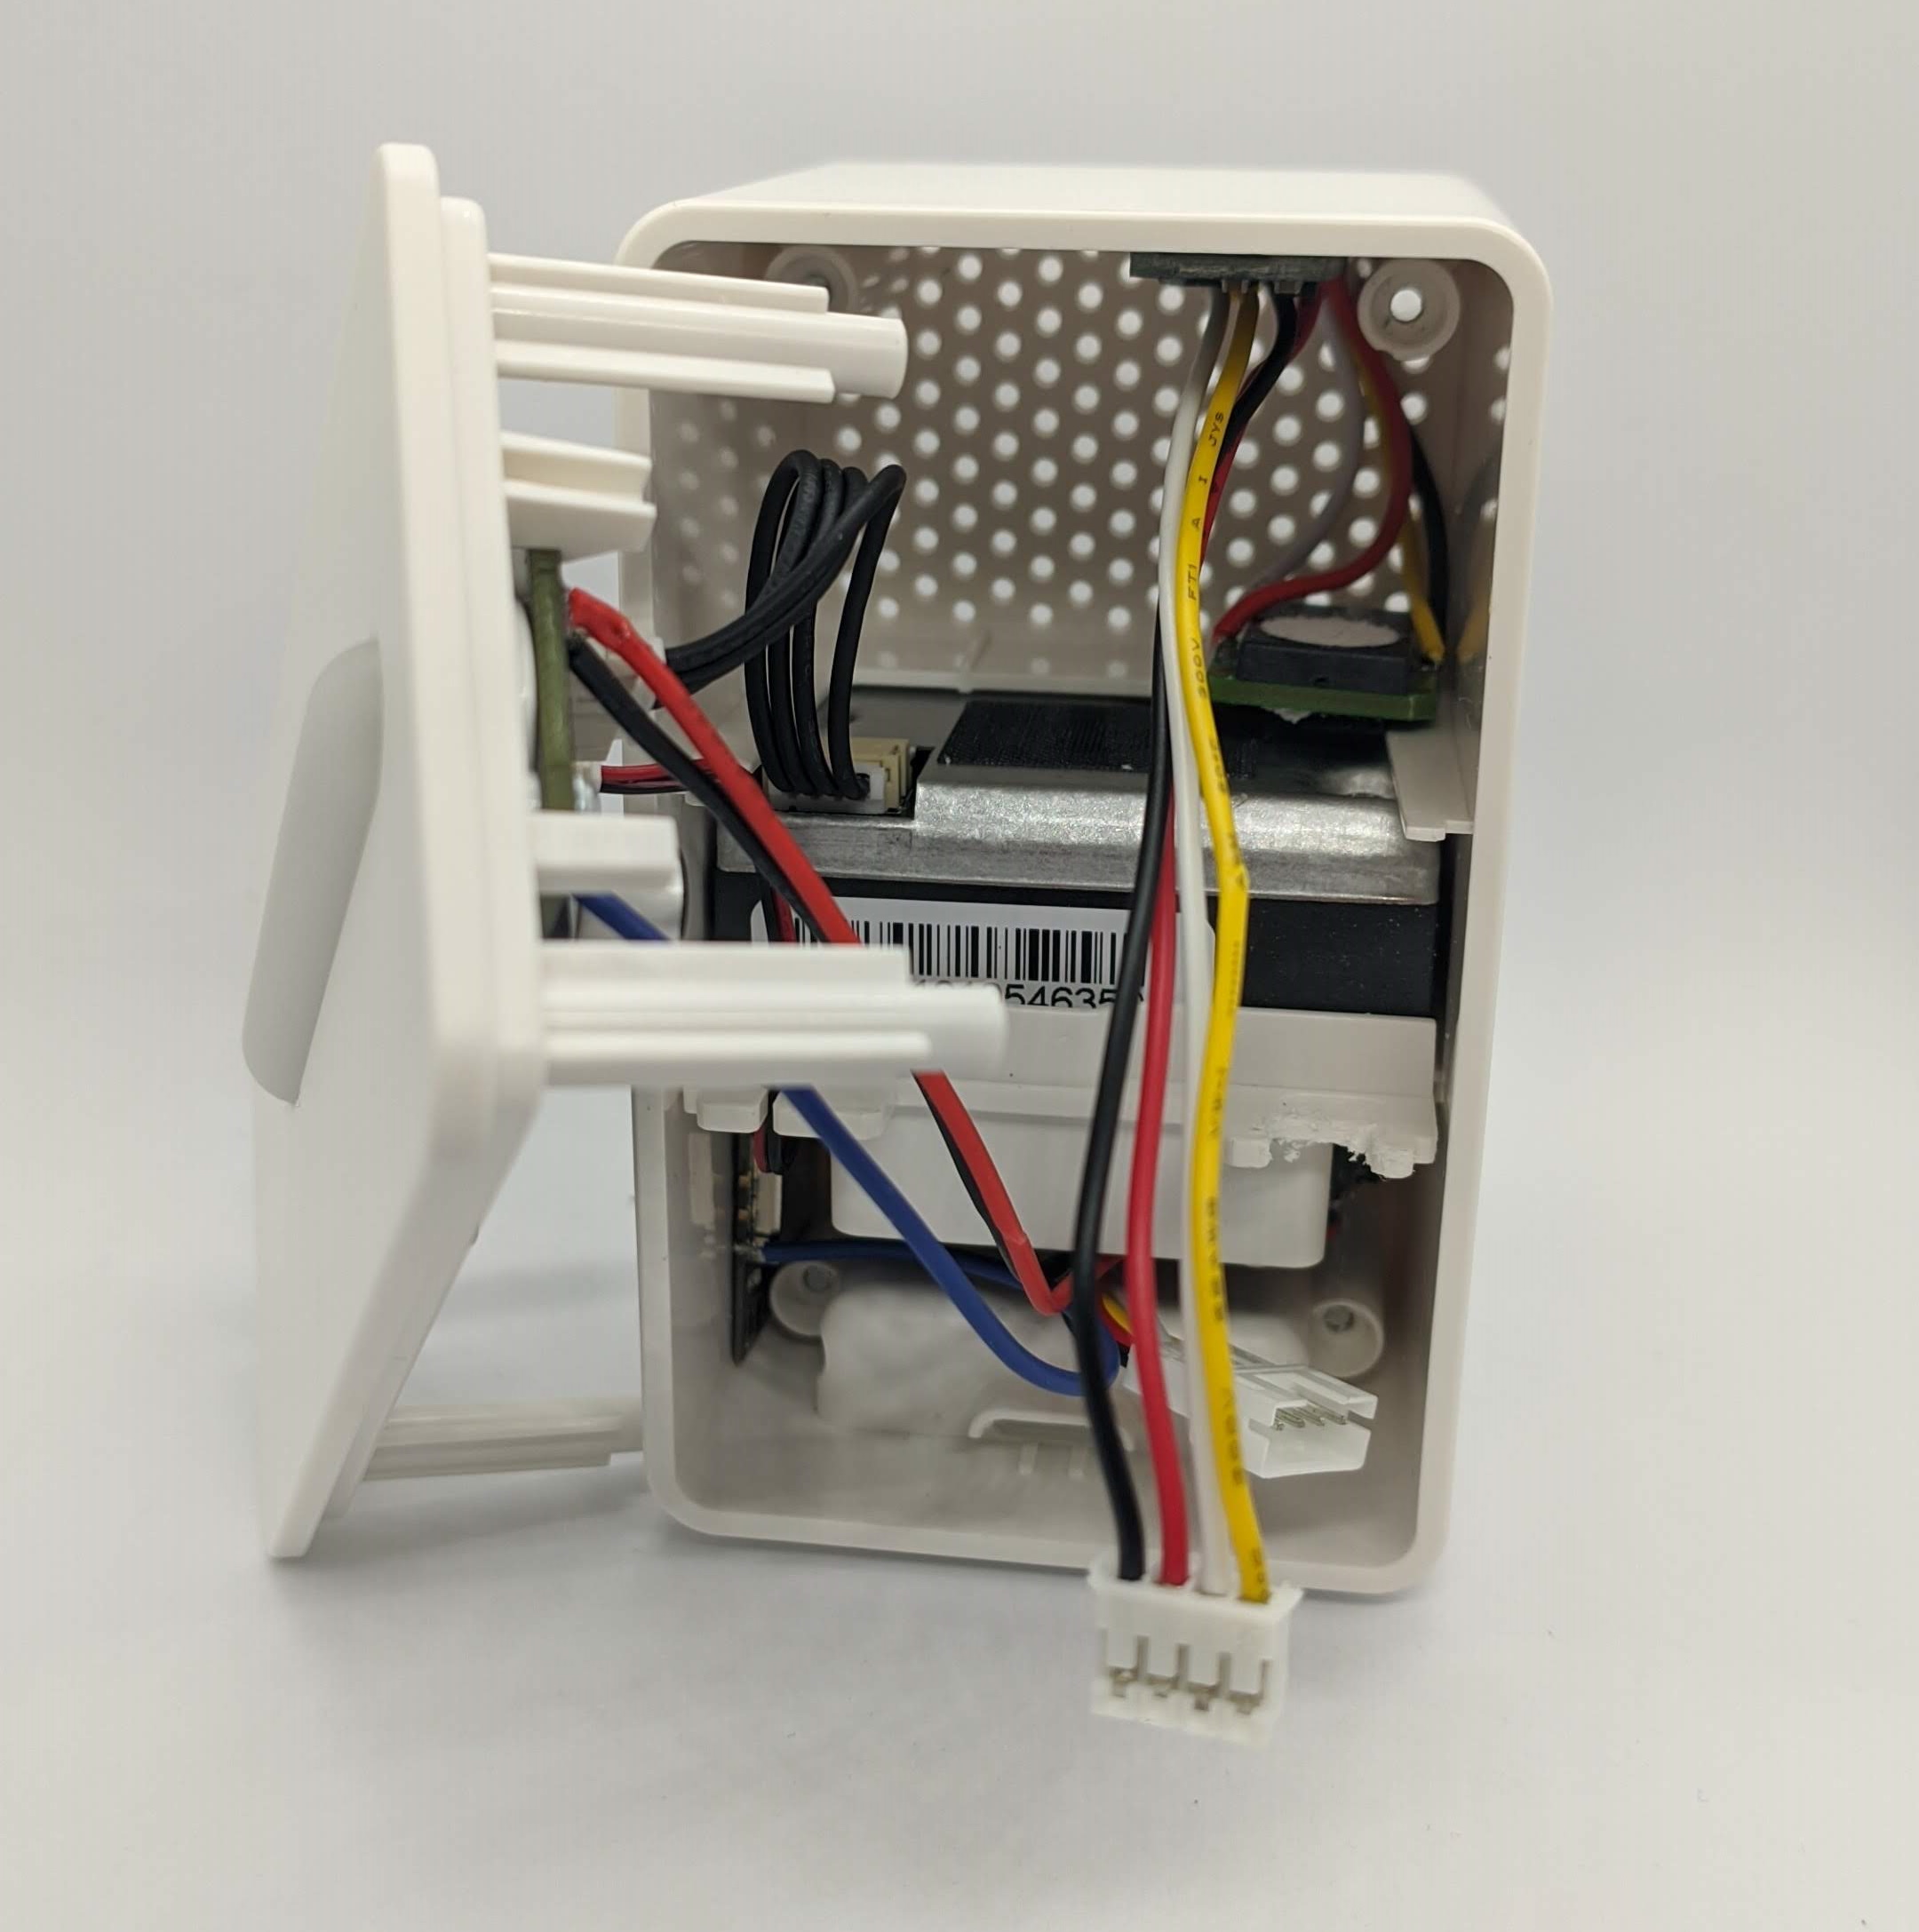
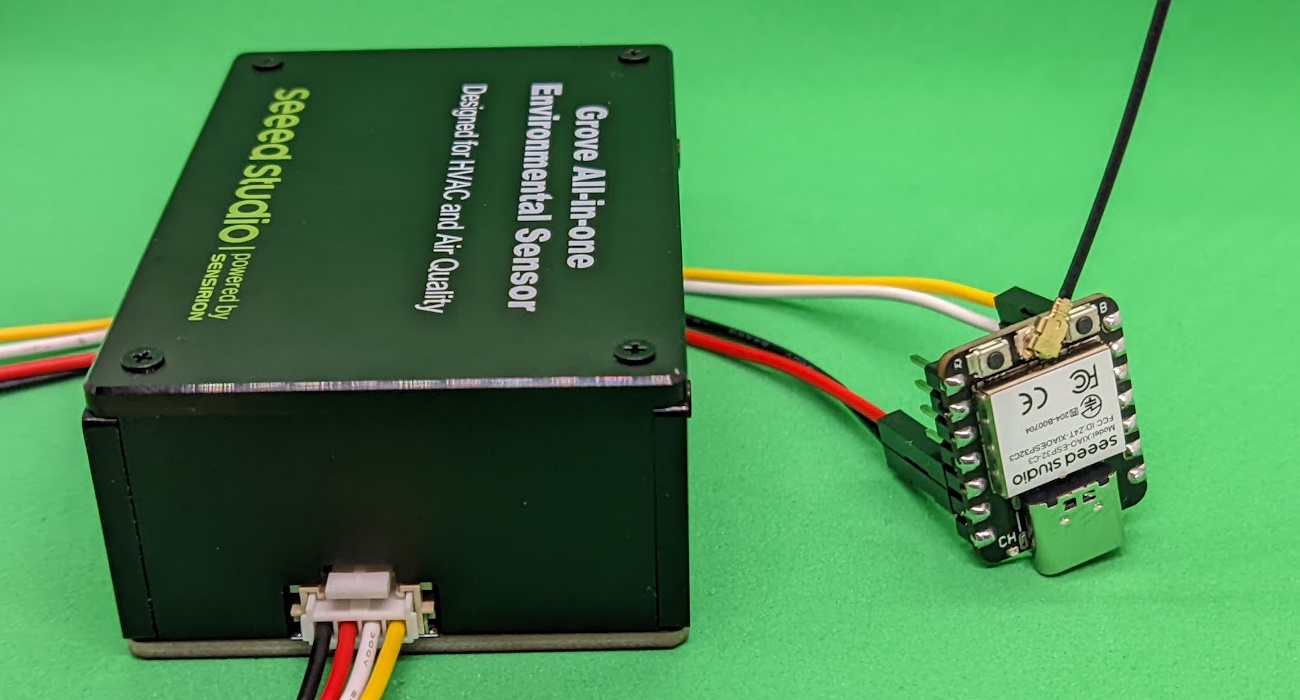
Here is the finished product with a little extra: 4 extra wires with a JST connector* are soldered for connecting additional I2C sensors. More on that at the end…
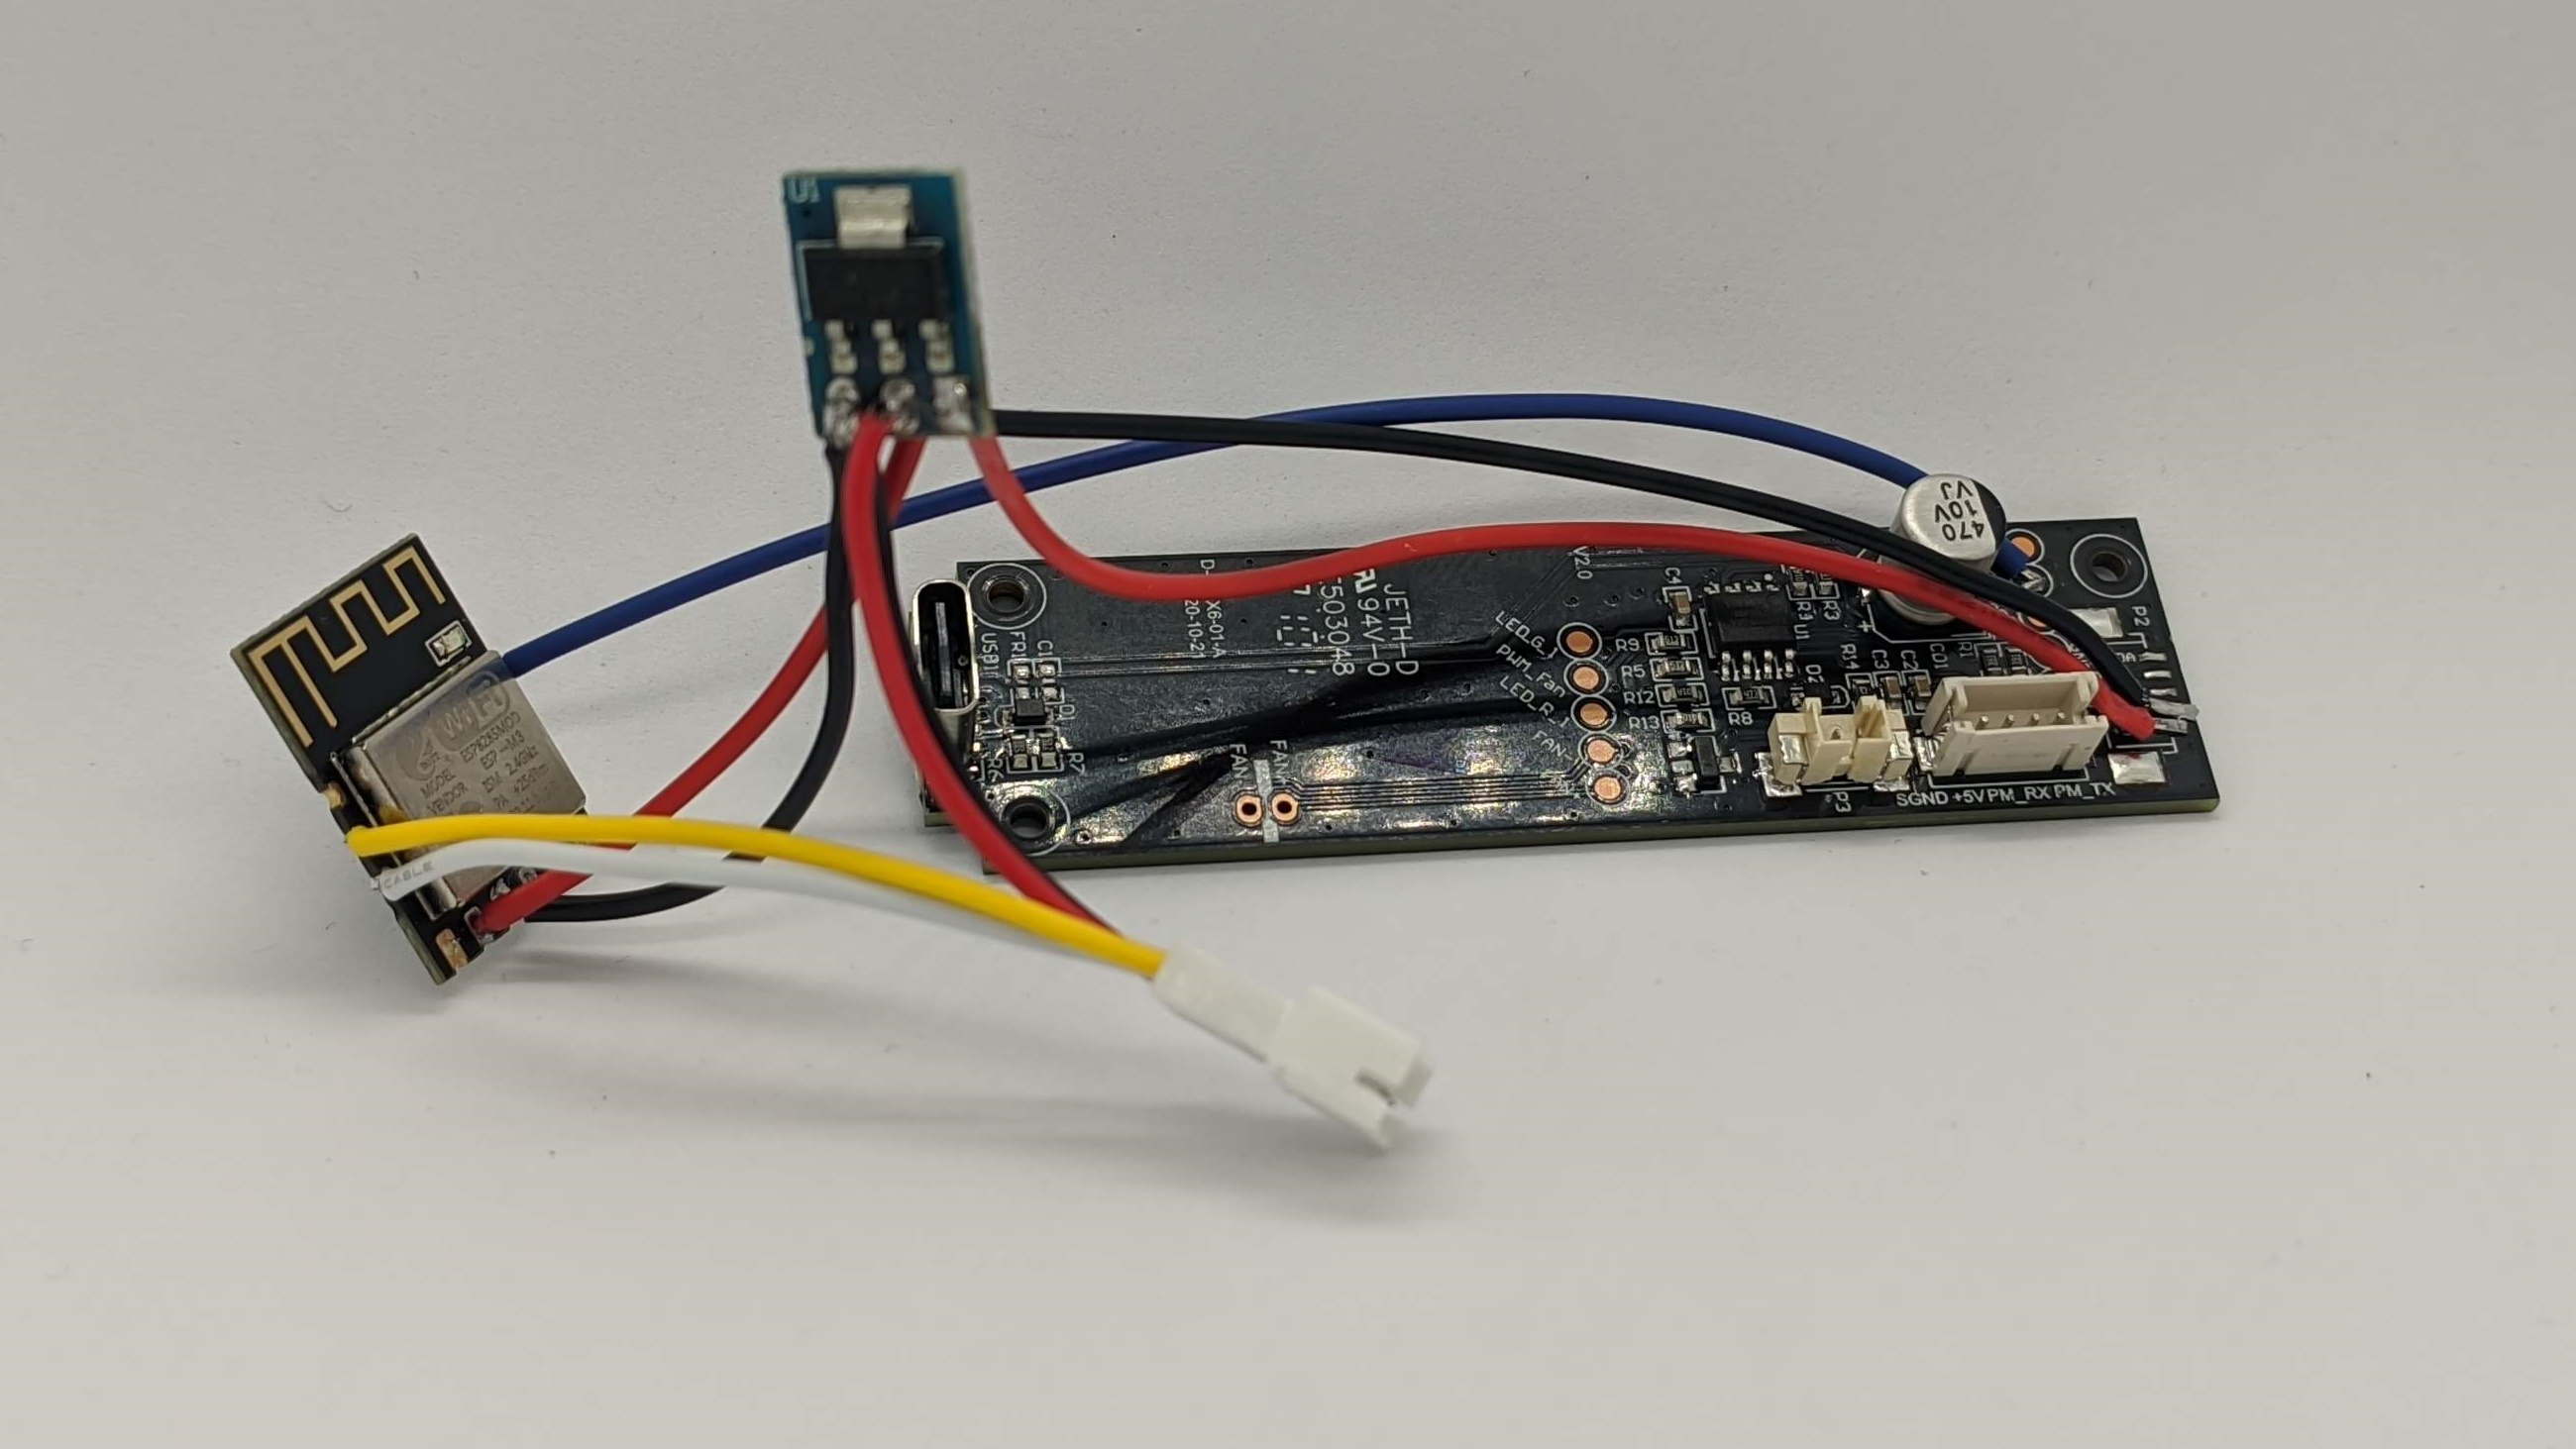
To fit the new wires seamlessly I made a hole on the other side.
Tasmota Configuration
To have support for Vindriktning’s sensor you need at least Tasmota version 9.5.0.7. Since it is not included in standard builds, you need to enable the sensor by adding it to user_config_override.h:
#define USE_VINDRIKTNING // Add support for IKEA VINDRIKTNING particle concentration sensor (+1k code)¸
Or, download an unofficial build tasmota-allsensors which supports almost all sensors, Vindriktning included.
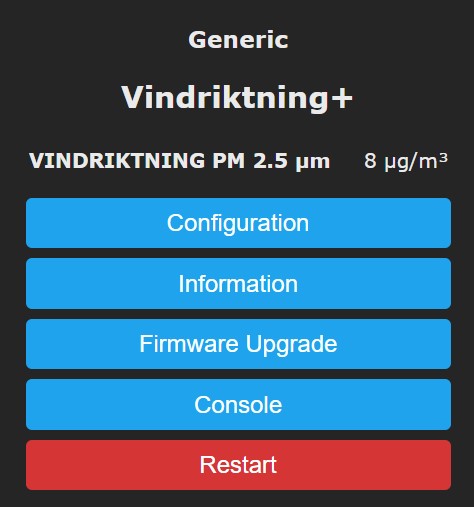
Once the firmware is installed on the ESP module go to Configuration - Configure Module and set the pin you connected the REST wire to as VINDRIKTNING. In my case it was GPIO5.
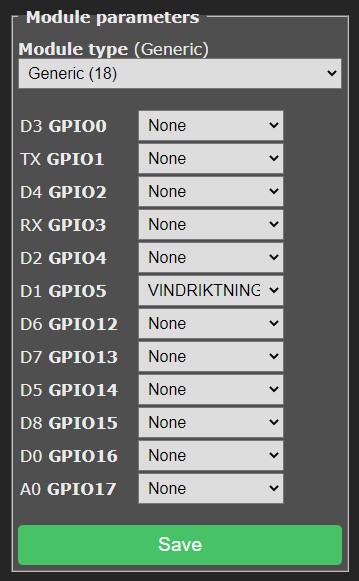
After a reset, if everything went according to plan you will see the values in the webUI
Adding more sensors
Because there’s a lot of room in the enclosure and the power supply is decent it would be a shame not to use that and add some more sensors in. Using I2C you can daisy chain a few of them using only two wires for communication with the ESP plus the wires needed to power them.
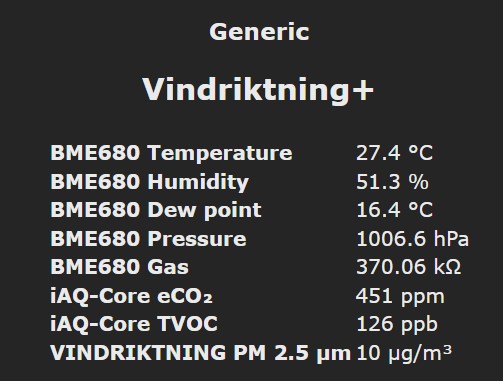
Since Vindriktning is an air quality sensor measuring particulate matter in the air, I decided to add moar air quality.
Sensors I had on hand were an iAQ Core* for eCO2 and eTVOC and a BME680* for temperature, humidity and pressure. I didn’t have any BME280 on hand which would be a more sensible choice. You can add any combination of different sensors and simply plug them in the JST connector.
As you can see, it all fits nicely and there’s room for more. I’m thinking about drilling a hole in the top for a TSL2561* illumination sensor.
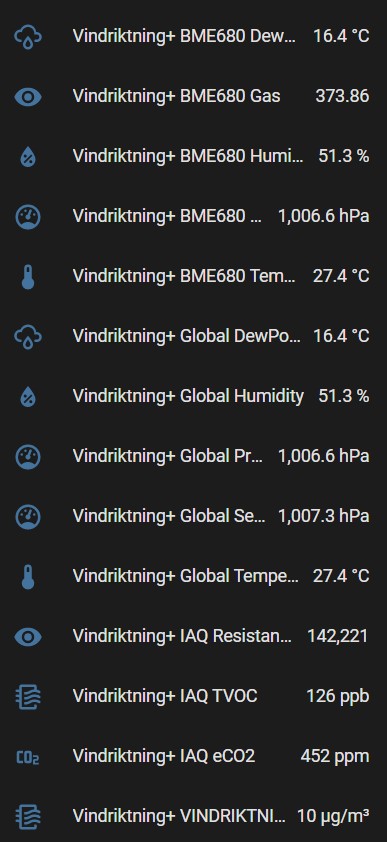
Using Tasmota integration in Home Assistant gets you loads of sensors and data.
What sensors would you add?

Explore more like this
Replace Tuya CB2L, WB2L, BW2L Modules with ESP
Replace Tuya TYWE2L, CB2L, WB2L, WR2L, WBR2L, BW2L and similar Wi-Fi modules with an Espressif ESP32 or ESP8266 light module.

Comments